I was searching for a way to write a bash/shell script to convert my Sony A7R III’s .ARW raw files to .jpg, expecting ImageMagick to be able to do it for me, since it can do everything. It turns out you can use the built-in tool sips.
for i in *.ARW; do sips -s format jpeg $i --out "jpg/${i%.*}.jpg"; done
That’s it! There’s now less of a need to have the camera generate .jpgs as well as raw, so you can save space while shooting.
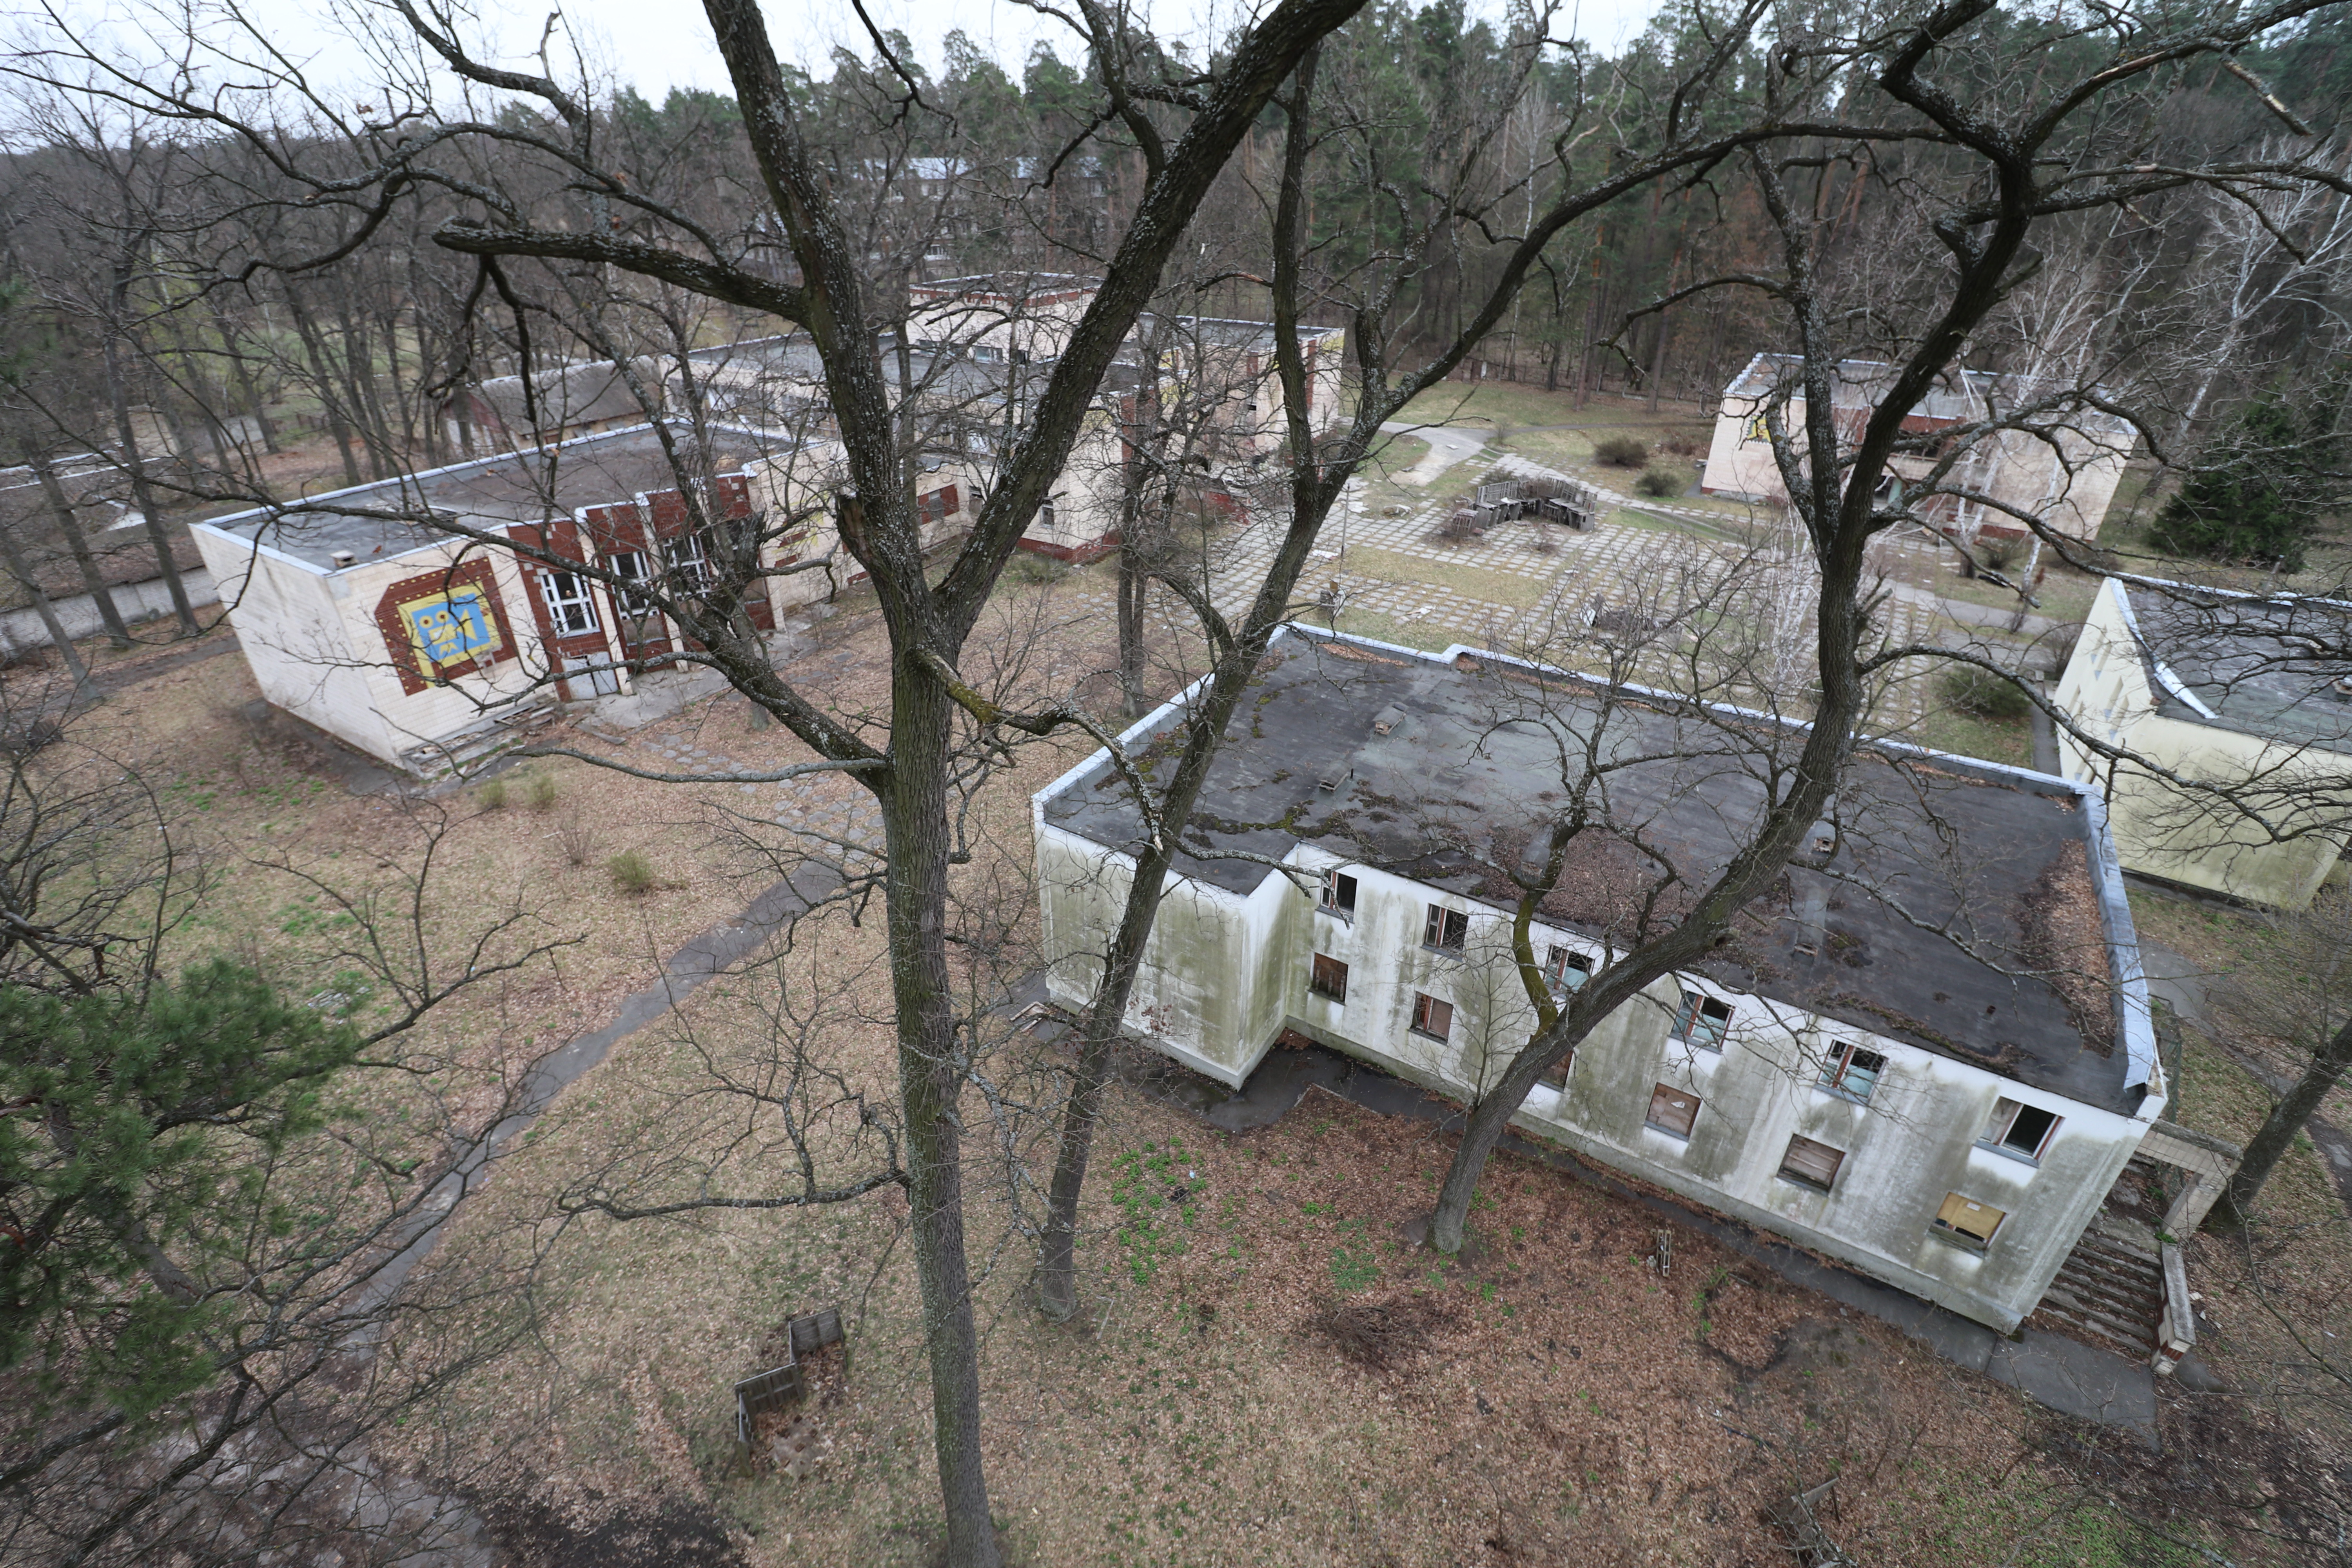
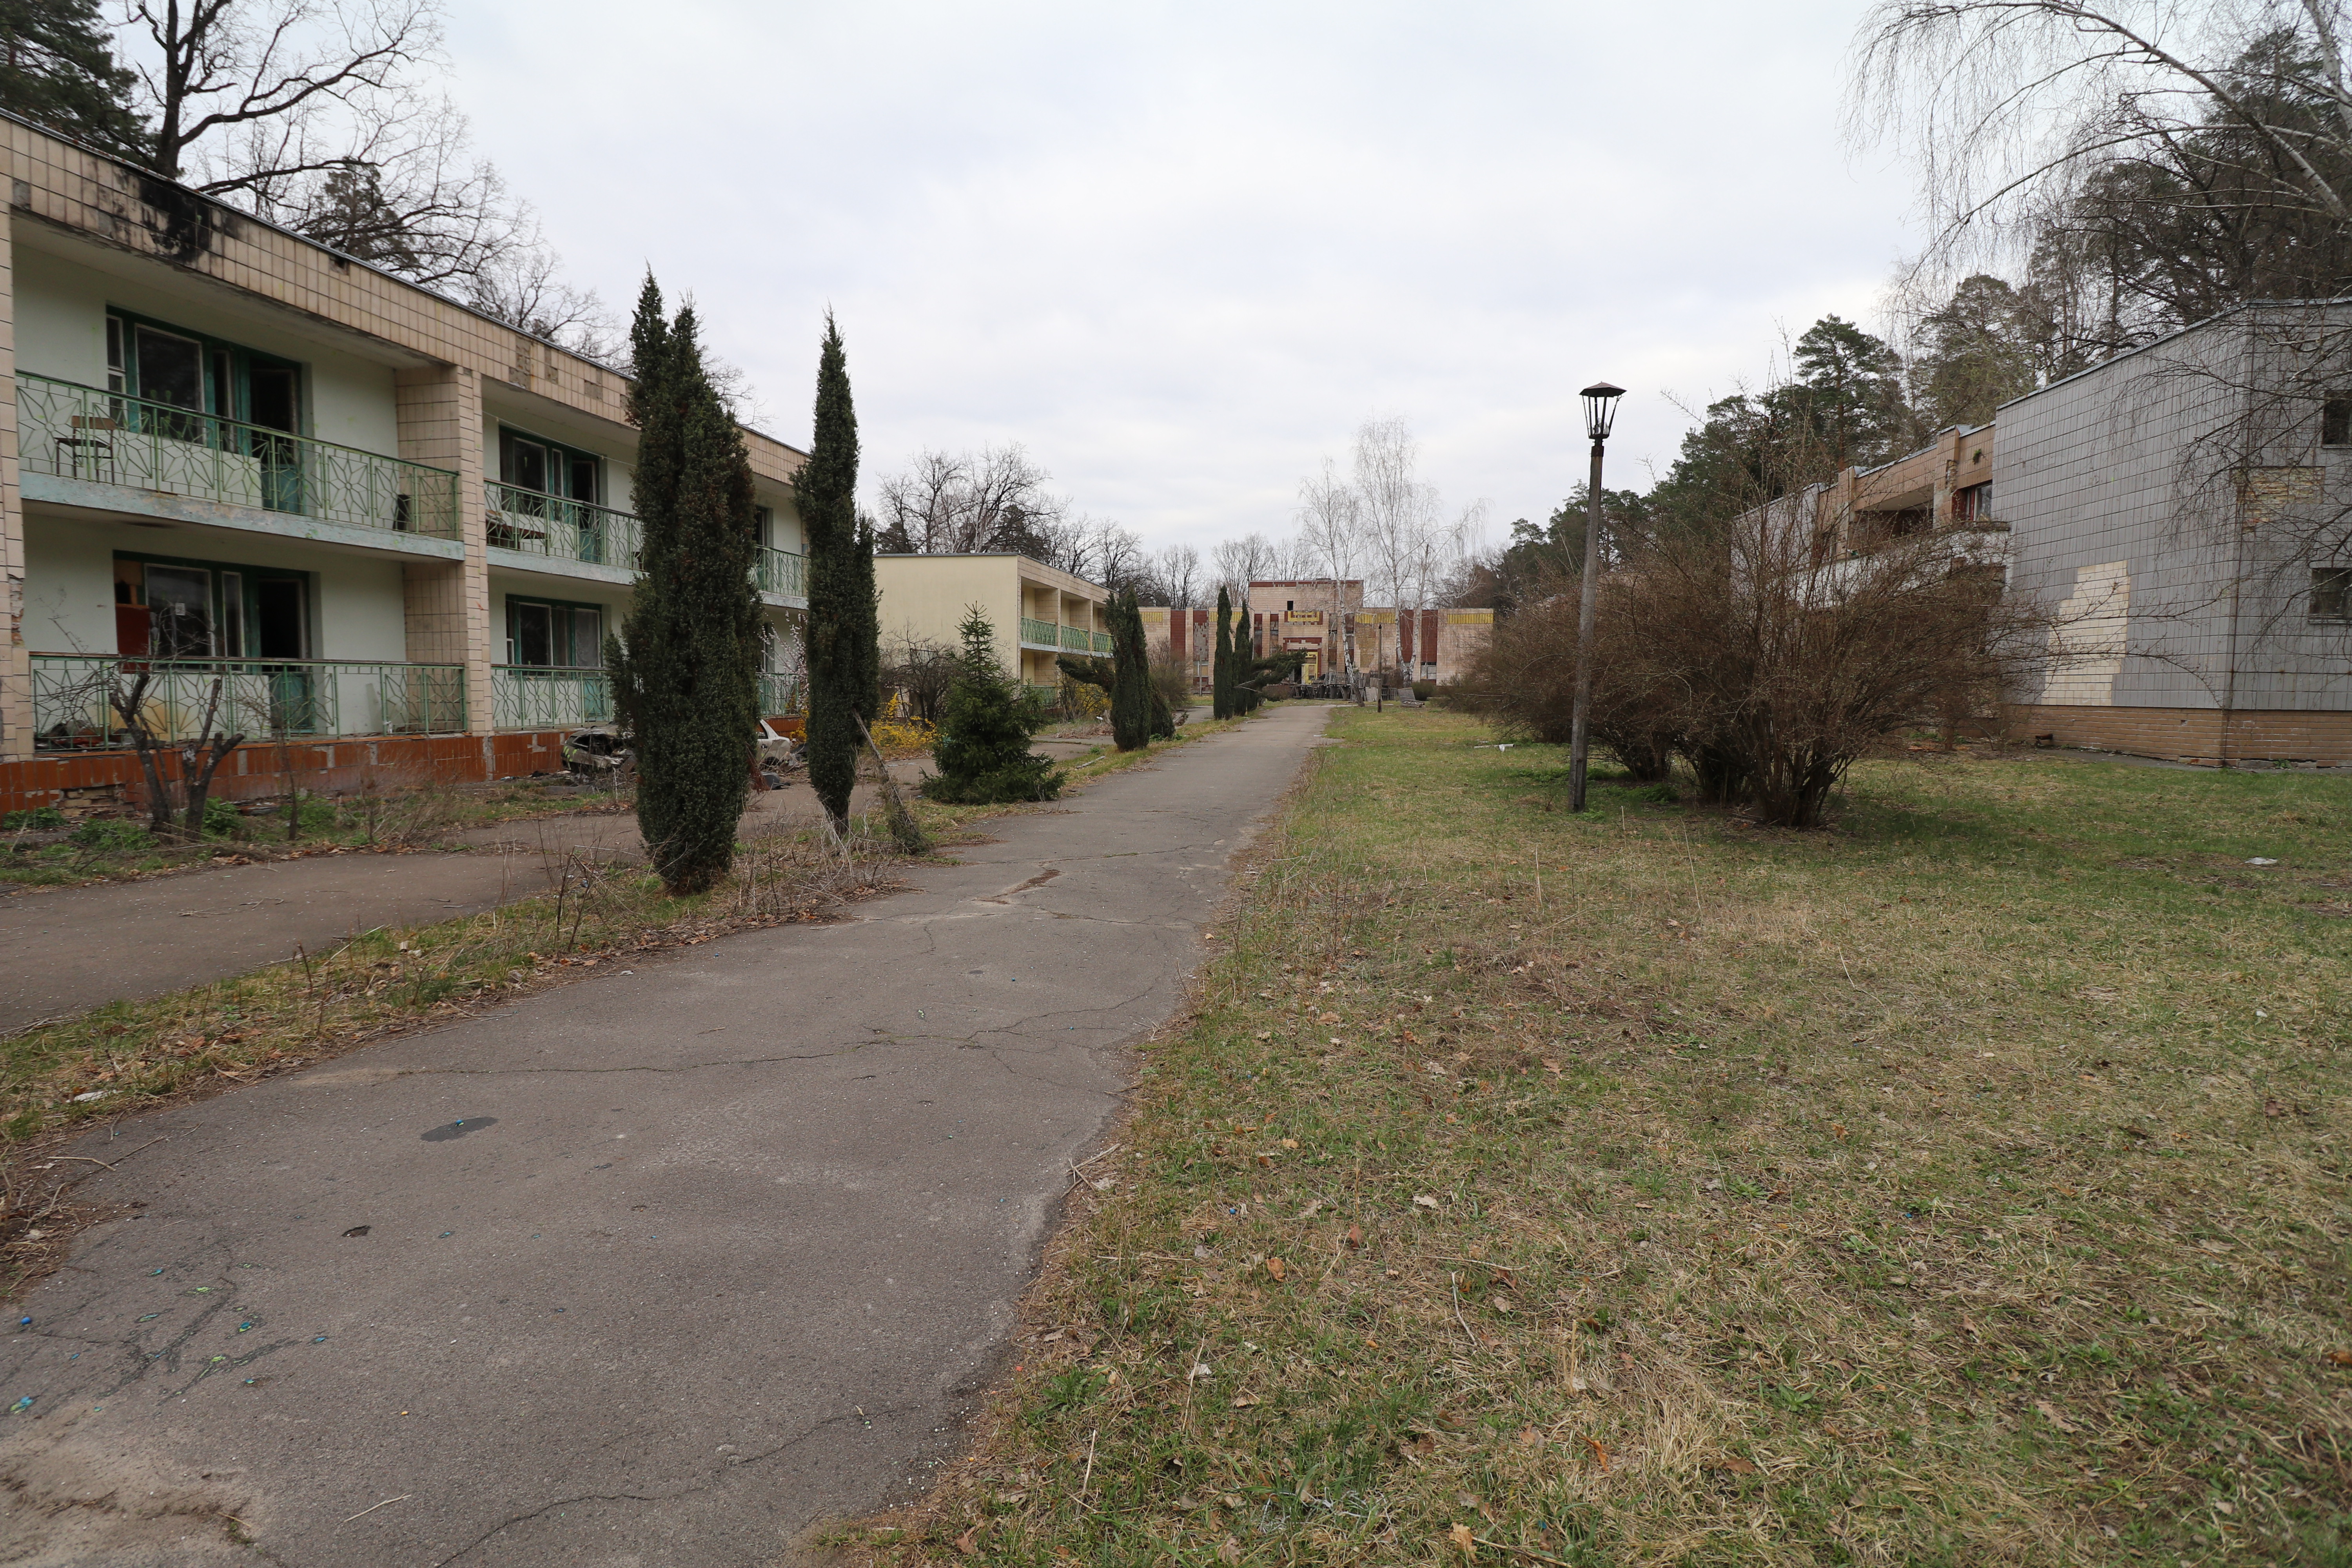
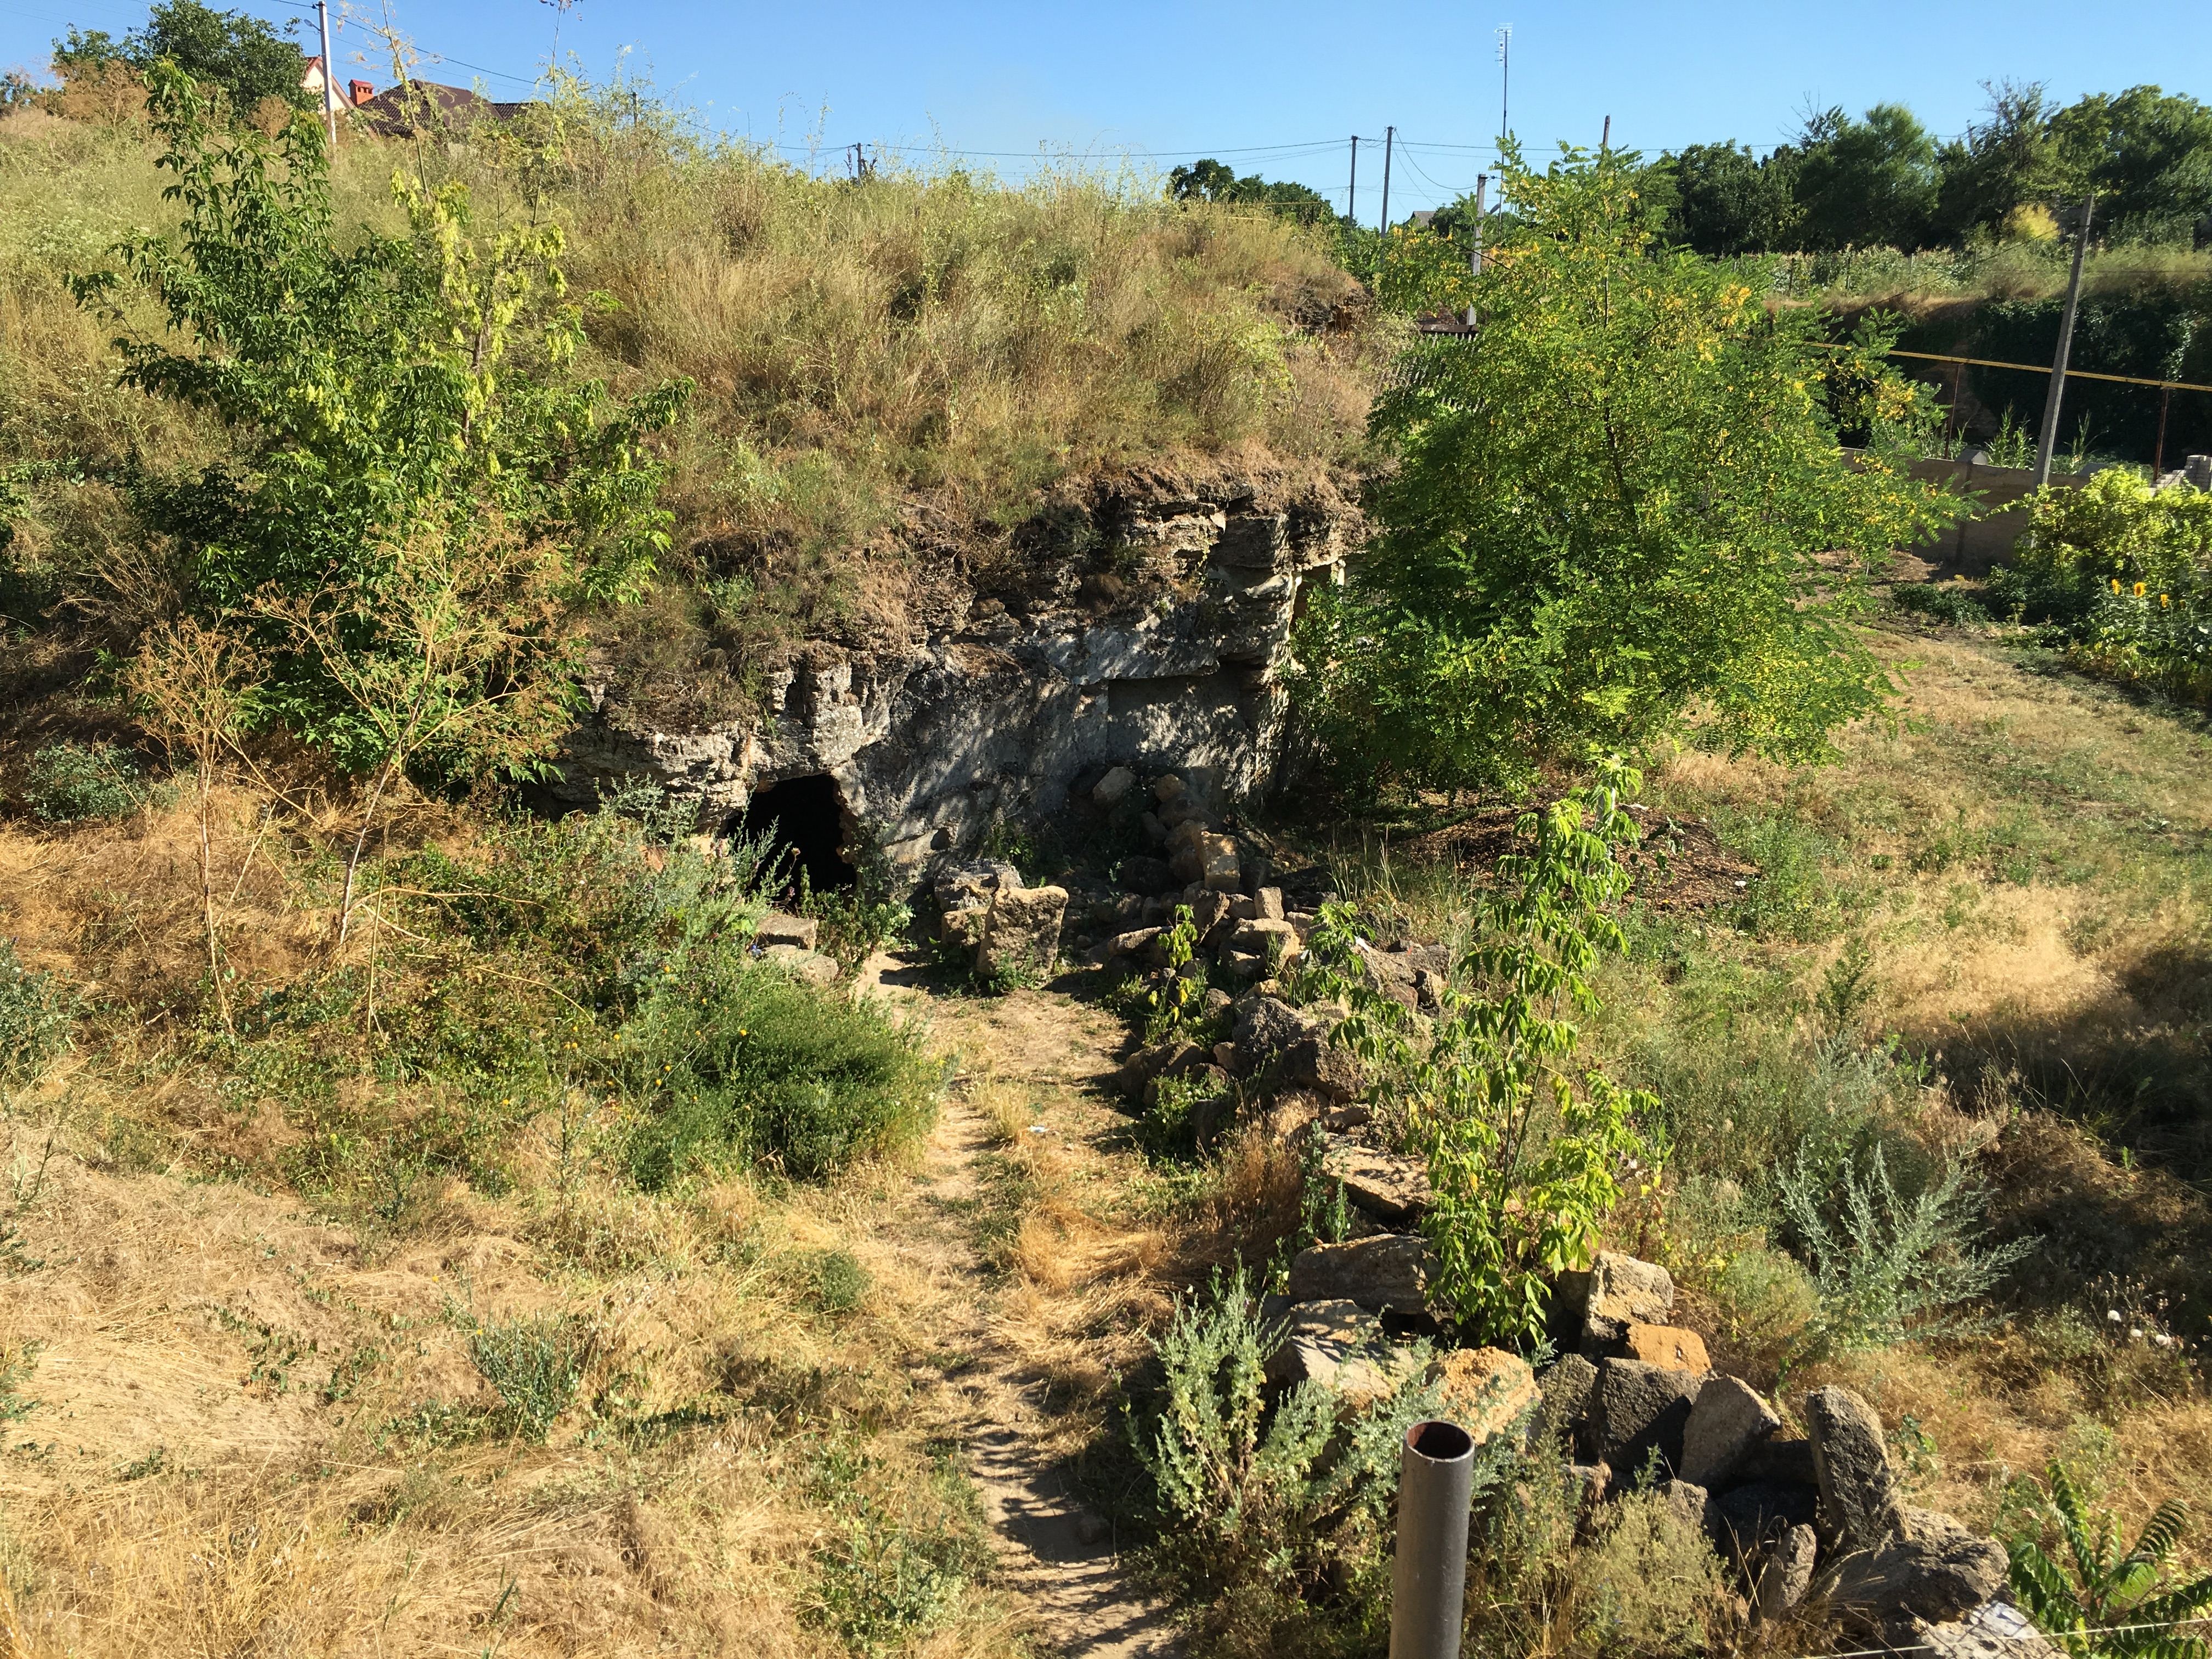
As a fan of abandoned buildings and apocalyptic environments, Ukraine is paradise. There’s an endless amount of places to explore.
I use Google Maps and Wikimapia to scout out locations, and there’s a spot just outside of Kyiv that’s been on my radar. On the weekend I have a bit more time to check things out, this time I was by myself. I was actually just intending to go on a walk and get some fresh air in the woods, but I ended up closer to this place than I initially realized.
I was under the impression there’s a chance this place is guarded, too many interesting places are, so I kept my eyes peeled for guards.
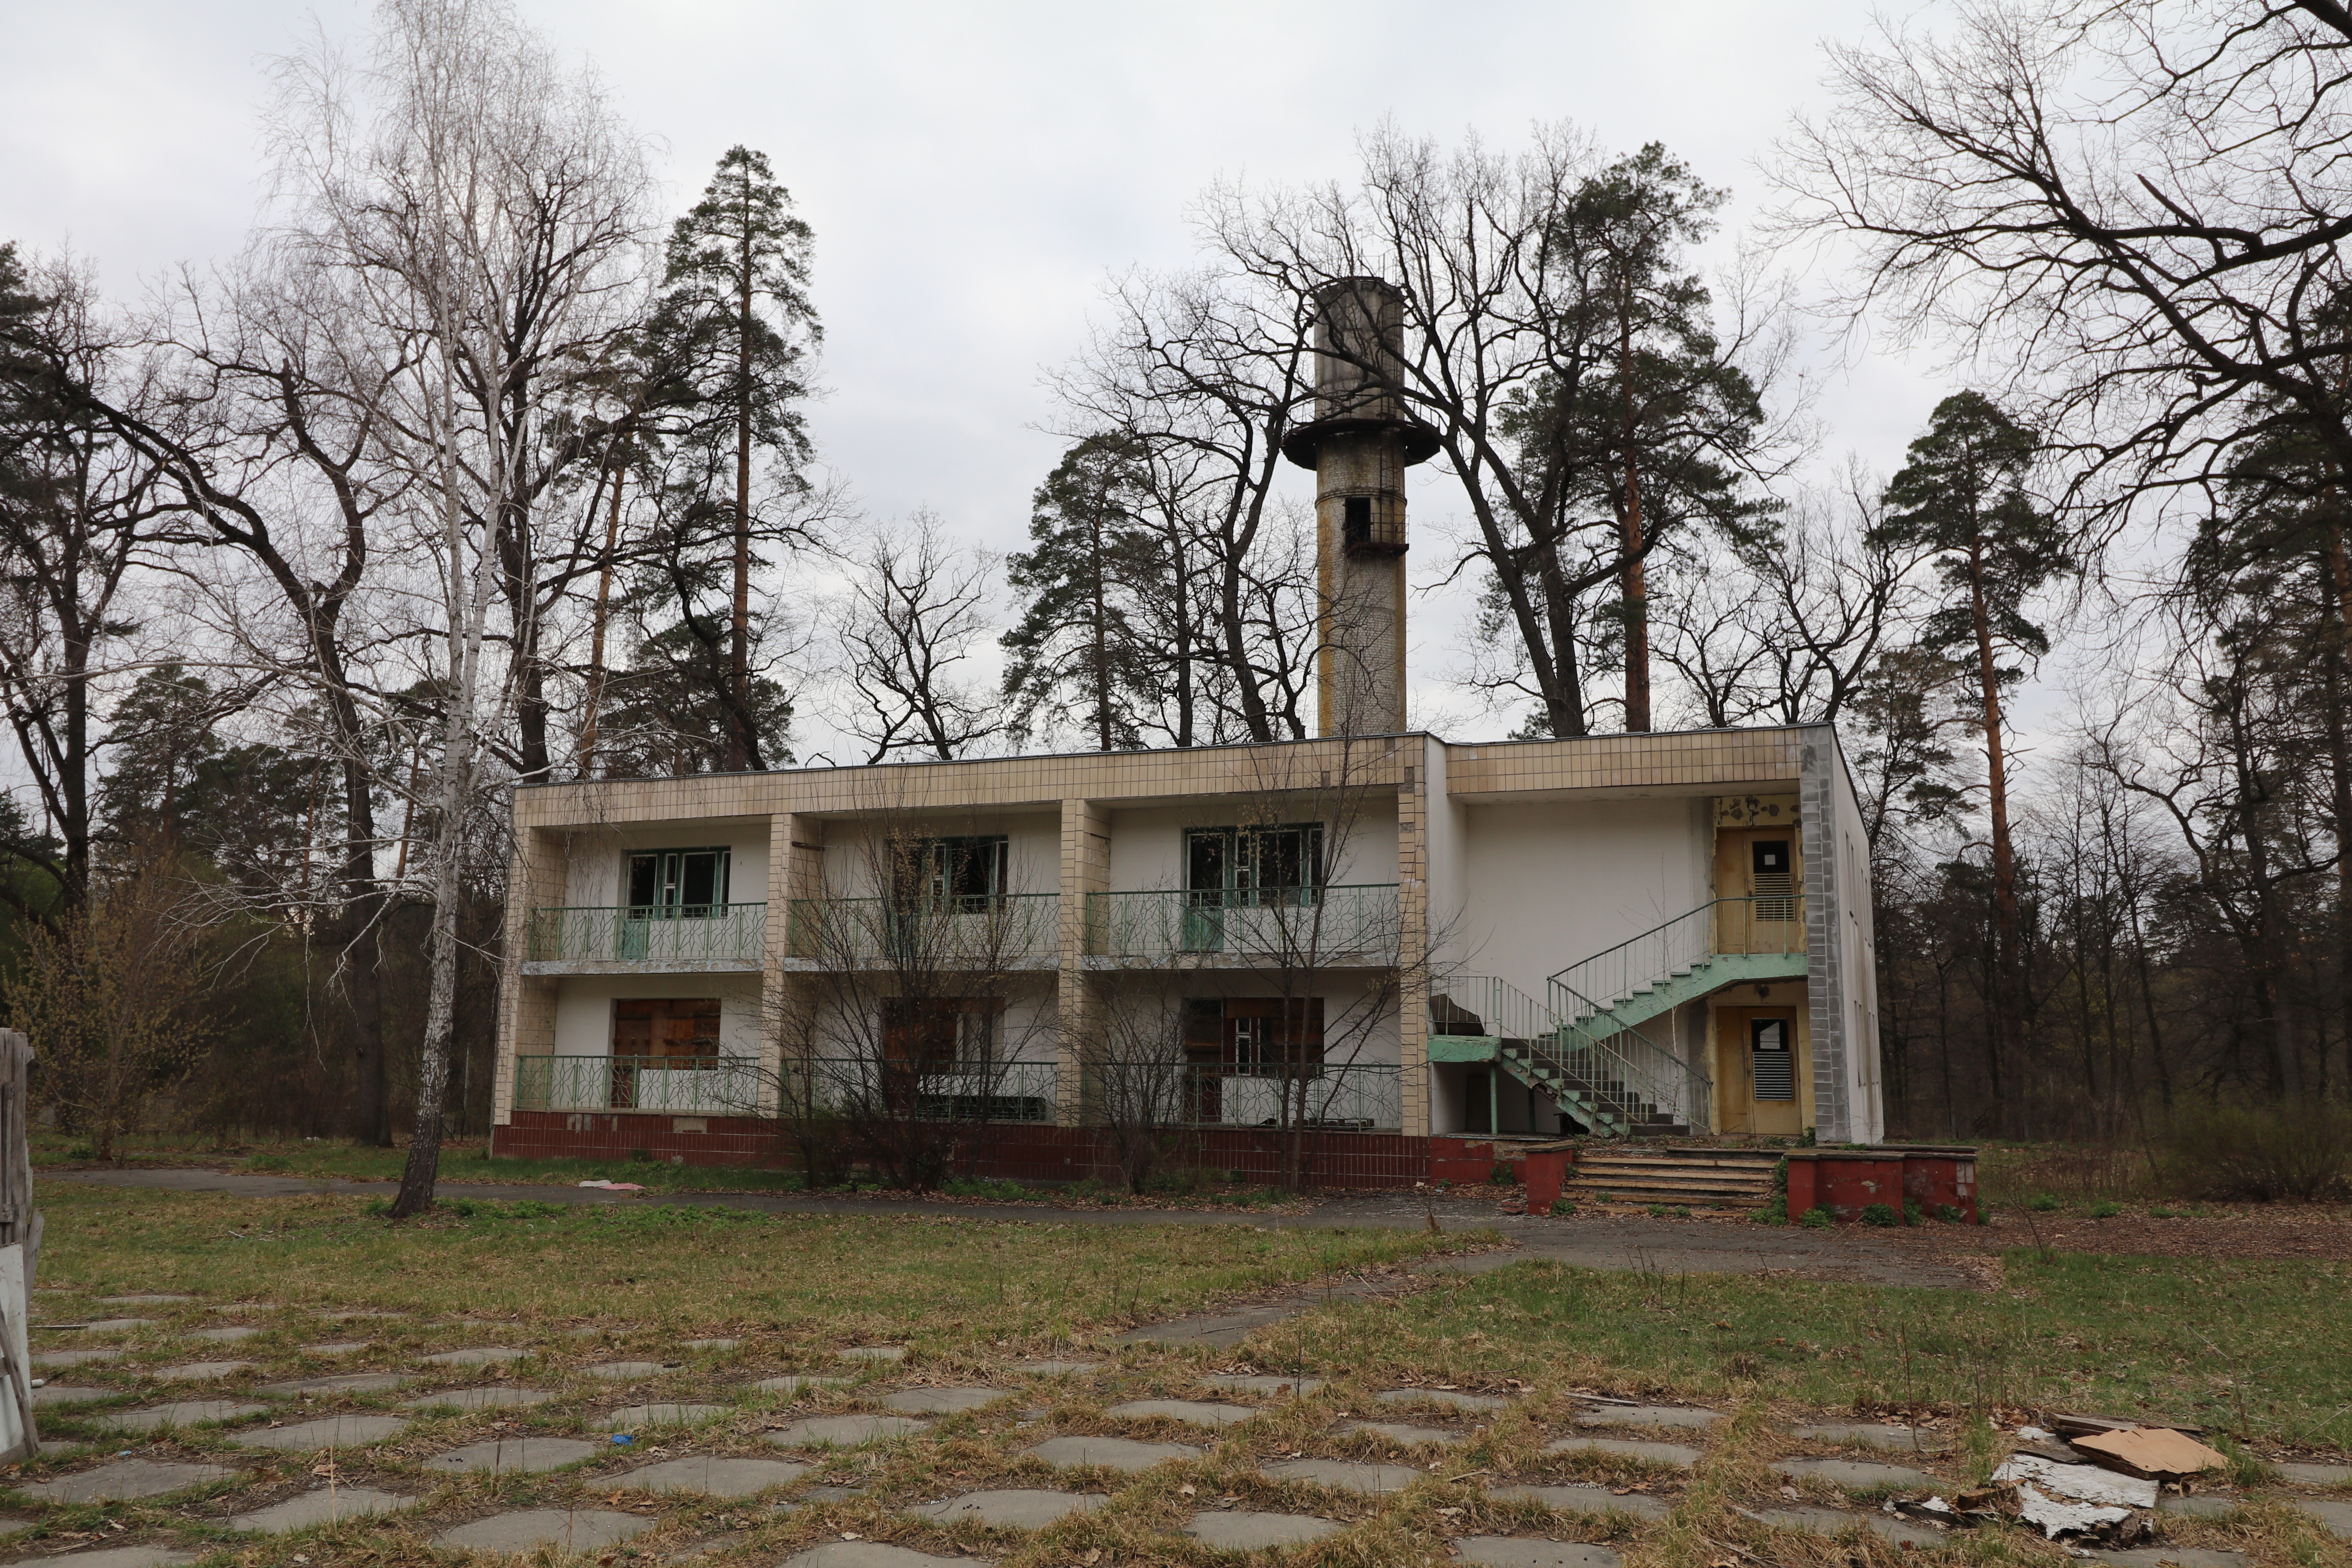
I followed the fence further along, and near the tower, found a nice big hole to pass through. That’d be a great place to scope out the area and look for security guards.
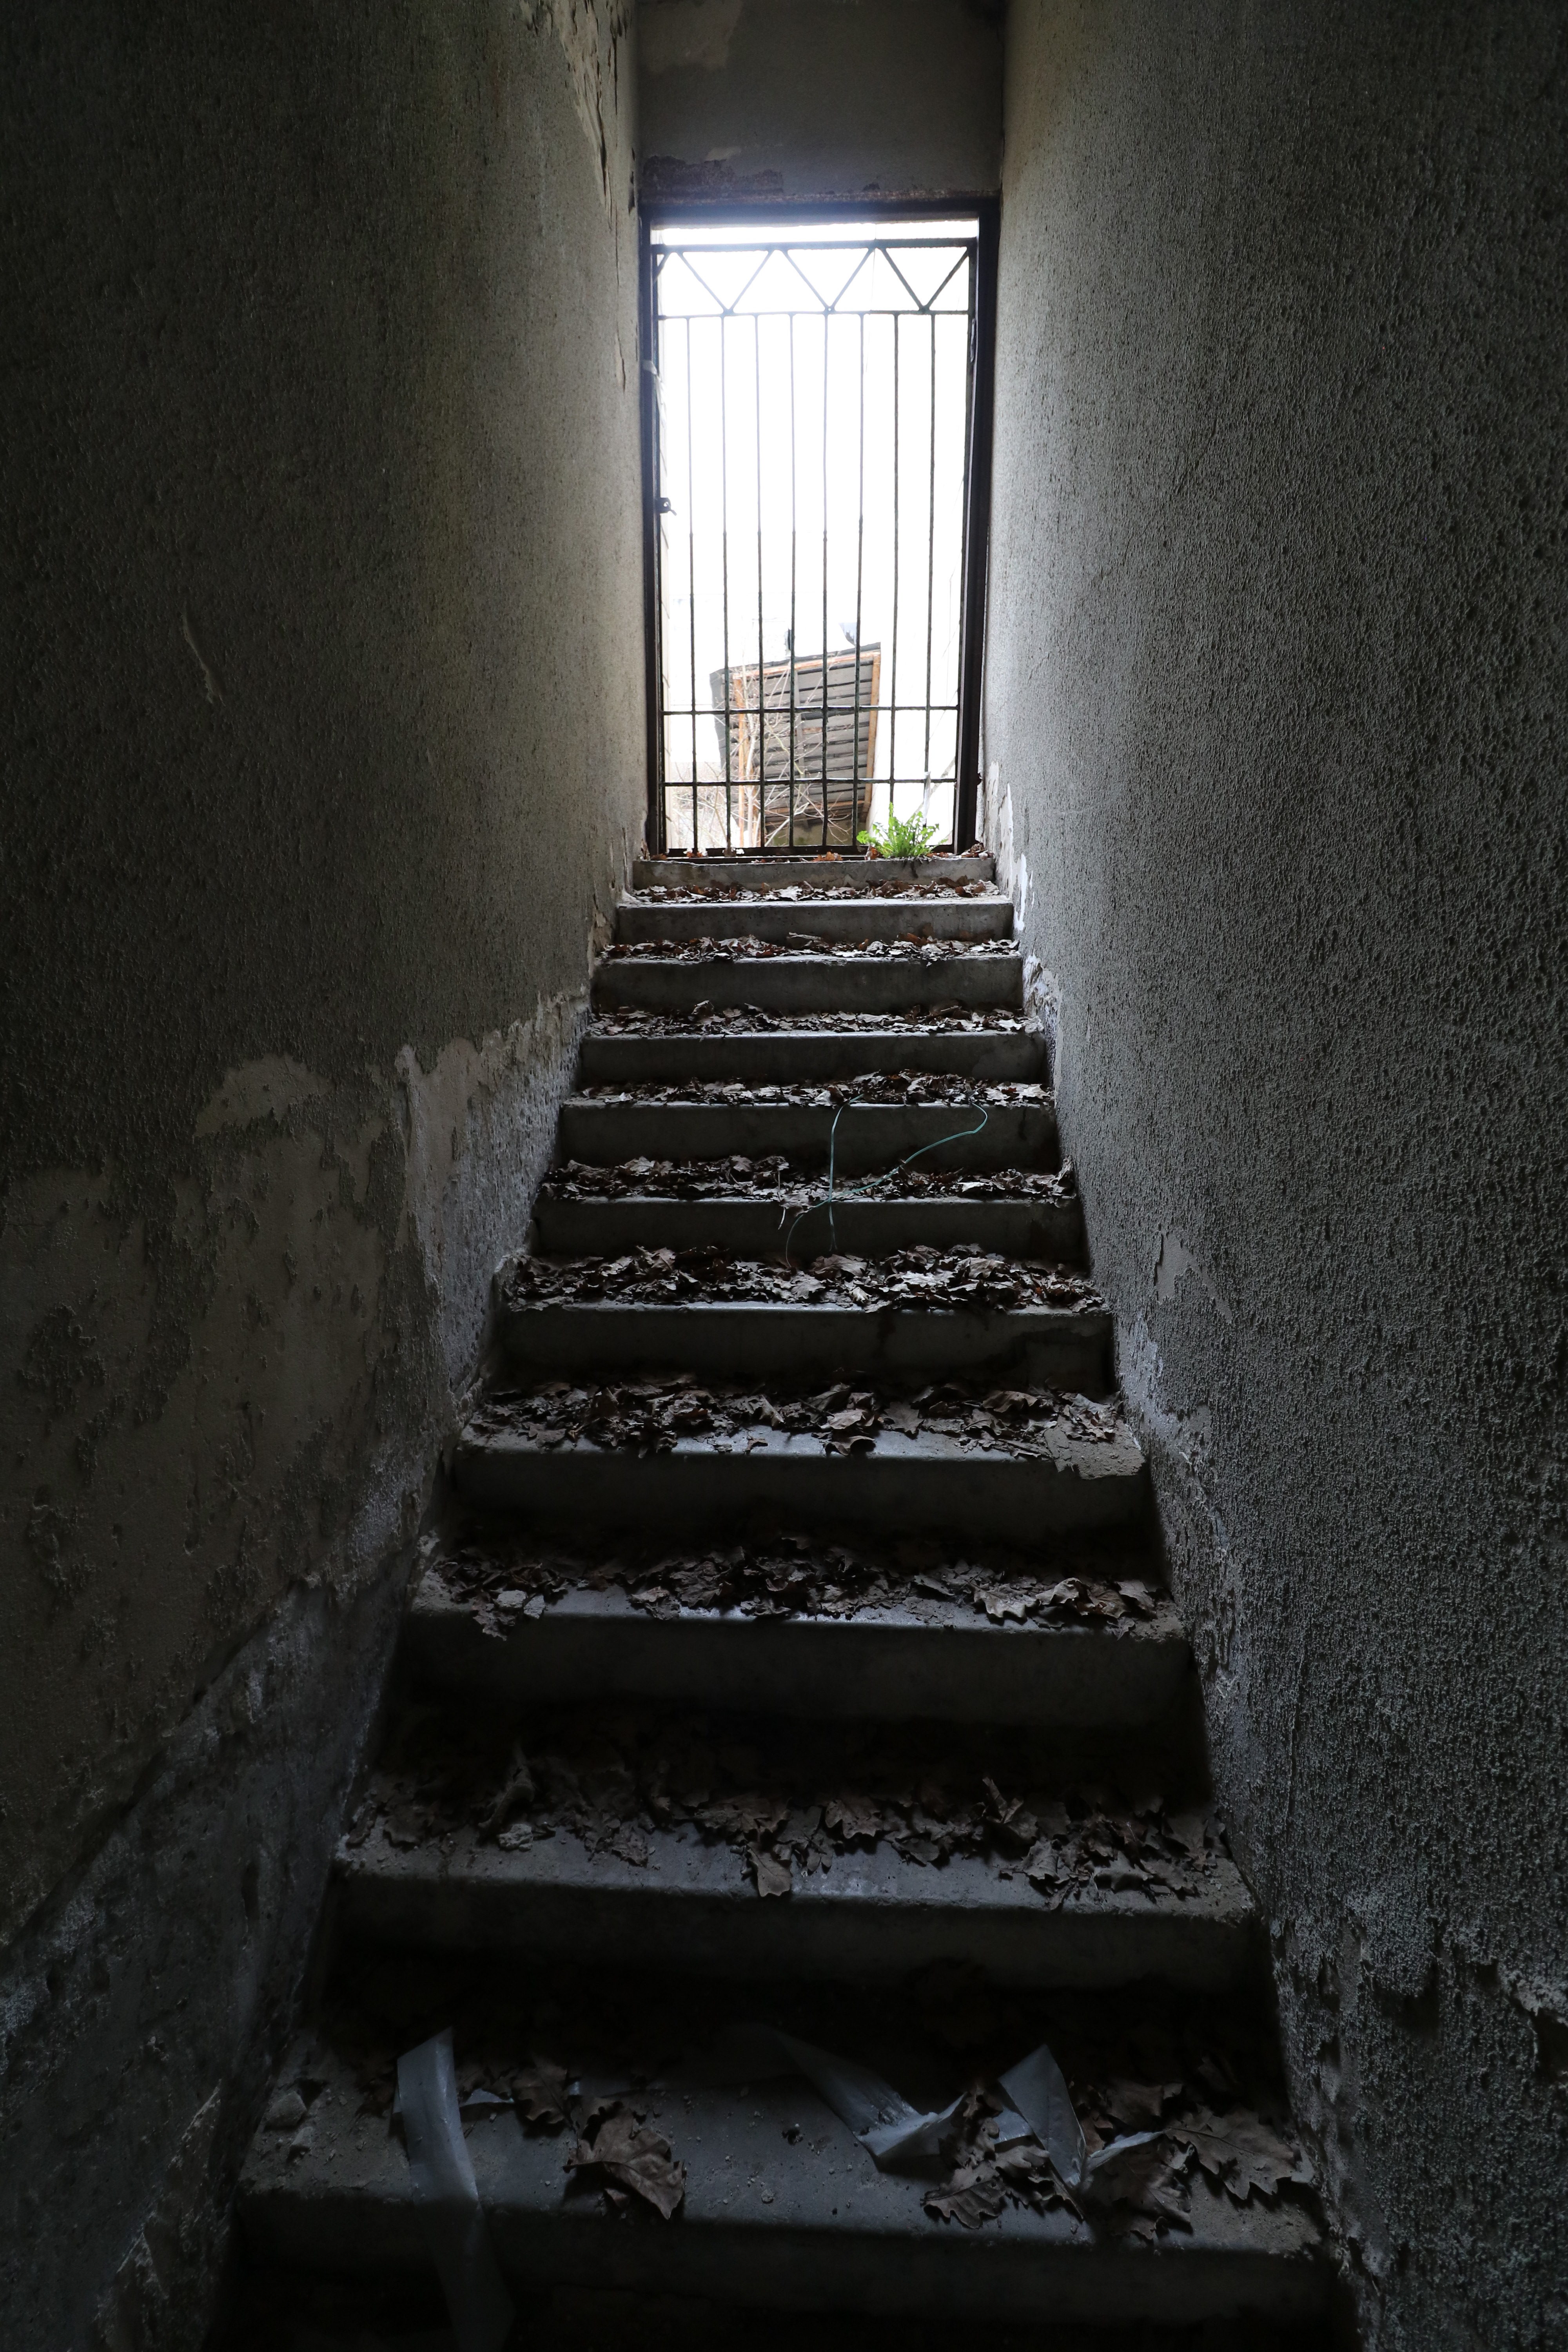
The adventure was unexpected, so I left my flashlight at home, but my iPhone was enough. Sometimes old towers have a row of stairs knocked out, to try and prevent people from climbing up, but that’s really just encouragement. Thankfully these were pretty easy, if shaky.
These metal platforms are always super sketch
I swapped to my wide-angle lens and scoped the place out.
It was possible to climb further to the top, but that would’ve made me too visible. At this point, I hadn’t seen anyone yet.
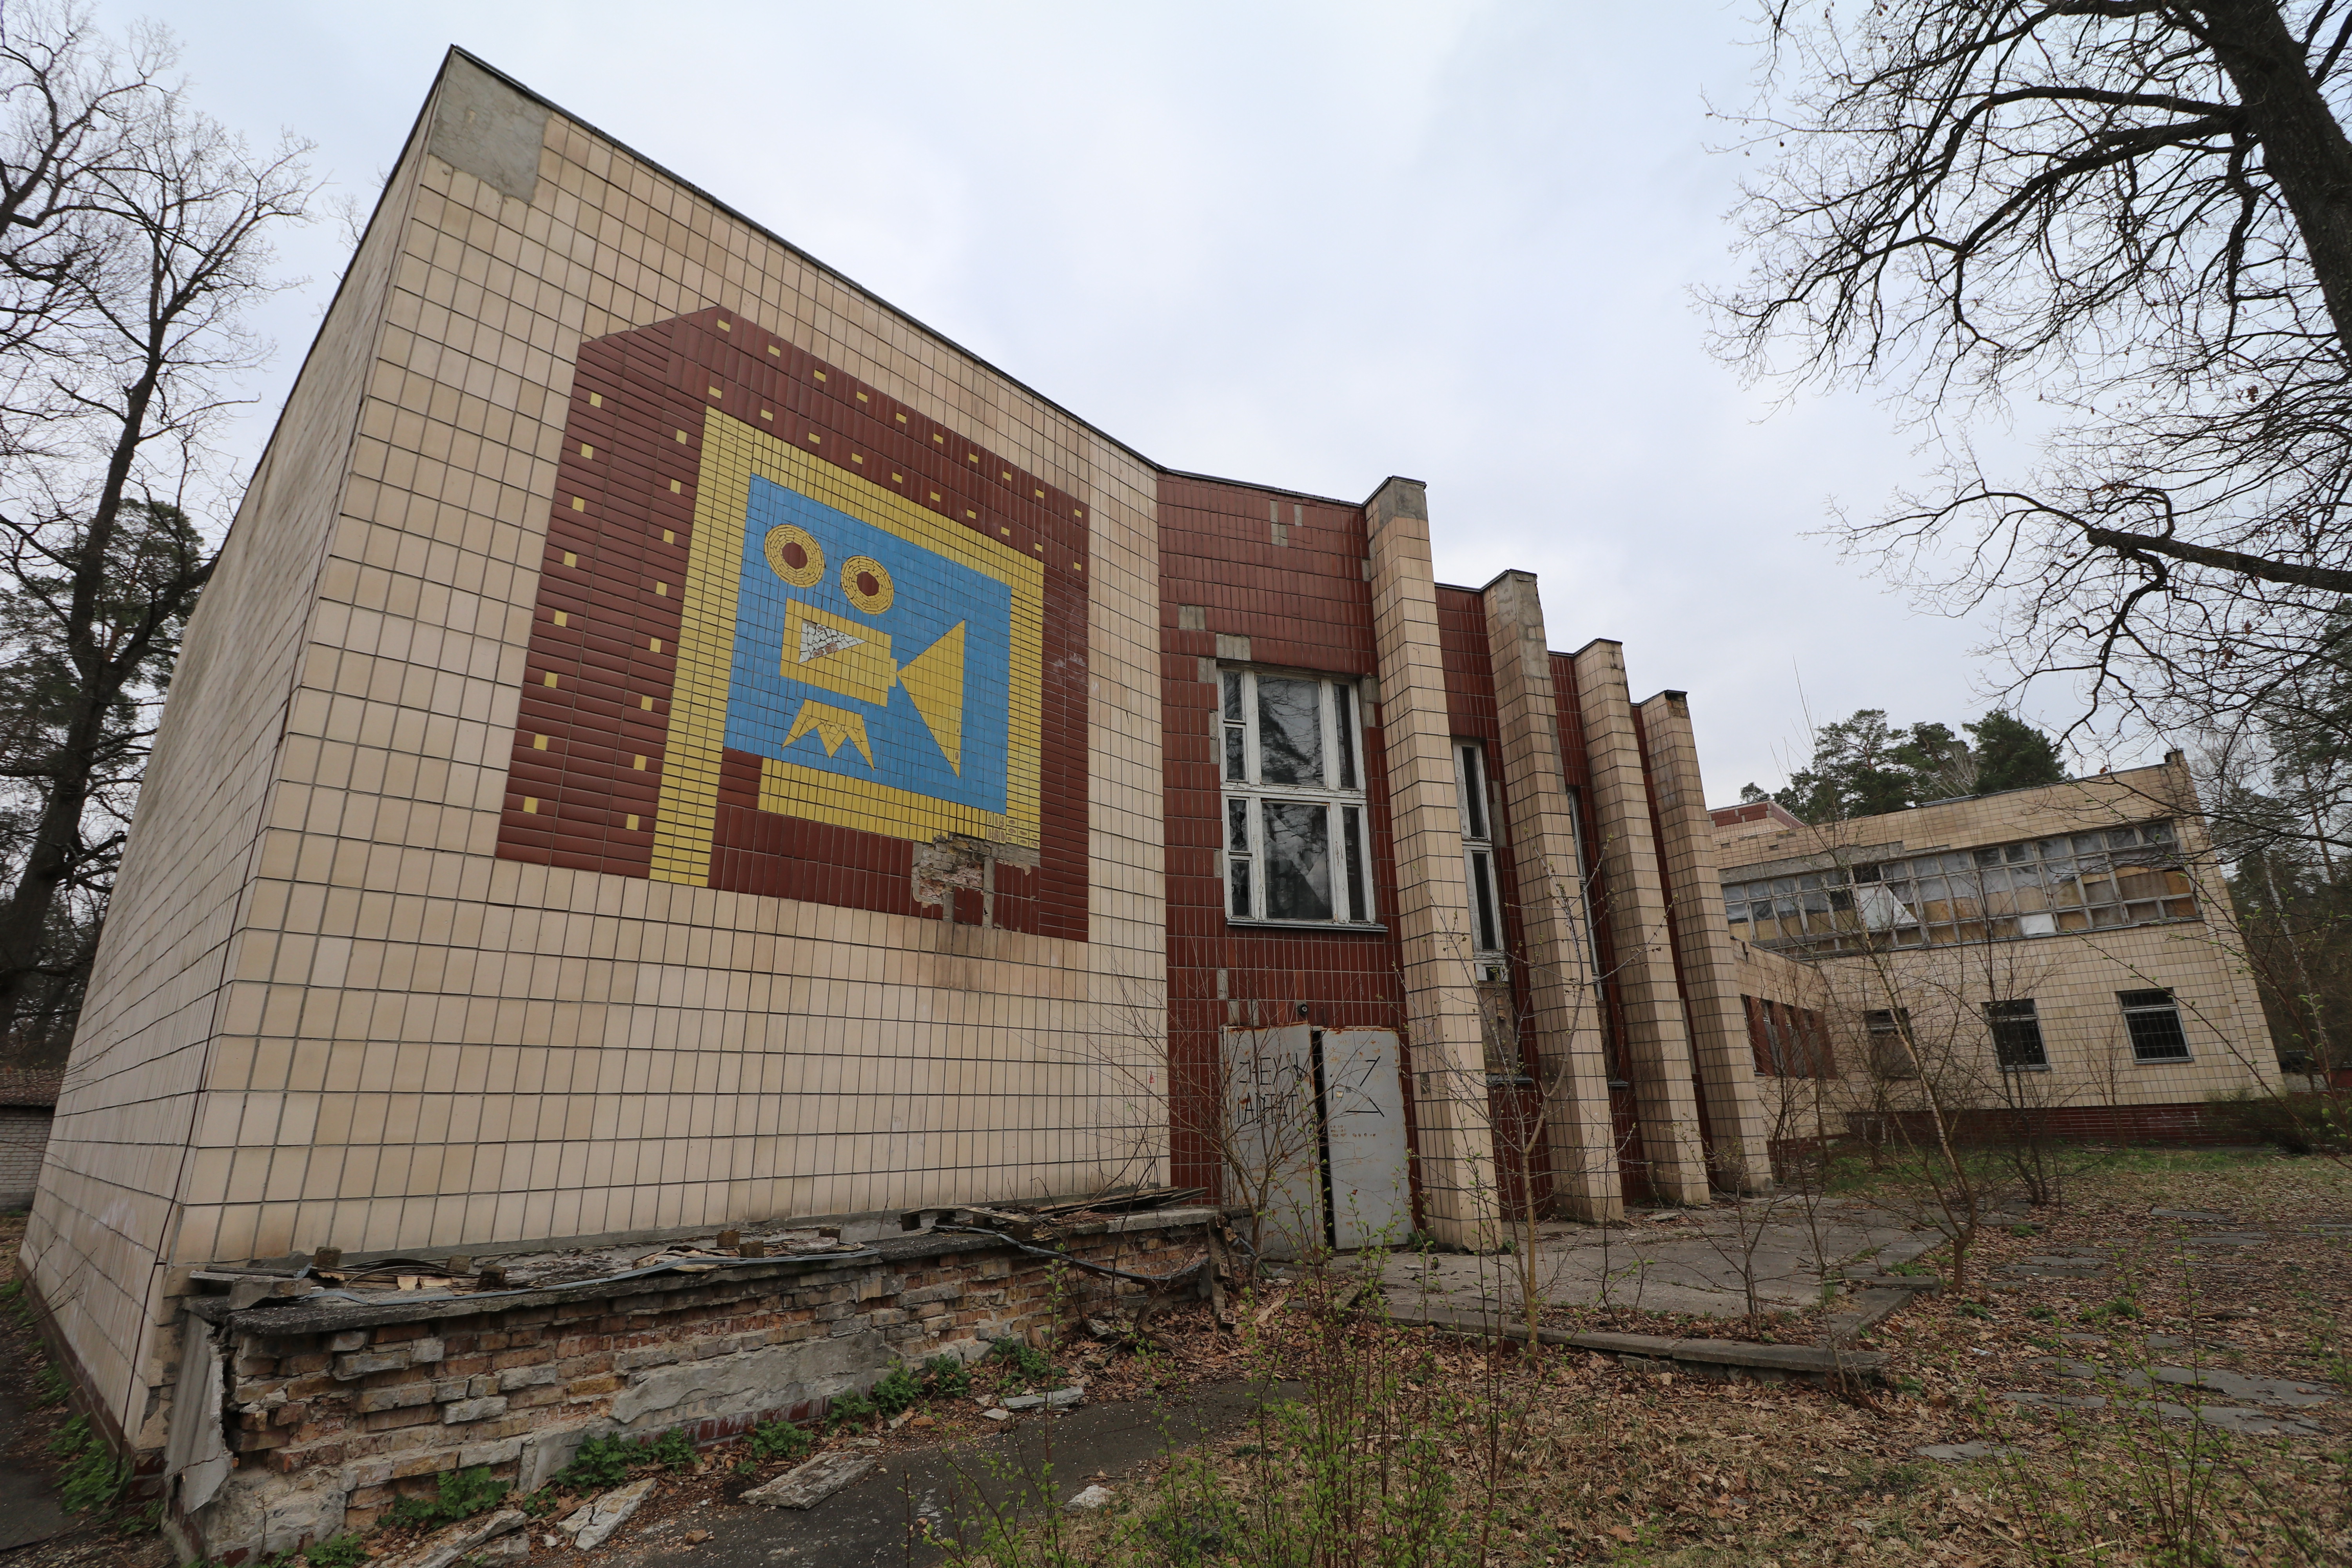
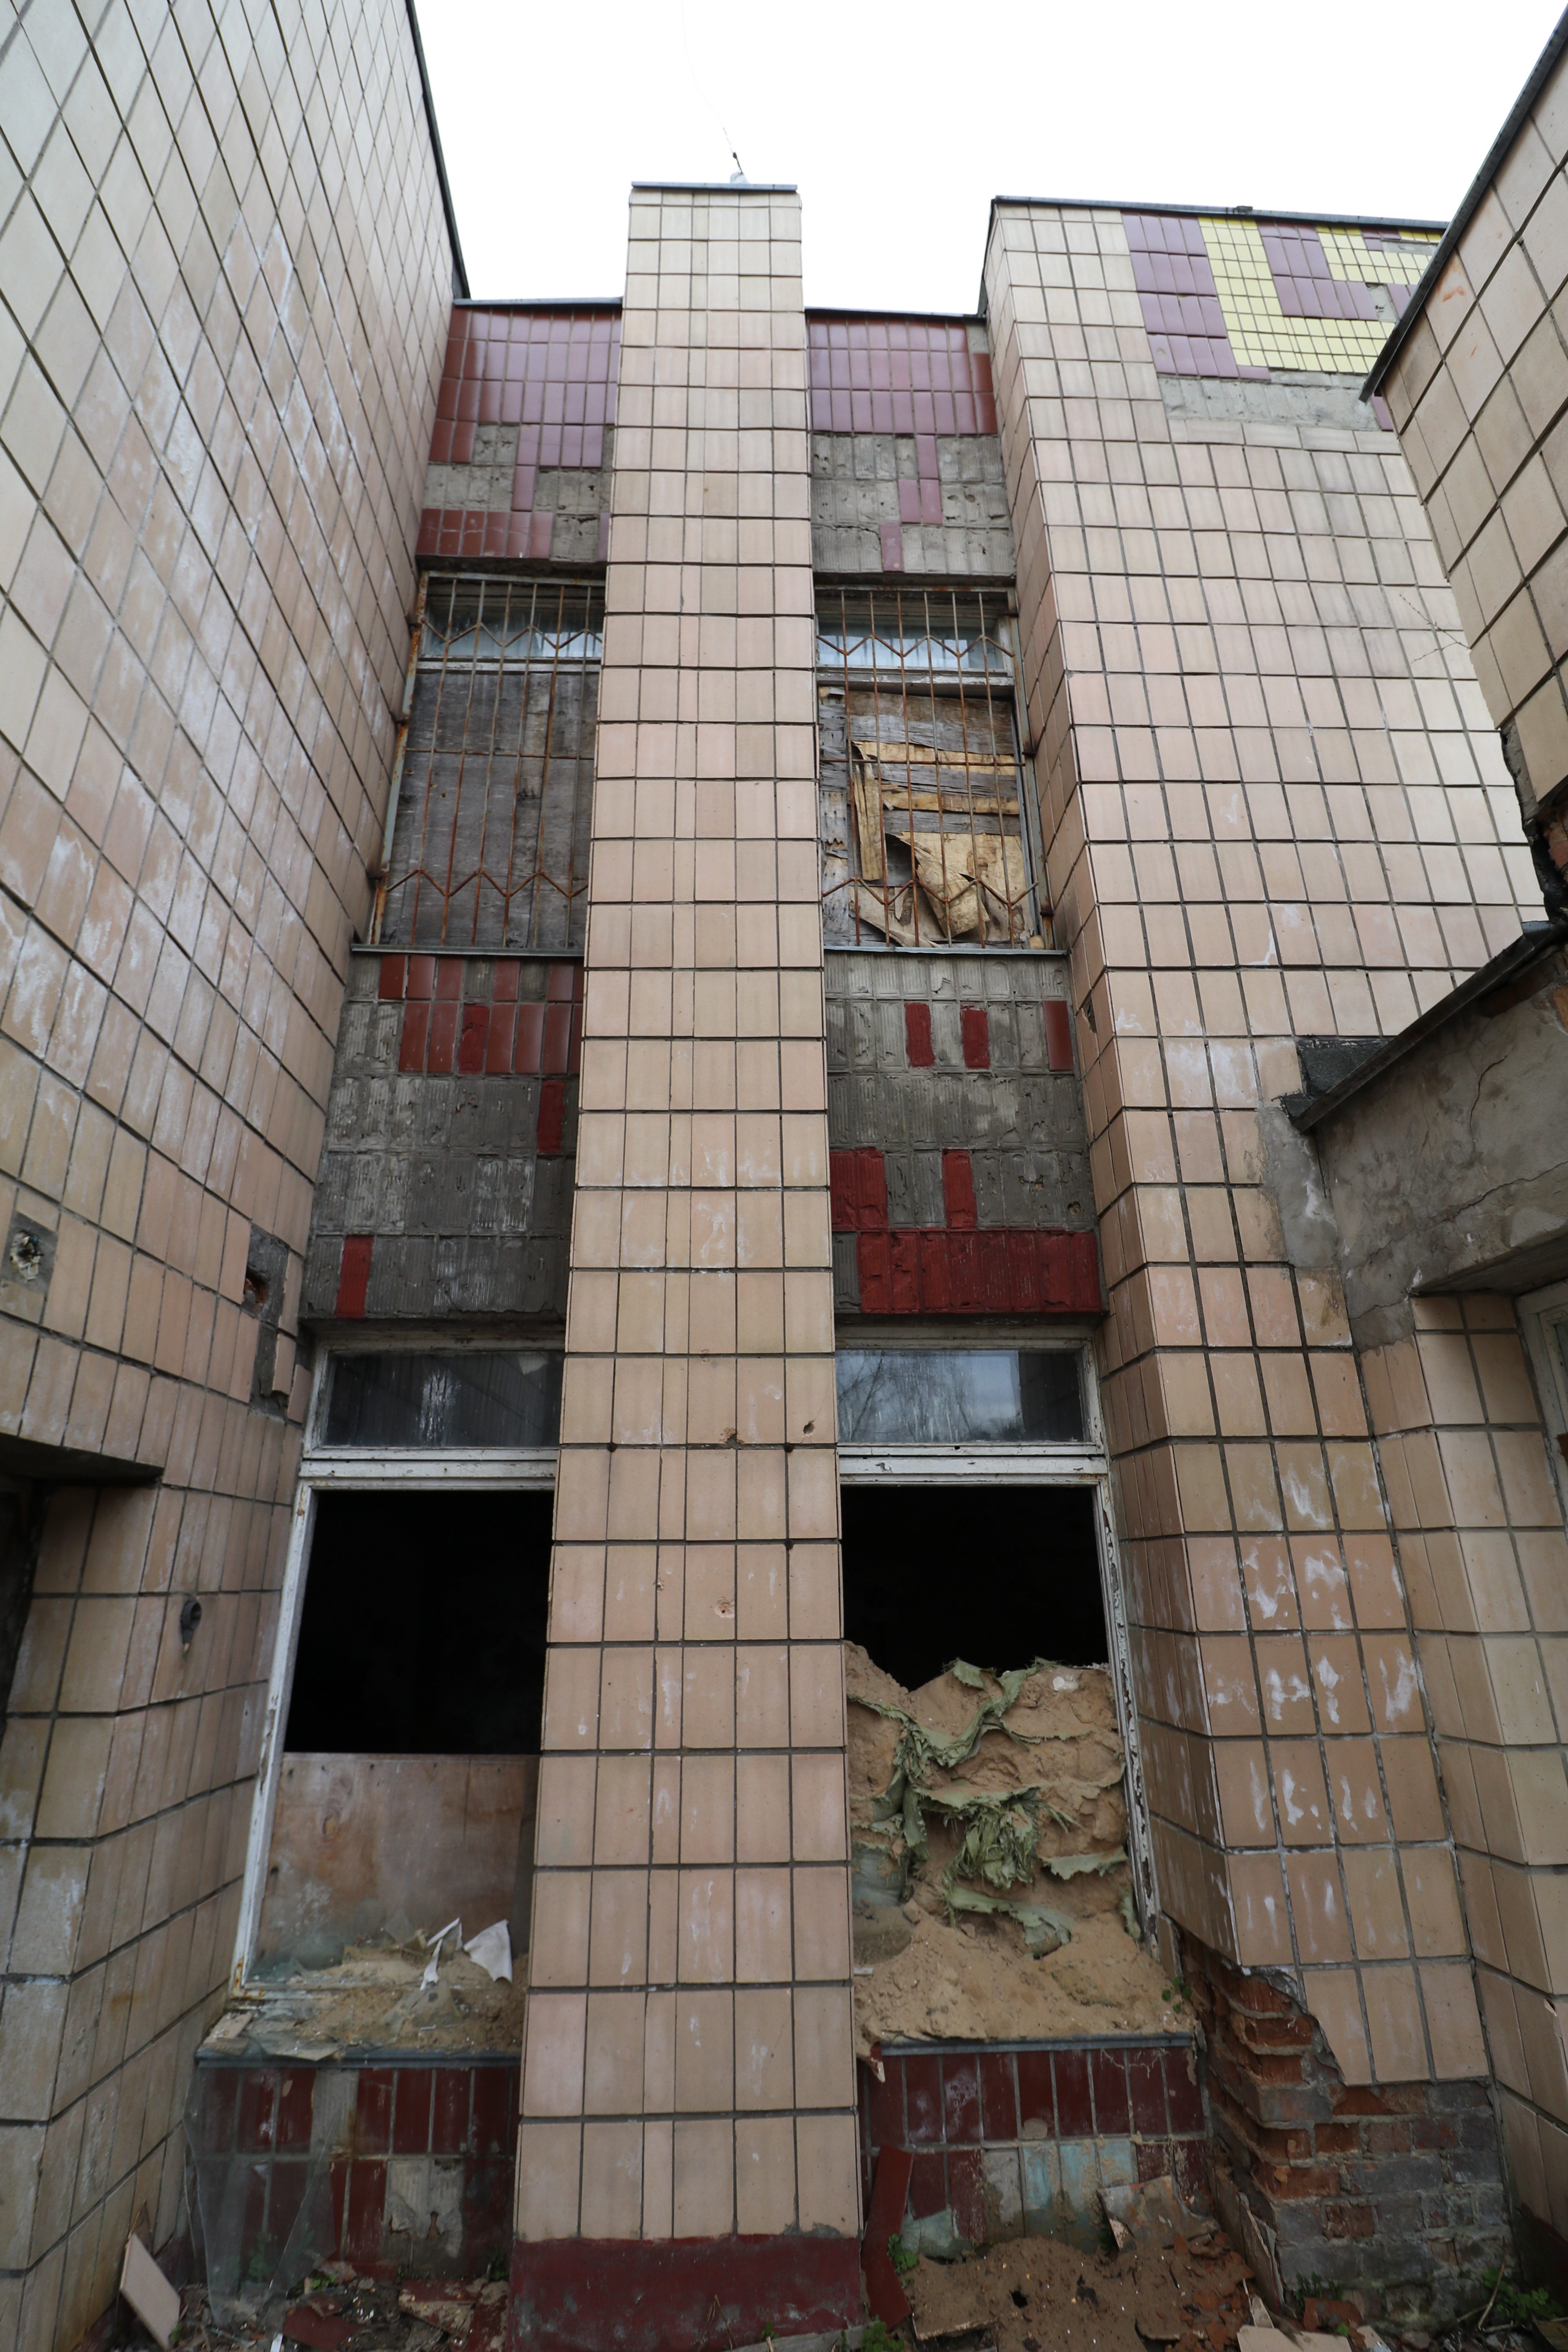
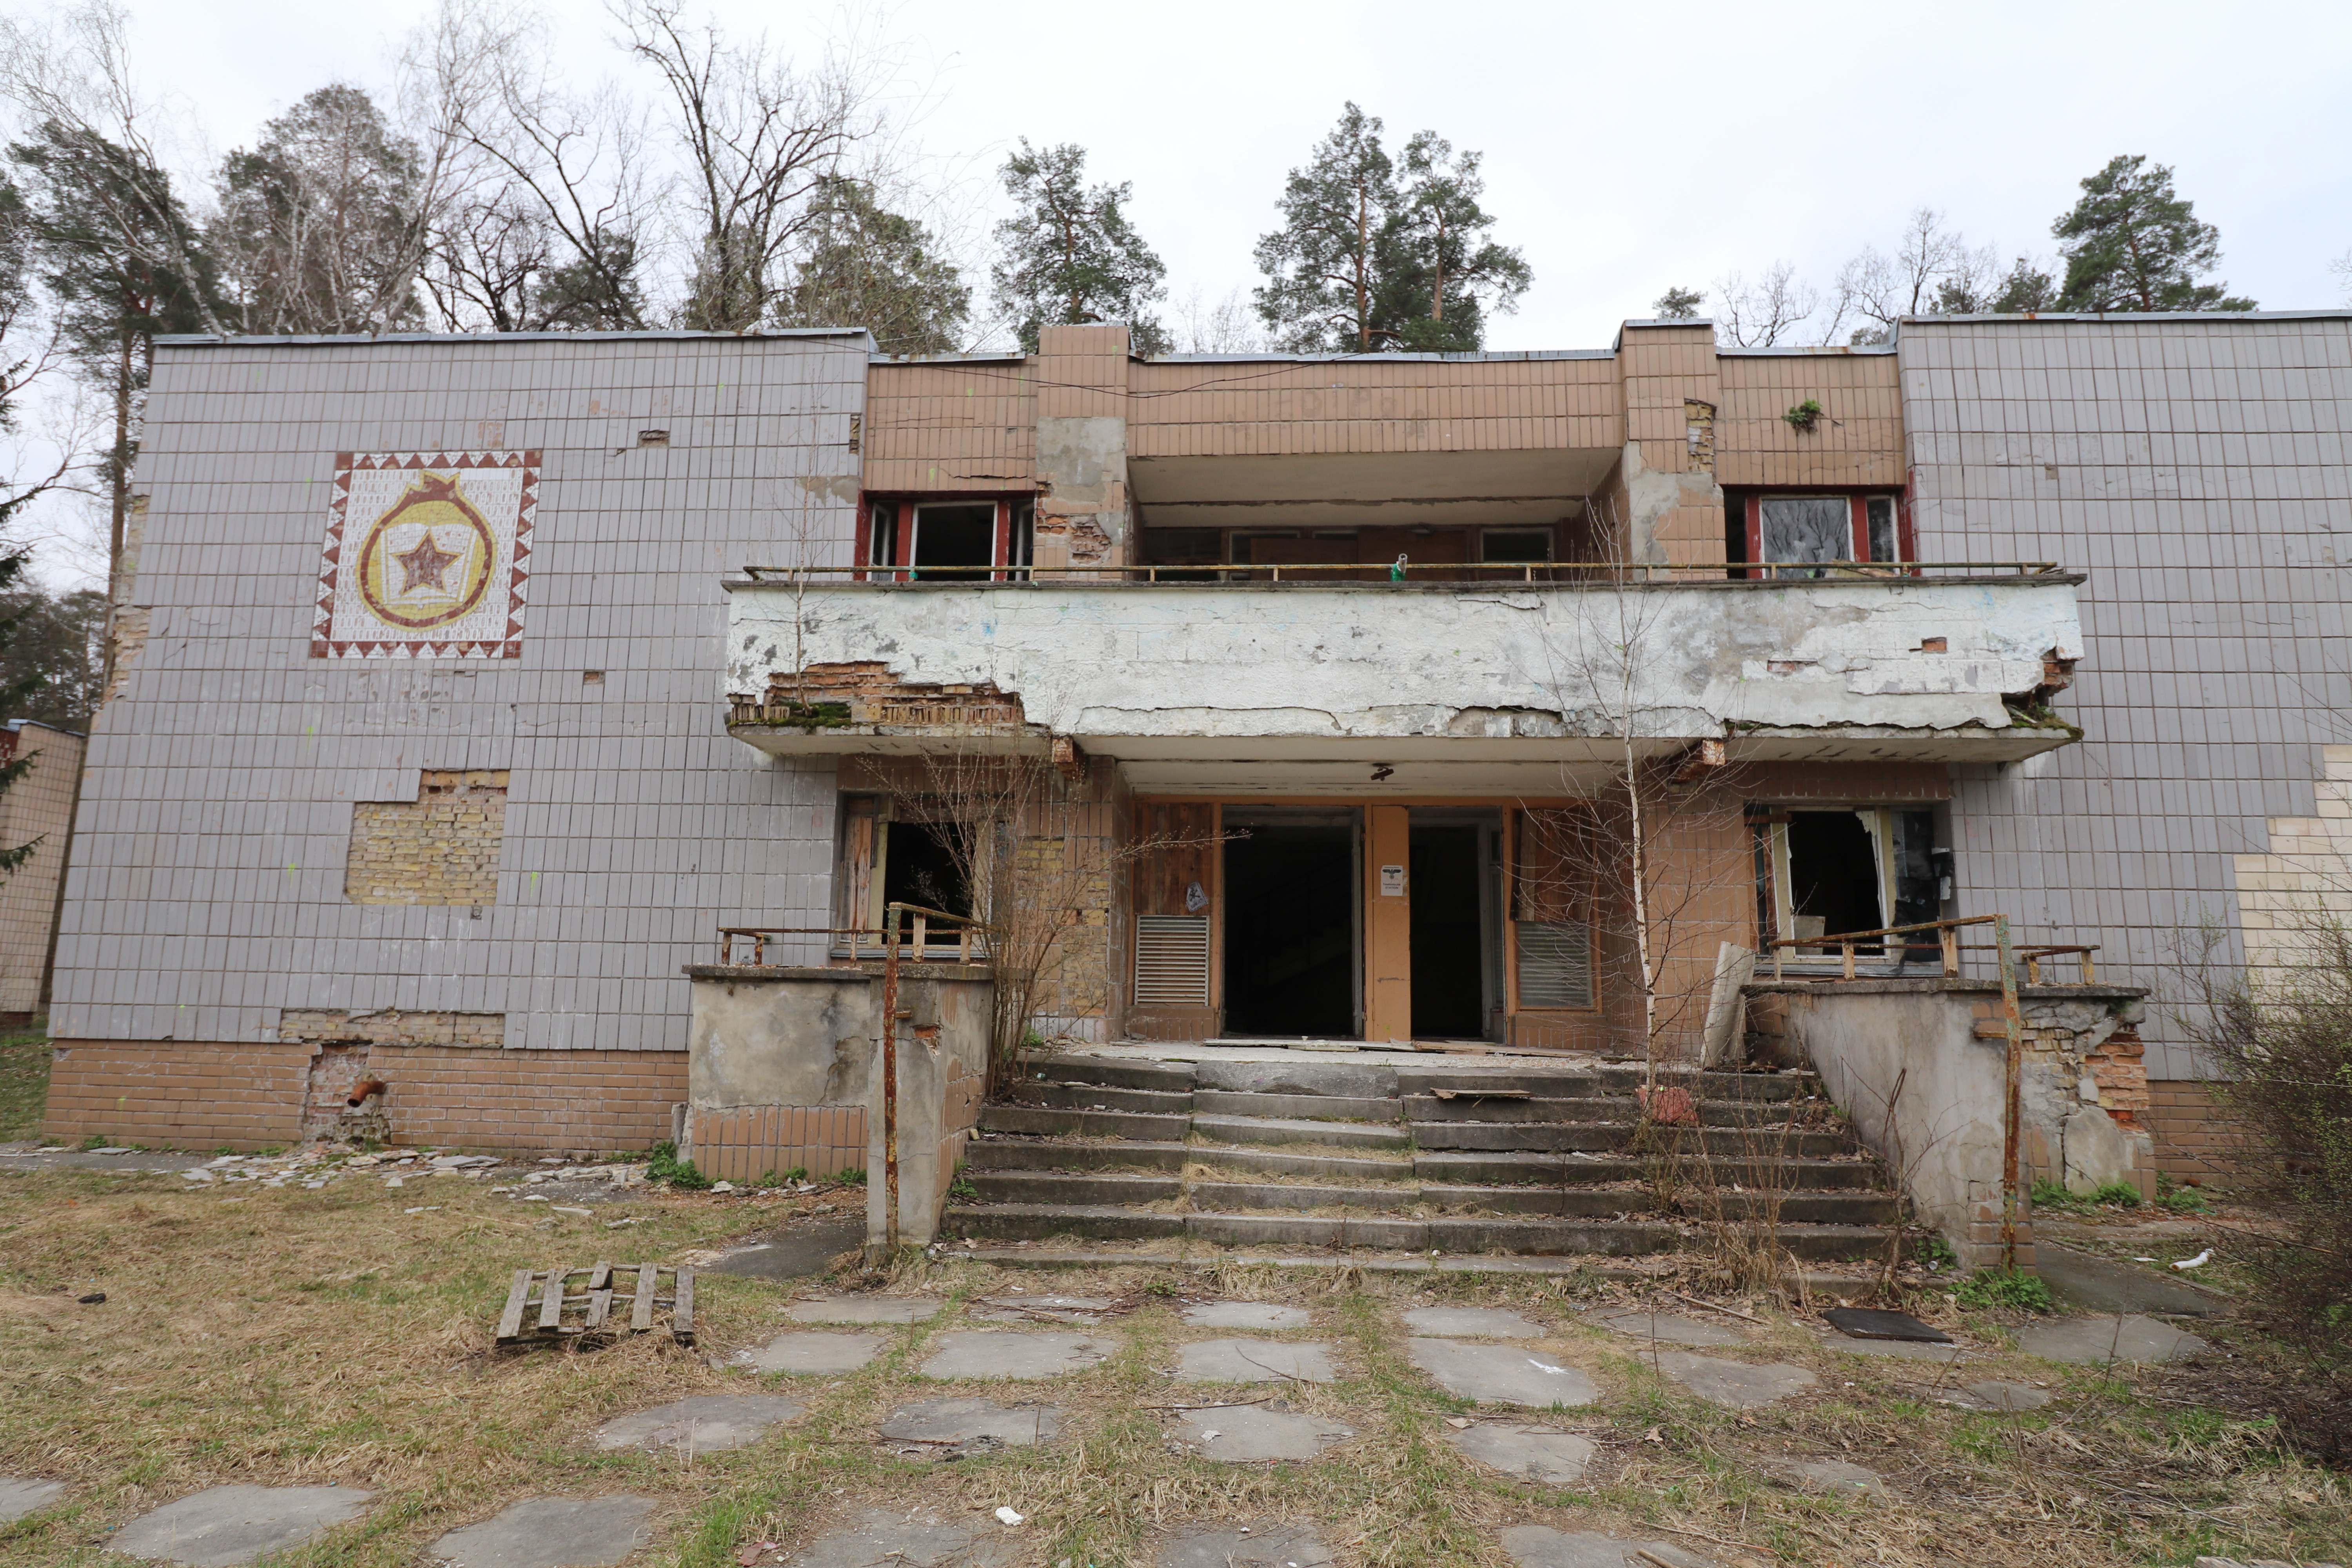
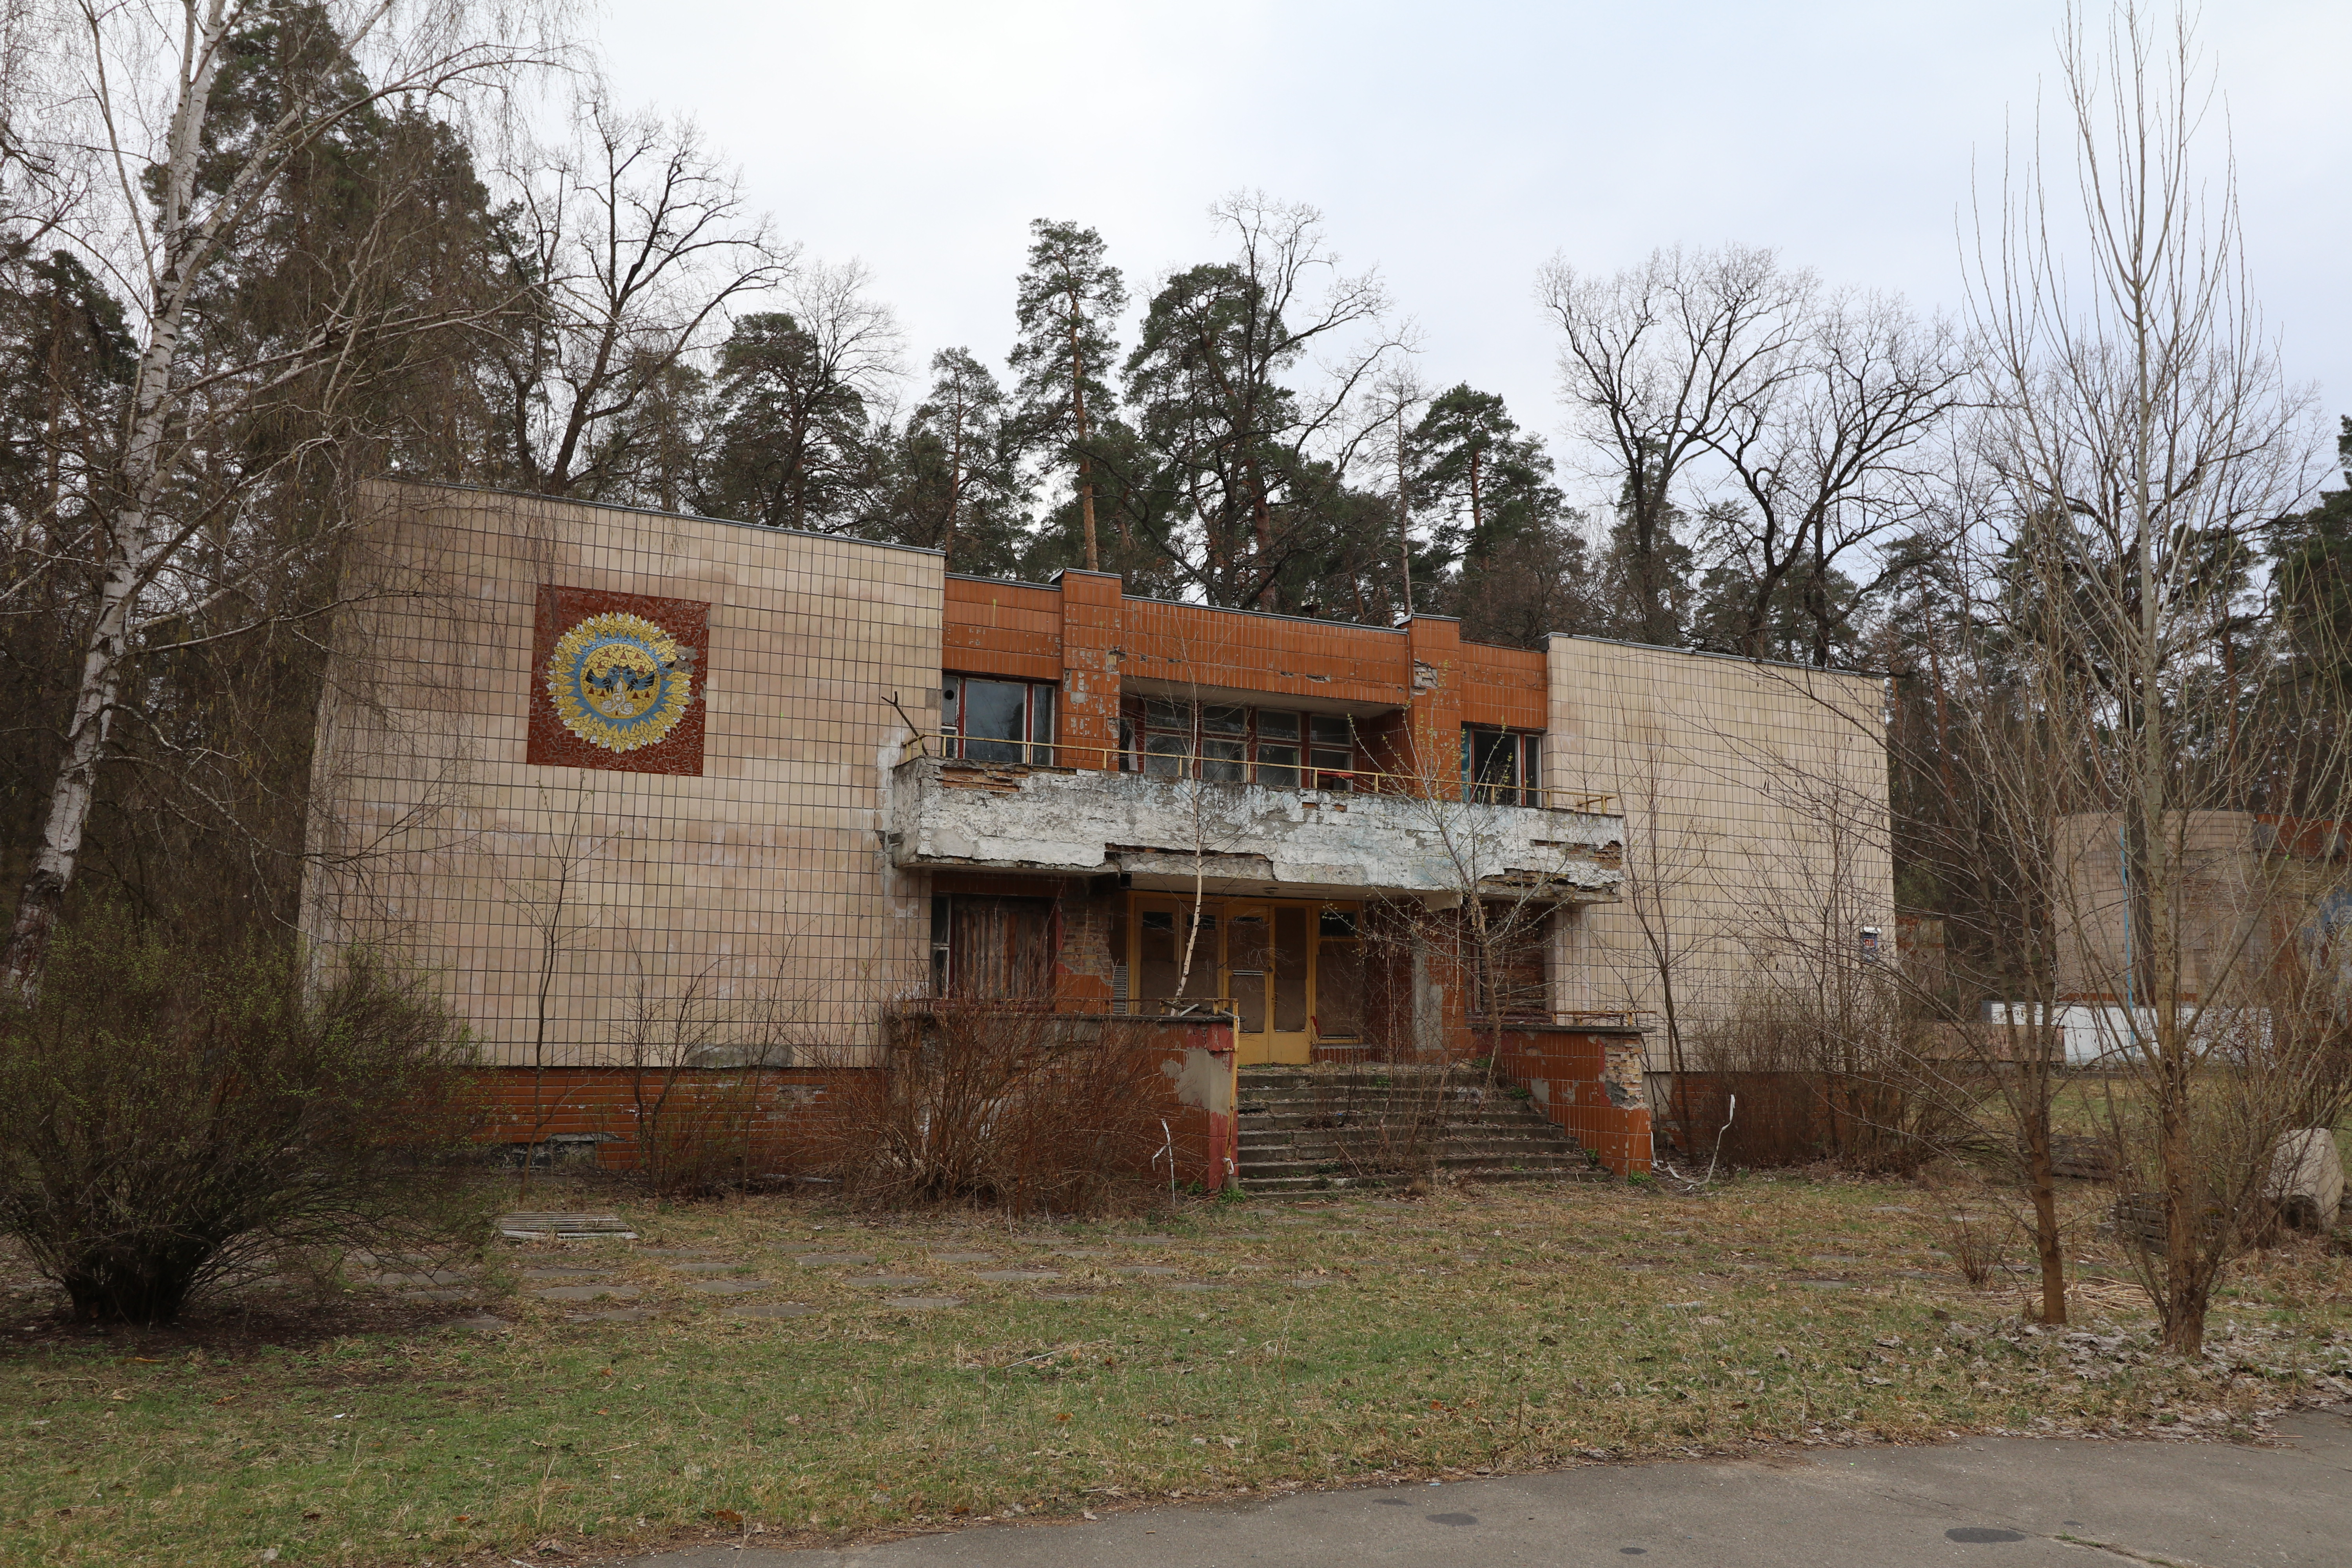
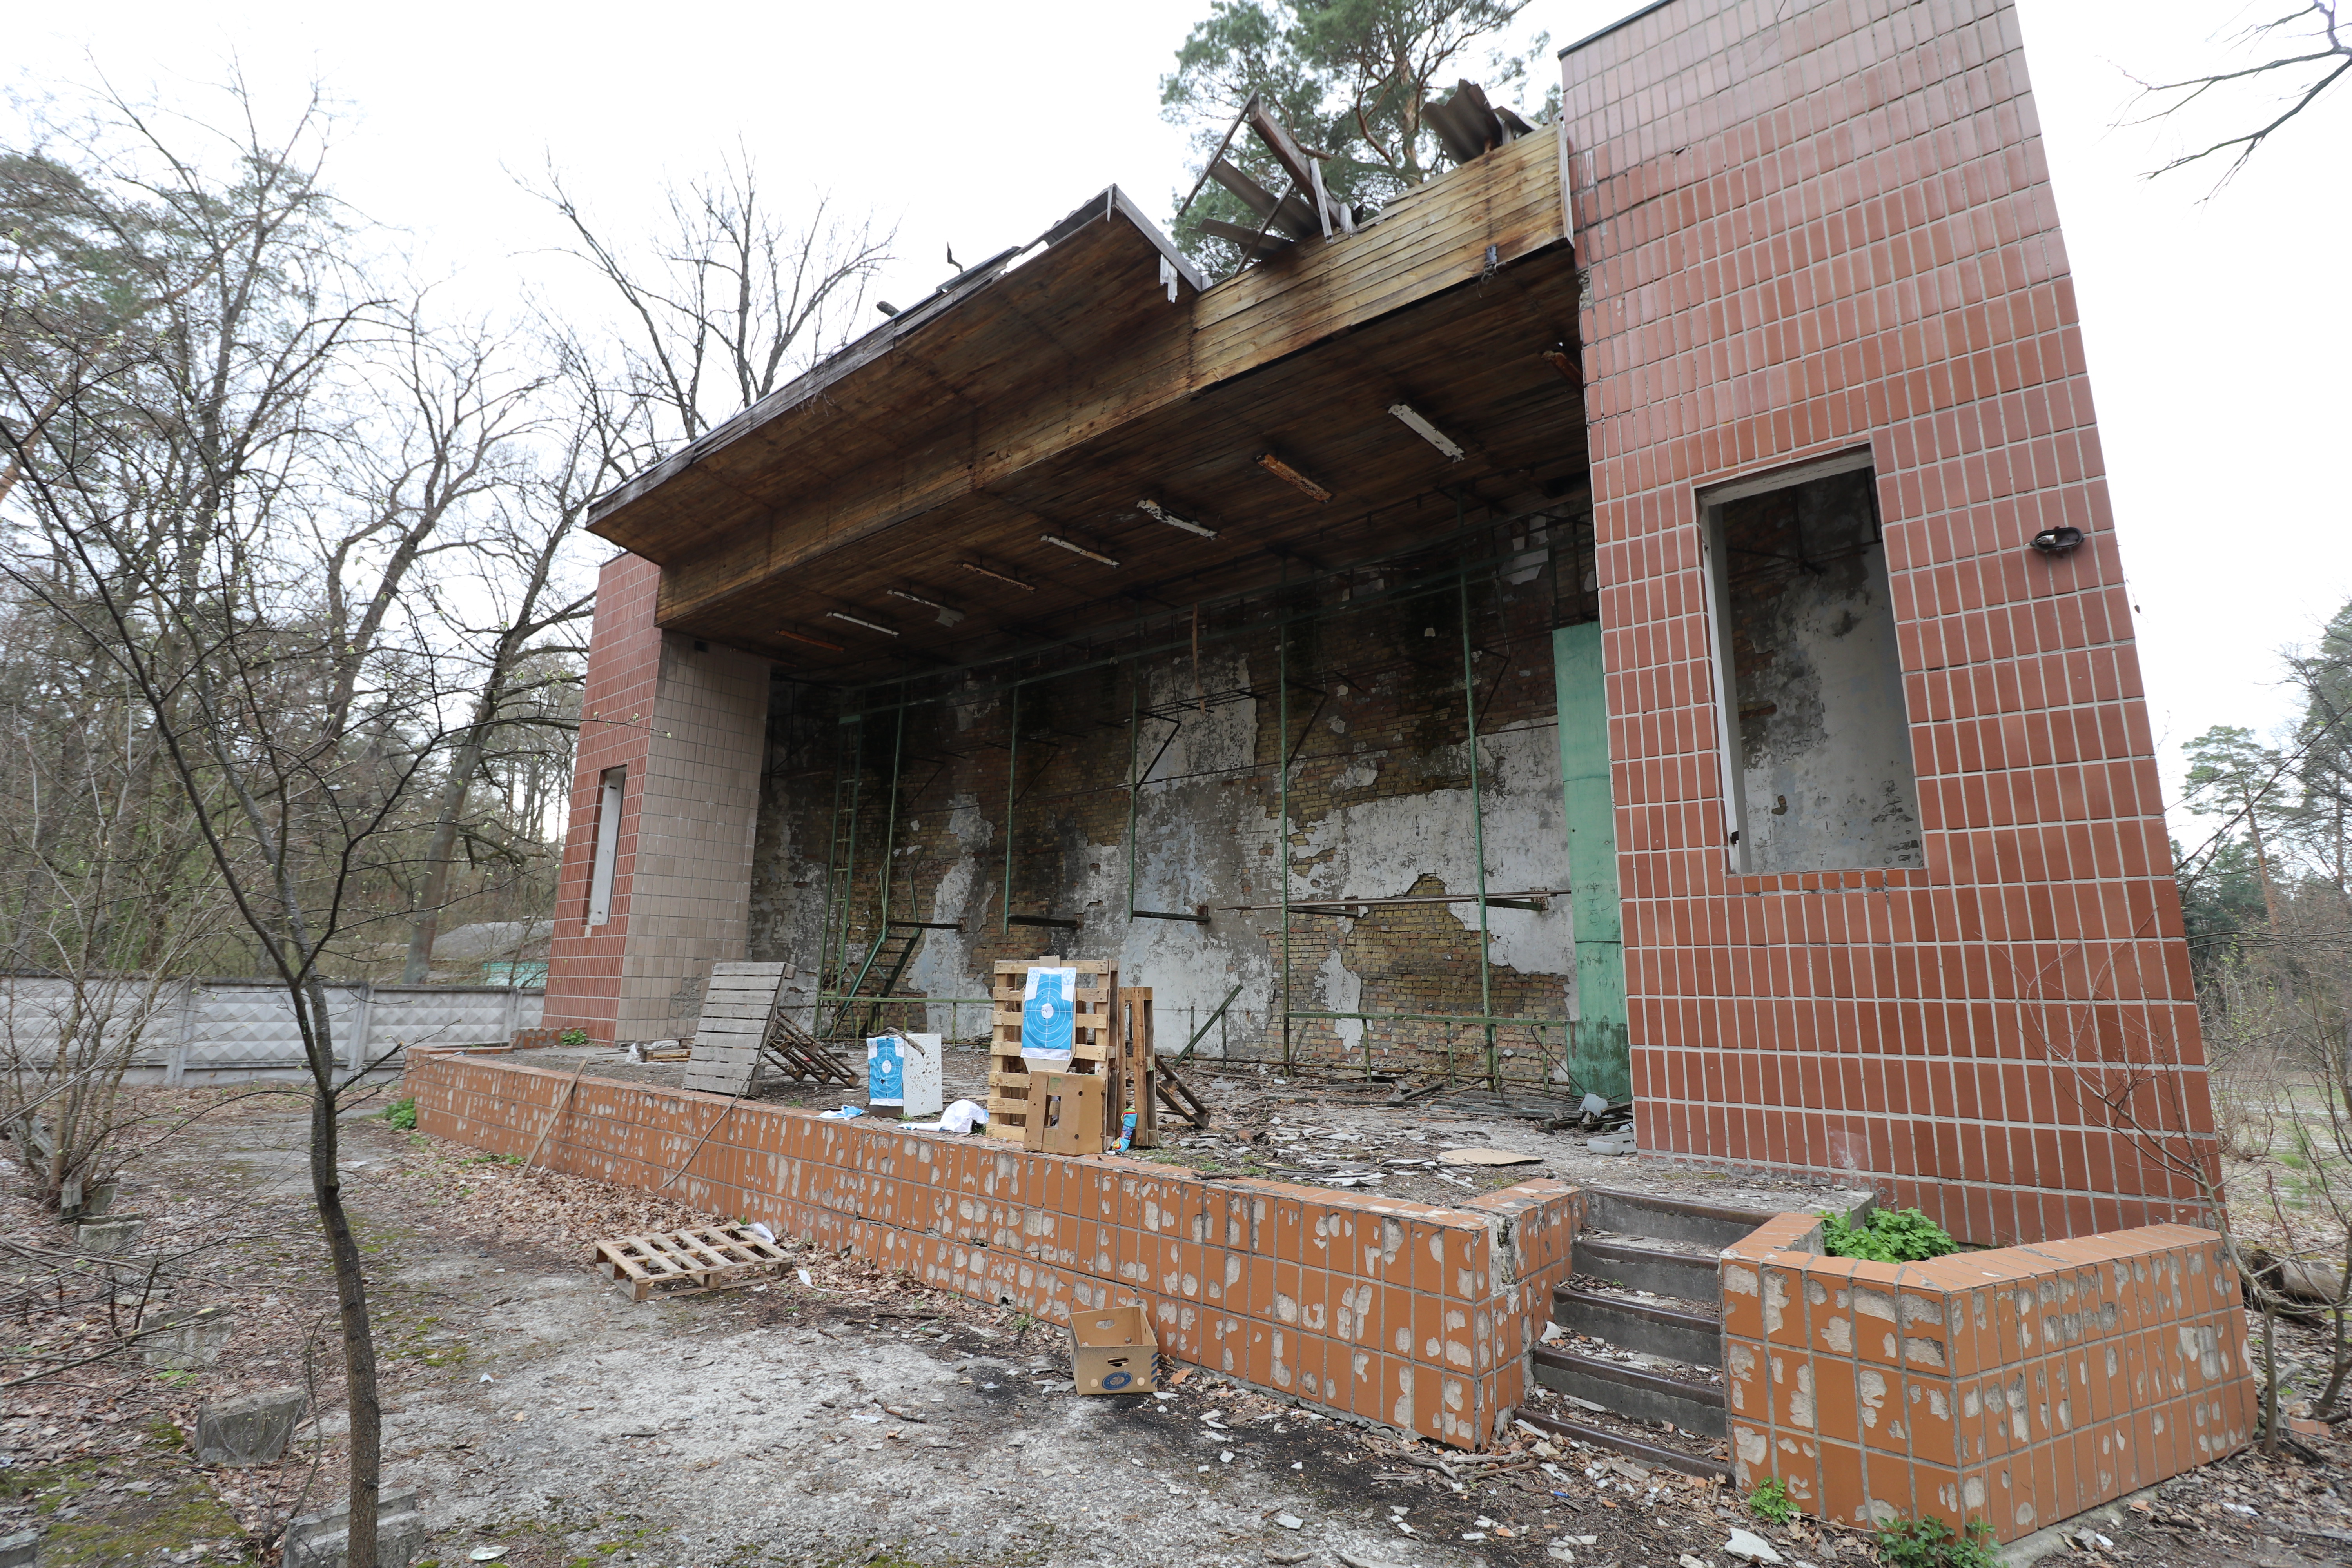
Feel pretty good about being able to make it to the building with the camera mural on it, I carefully climbed back down and made my way in. You never know when there could be someone or something inside unexpected.
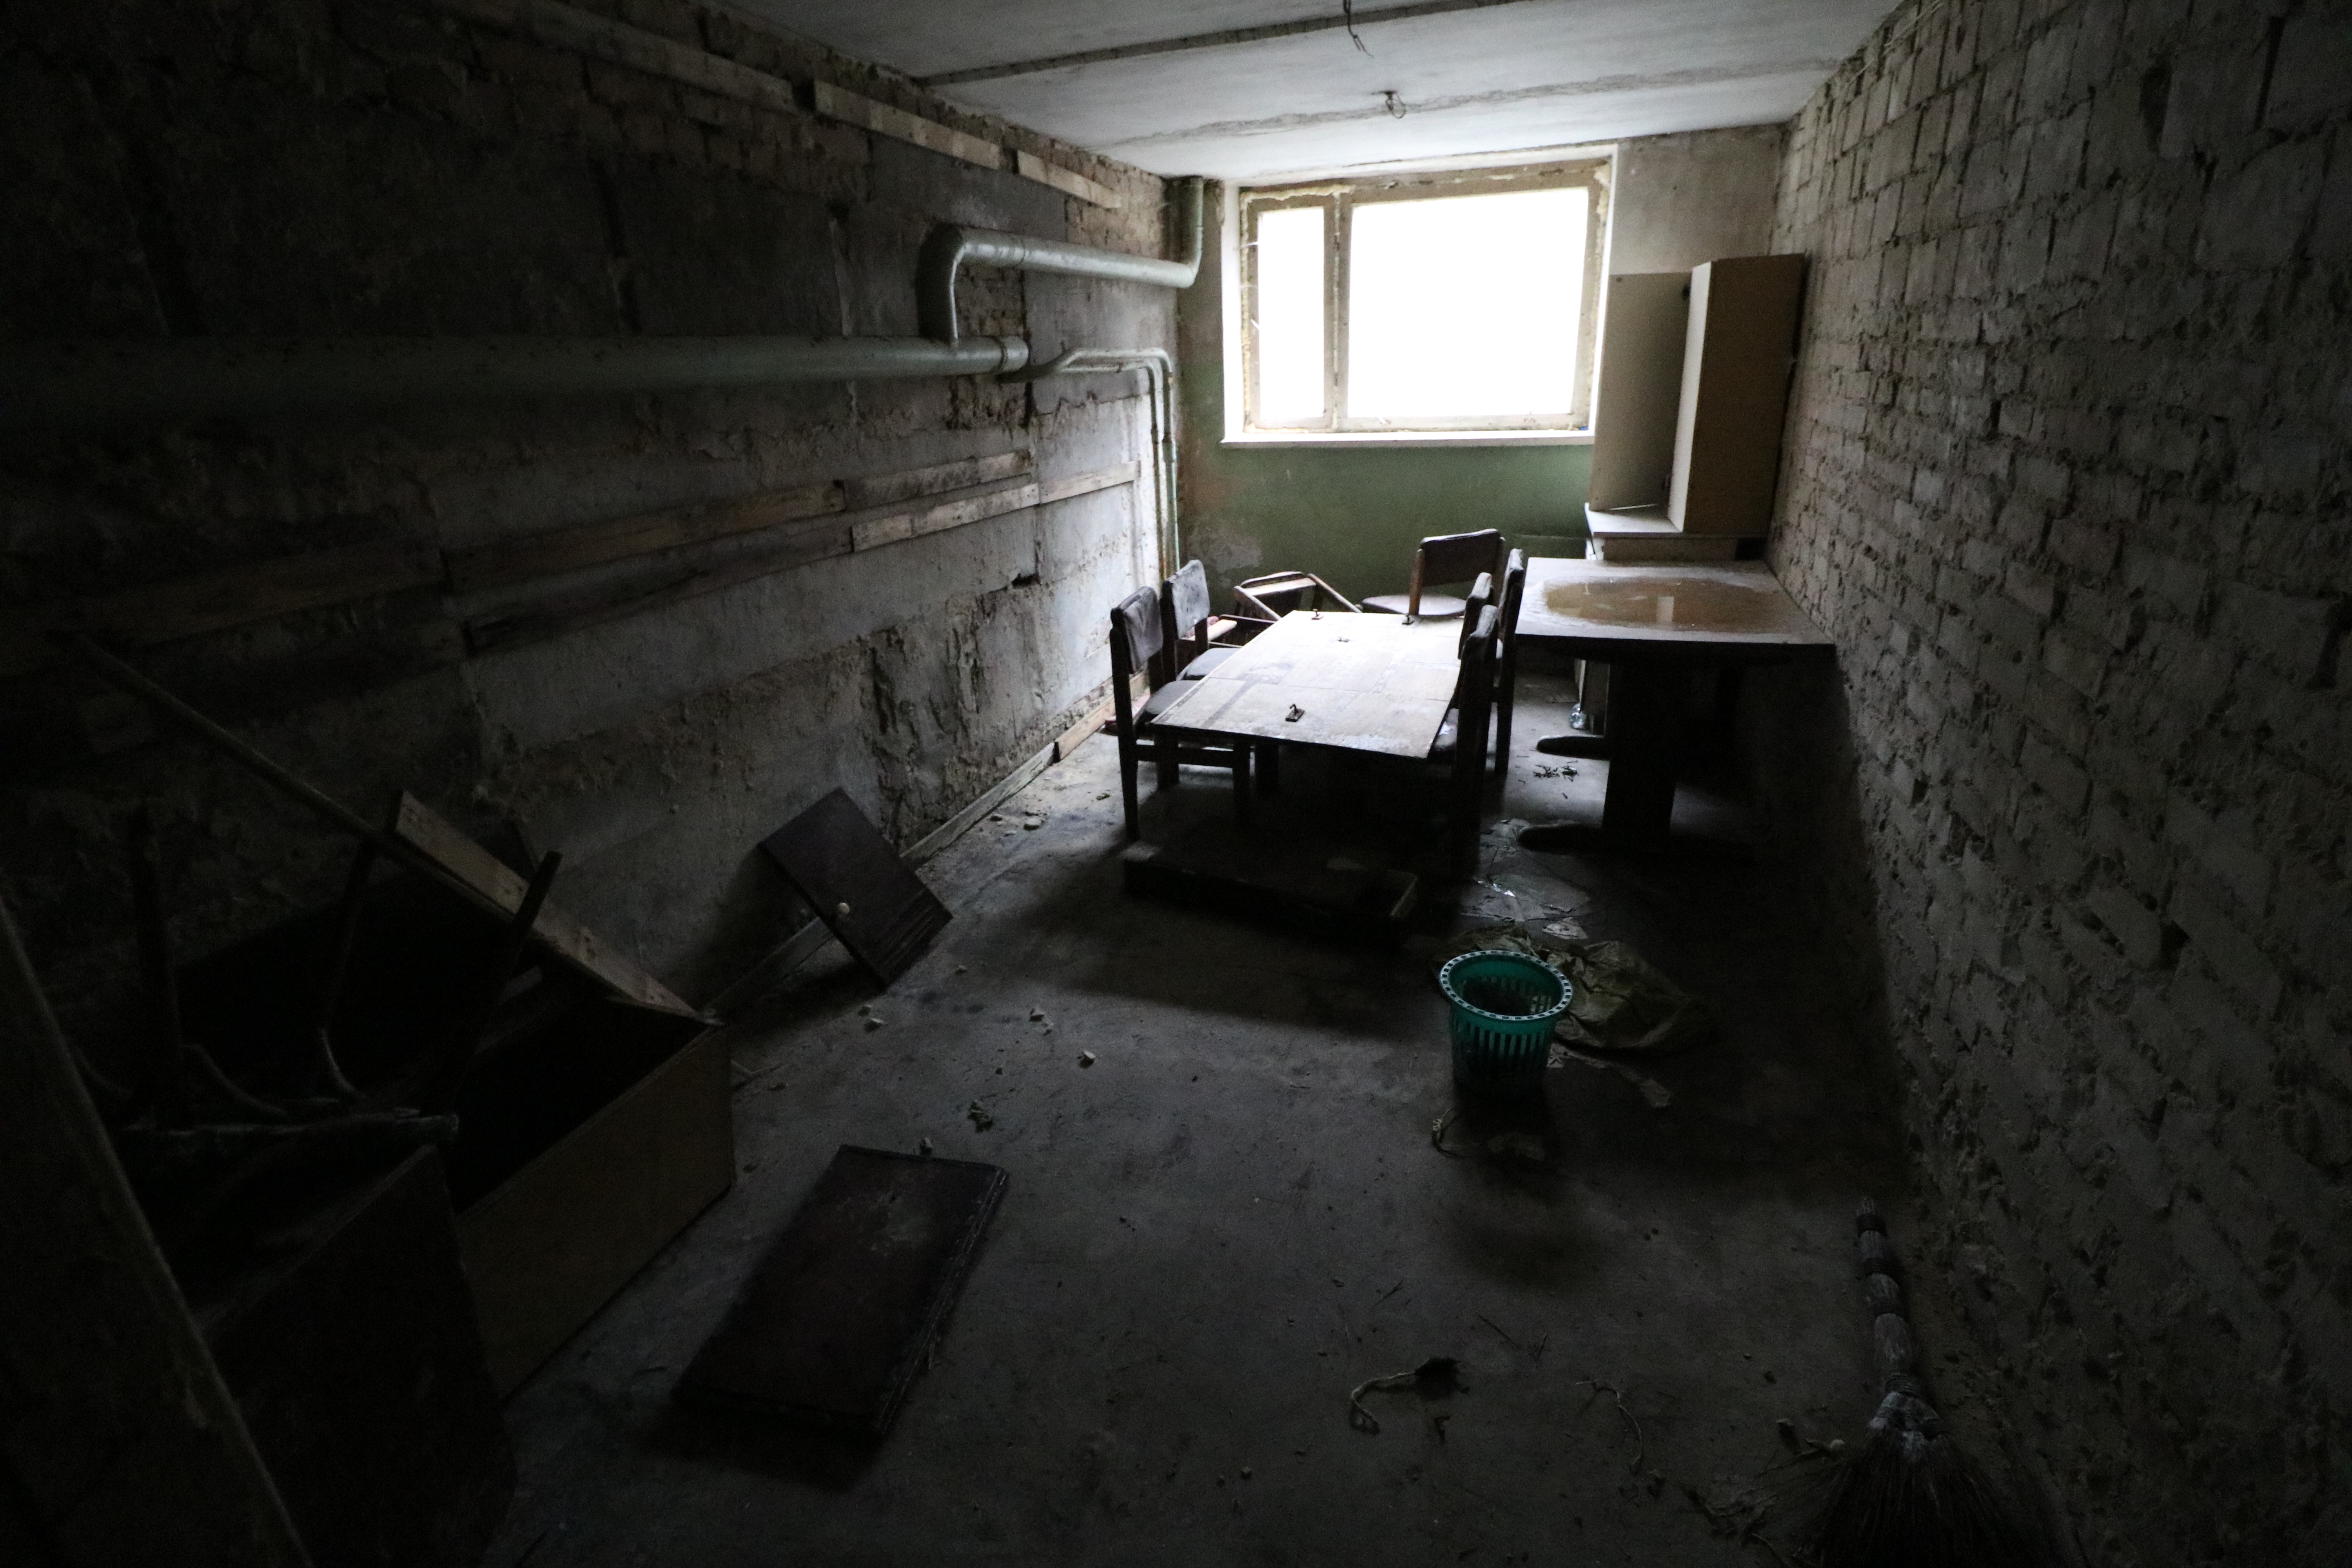
I made my way behind the stage, there were some stairs down to the basement.
I ended up not being able to make my out from down there, so had to backtrack.
Part of the theater building hallway was blocked off, so I had to go back out to make it to the other part.
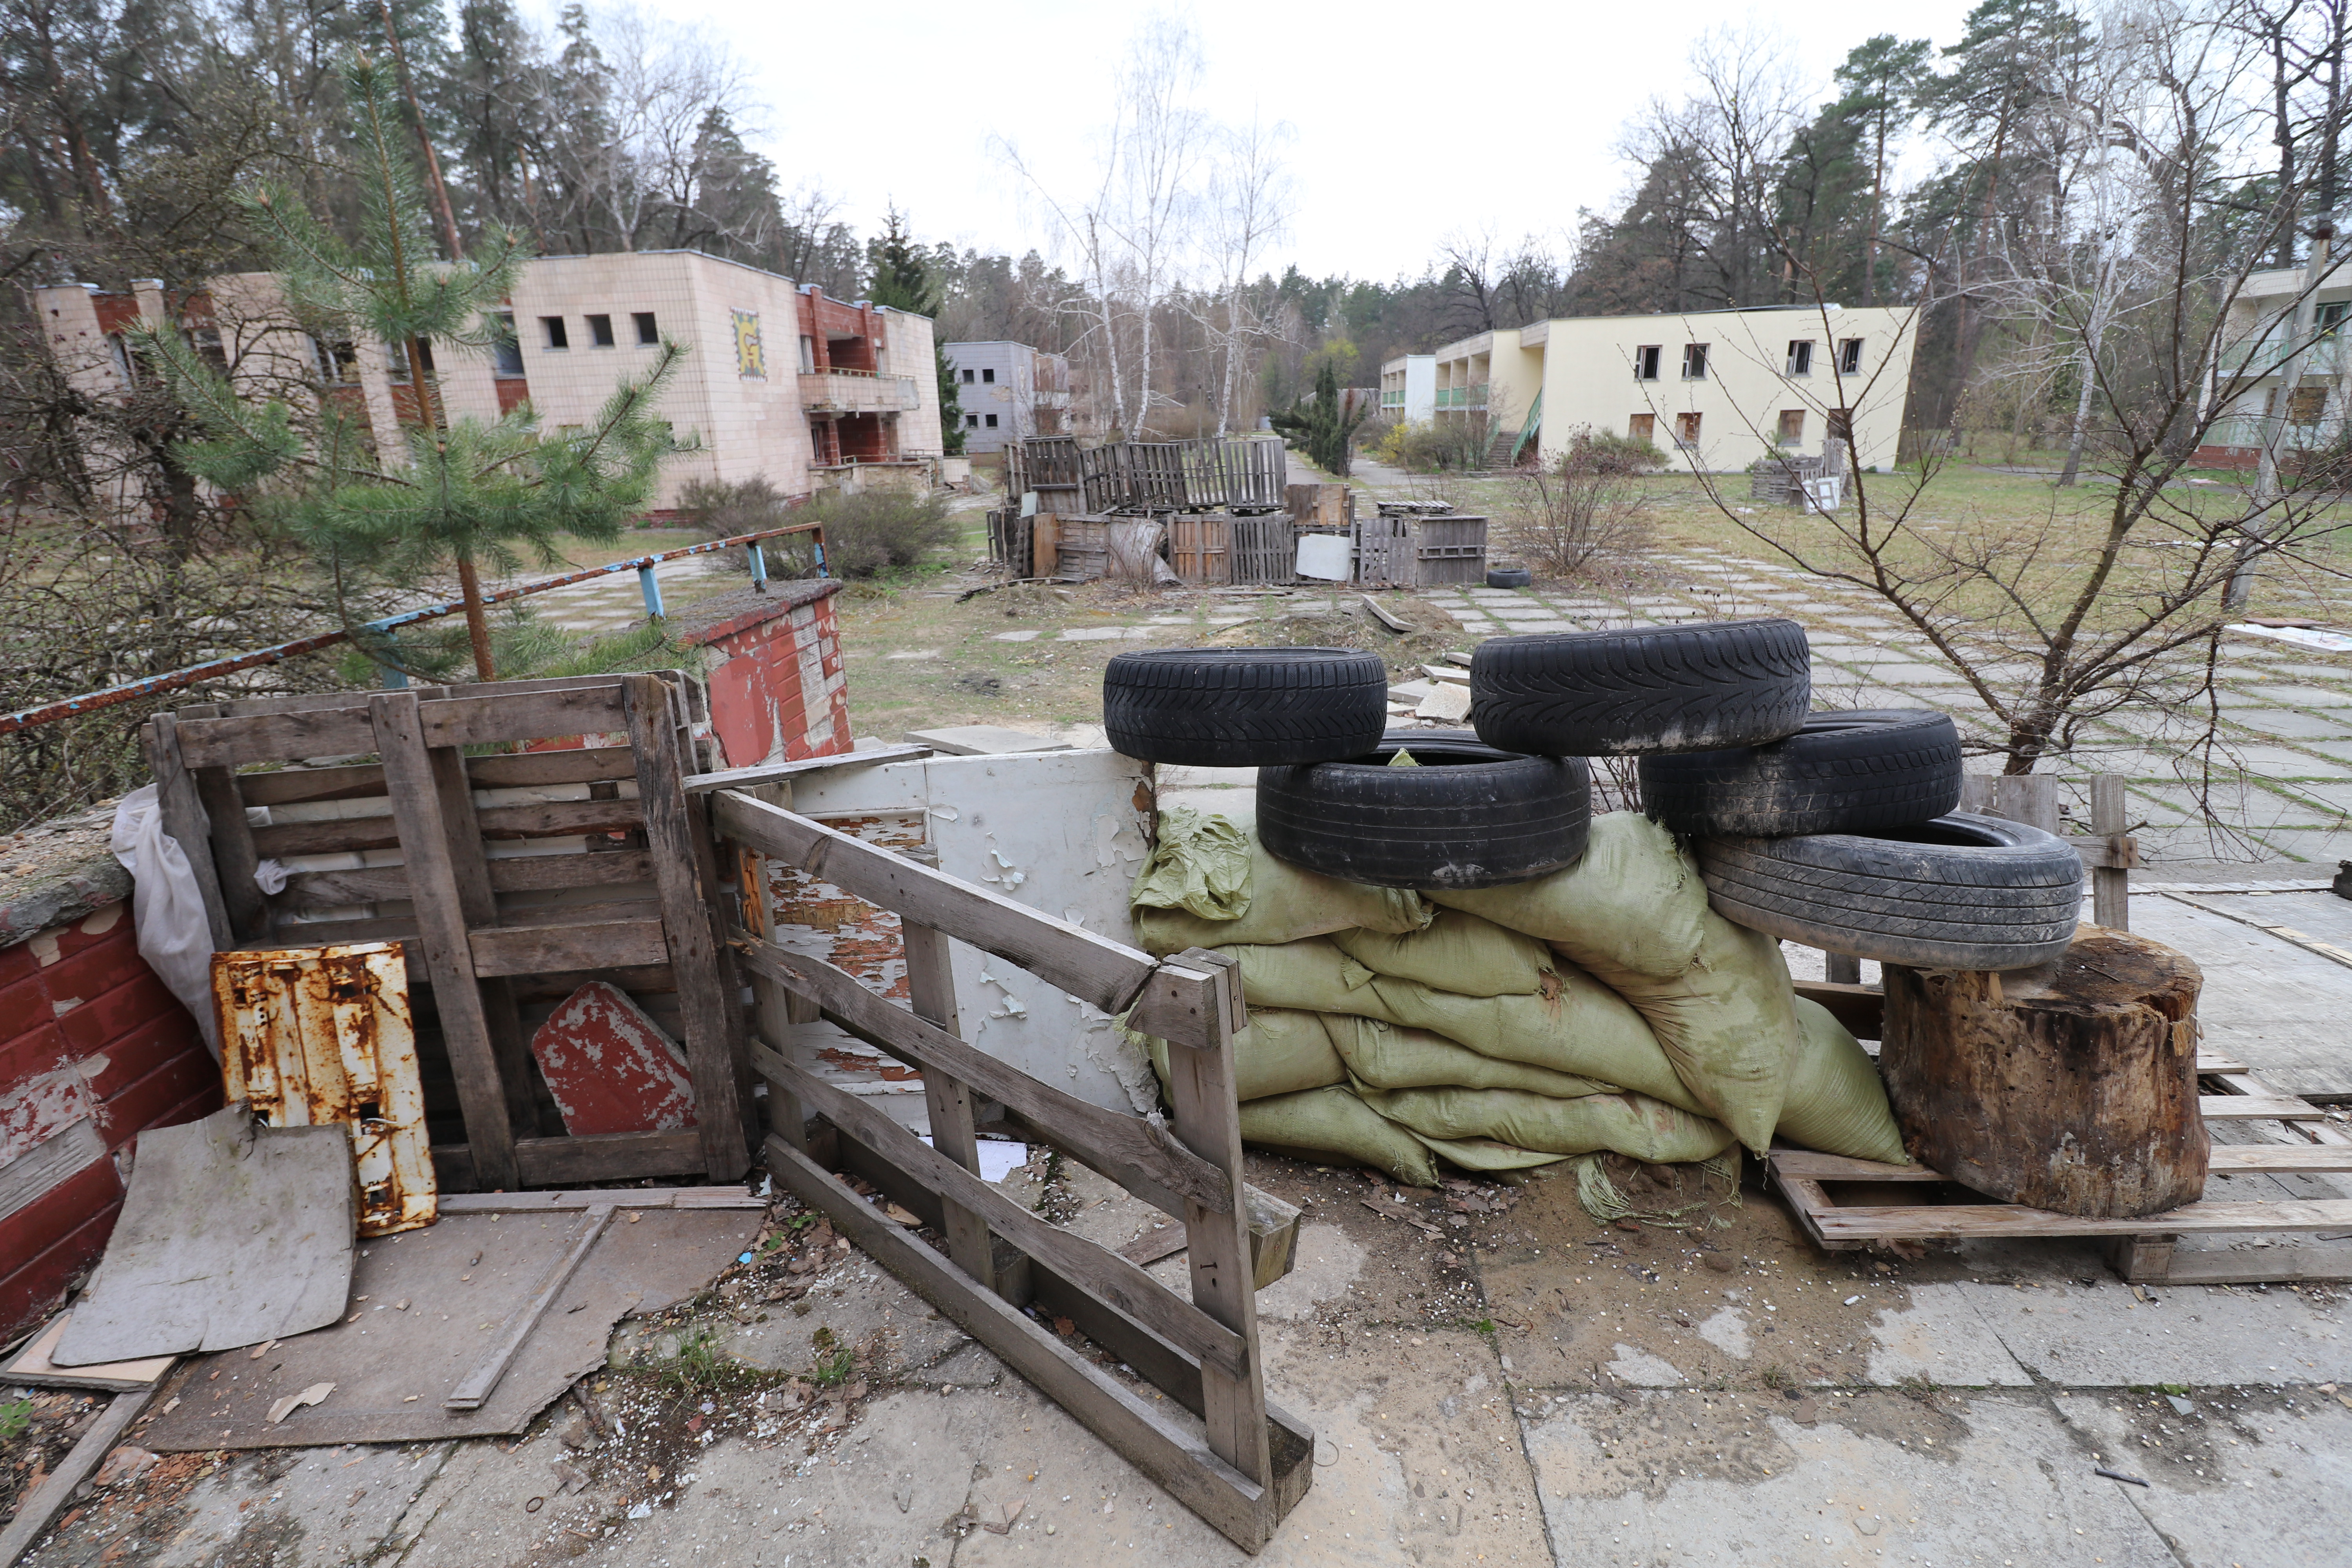
I could get a better view of the rest of the buildings along the main walkway. Someone had built what looked like a barricade in front of the other entrance of the theater building. I guessed it might’ve been for paintball or Airsoft.
This must’ve been a serious game of Airsoft!
Or… maybe it was something more than that. This place is pretty isolated in the middle of the woods. With the war going on in eastern Ukriane, perhaps it was used for military training?
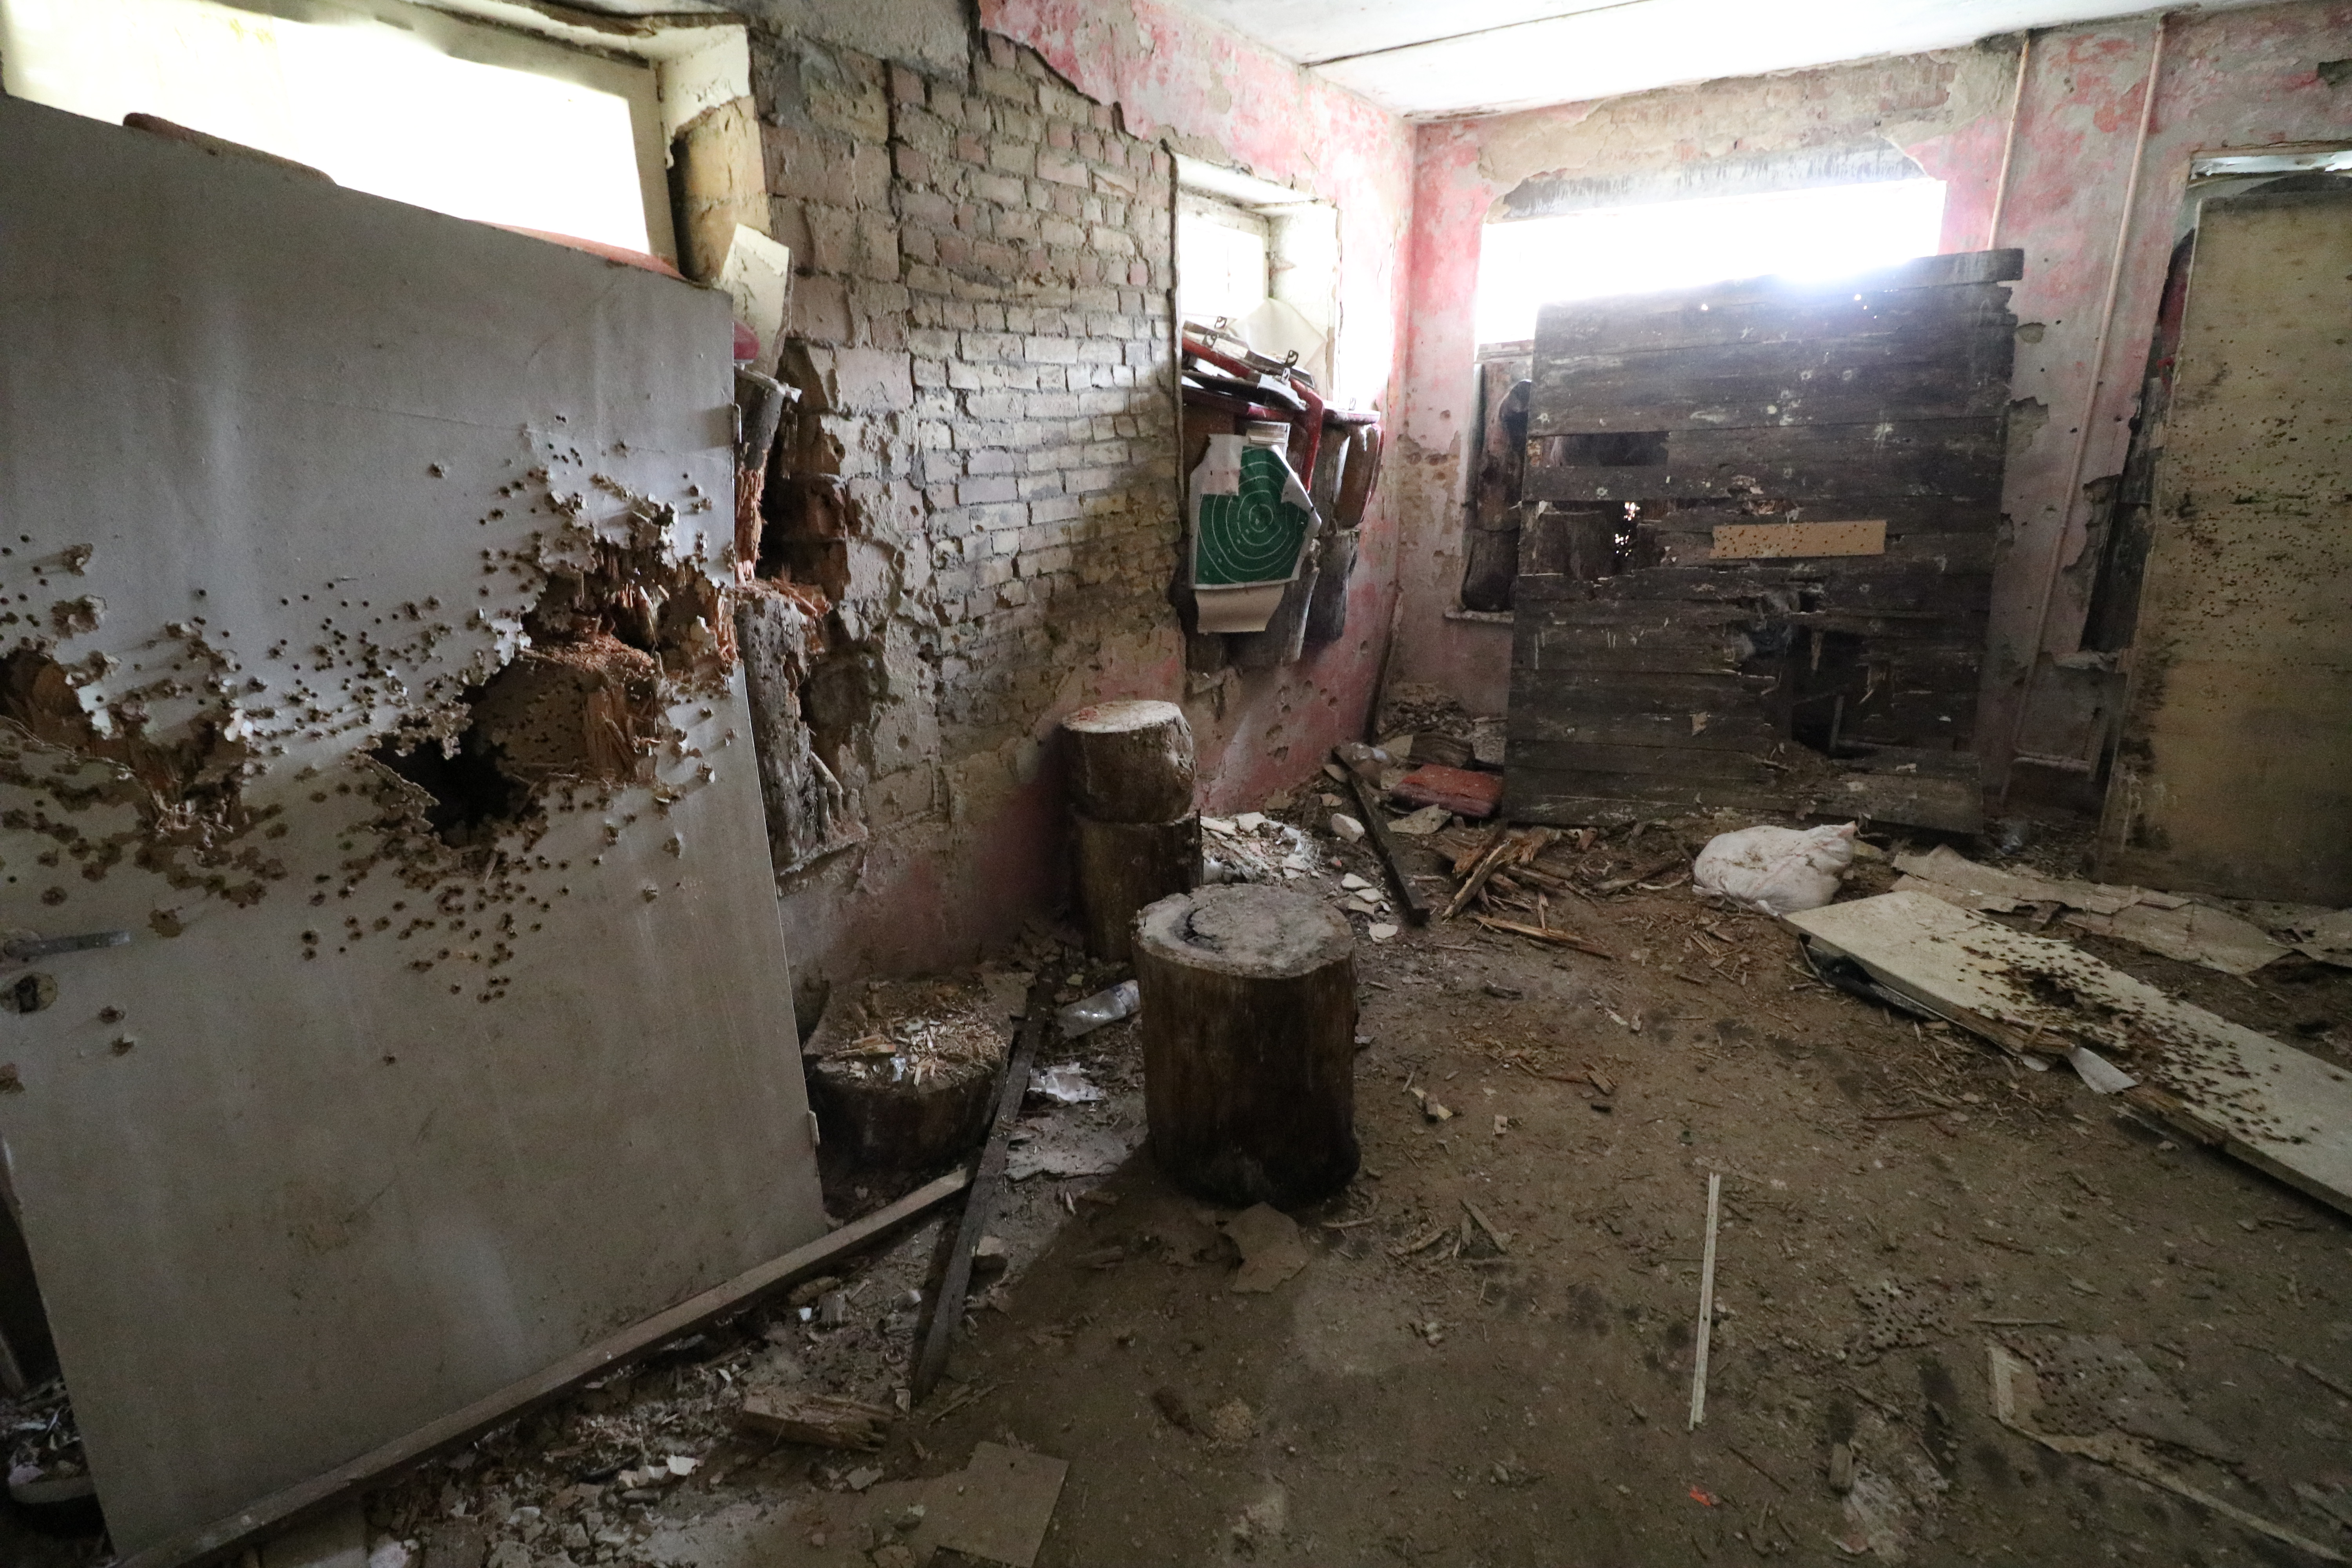
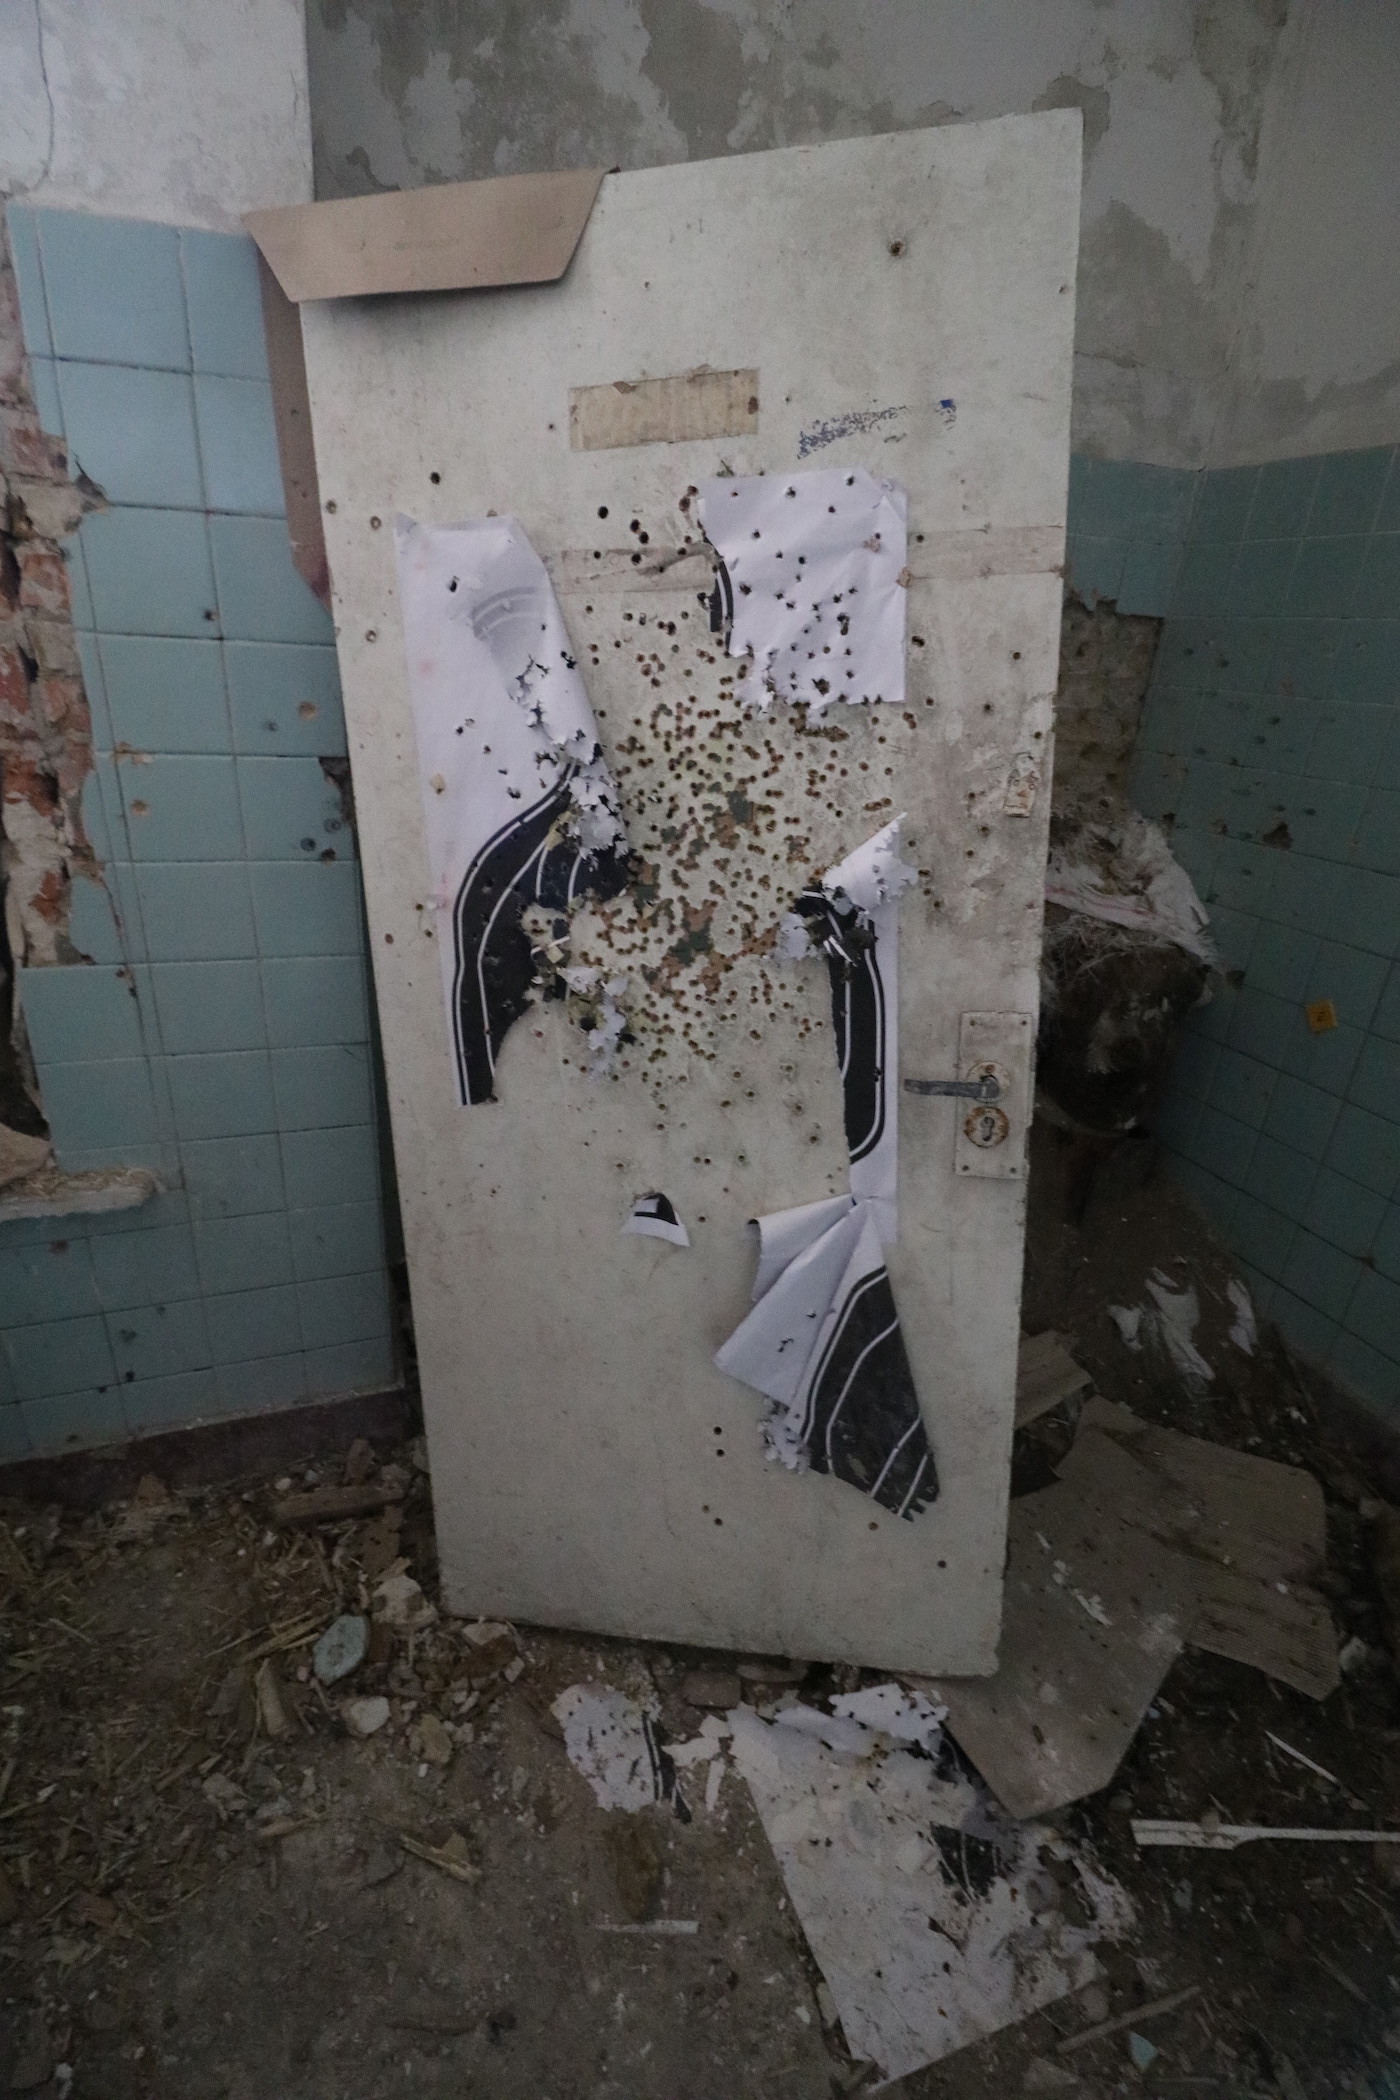
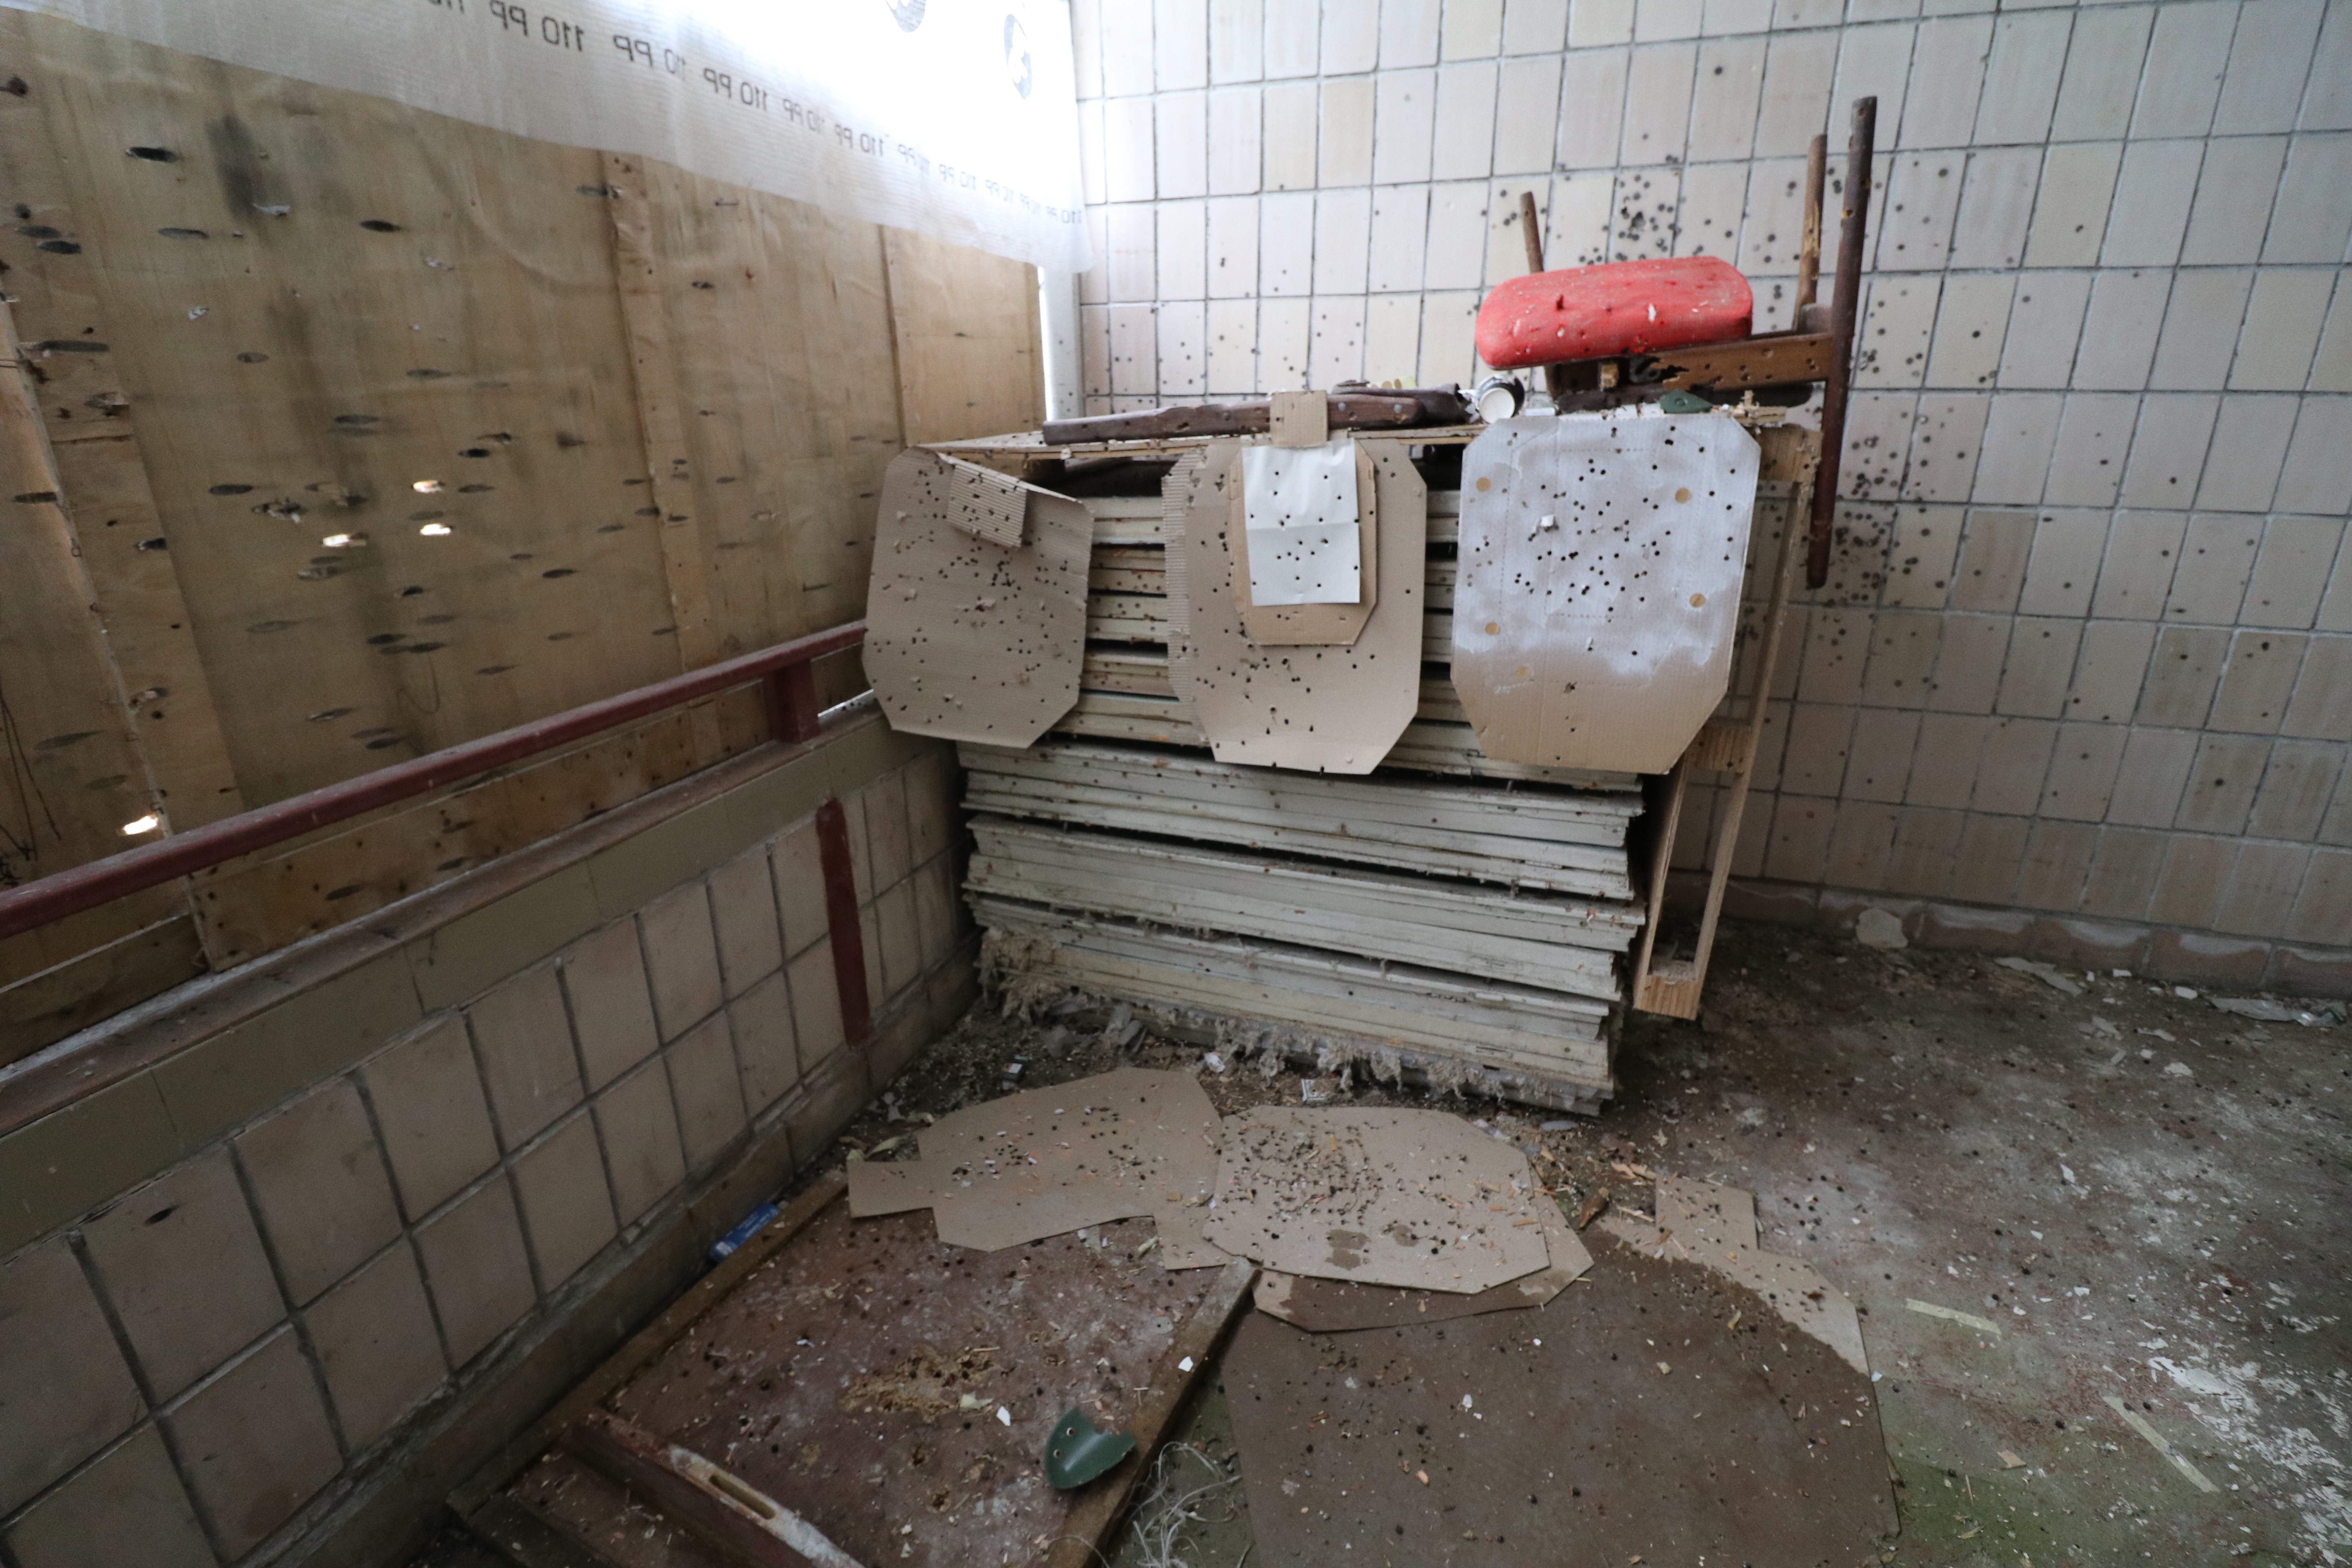
The next room surprised me. There’s no way those holes were from paintball or Airsoft, they must’ve been from real guns.
That spooked me. I was solo exploring this time, and although my Russian is ok, most people can tell after a few sentences I’m not a native speaker. If I ran into a military guard here, they might have some questions. It seemed unlikely, but I was prepared to be as friendly and honest as possible.
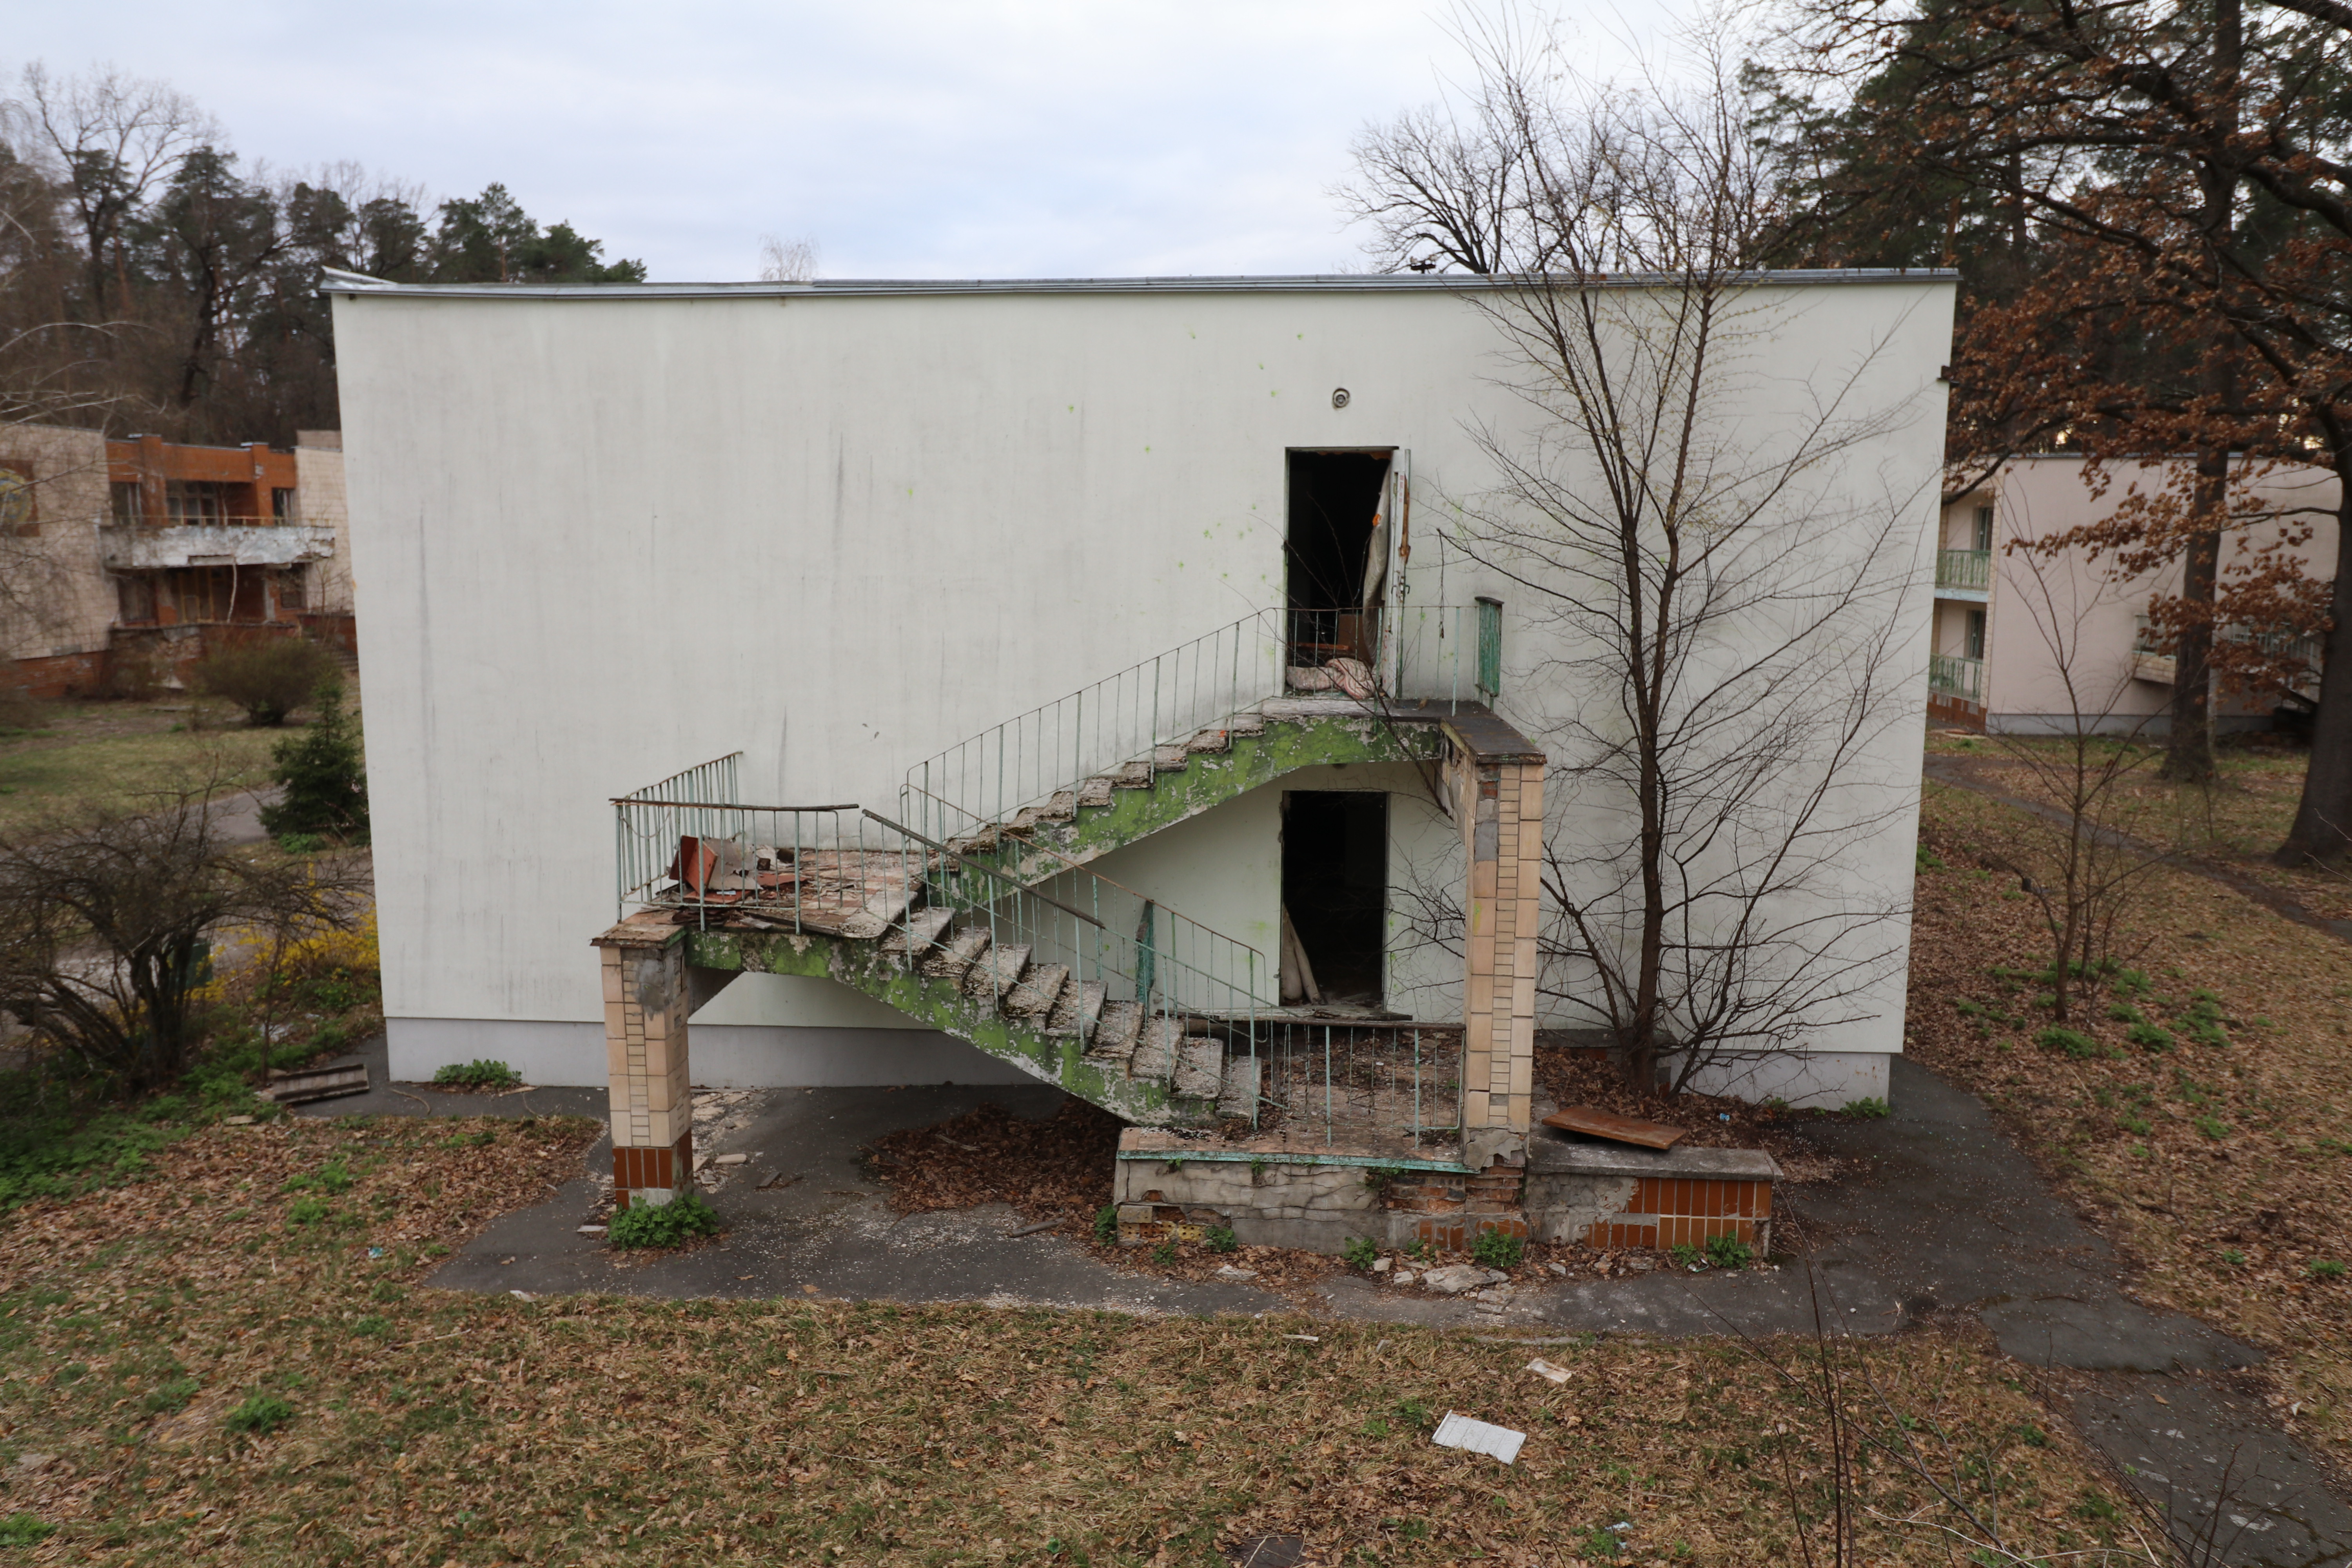
On the backside of this building, I could see a newer building a couple hundred meters away. There was a real possibility I was visible, so I went in the opposite direction, cautiously.
I snapped another shot of the other entrance of the theater building before noticing some stairs, so I went up to the second floor.
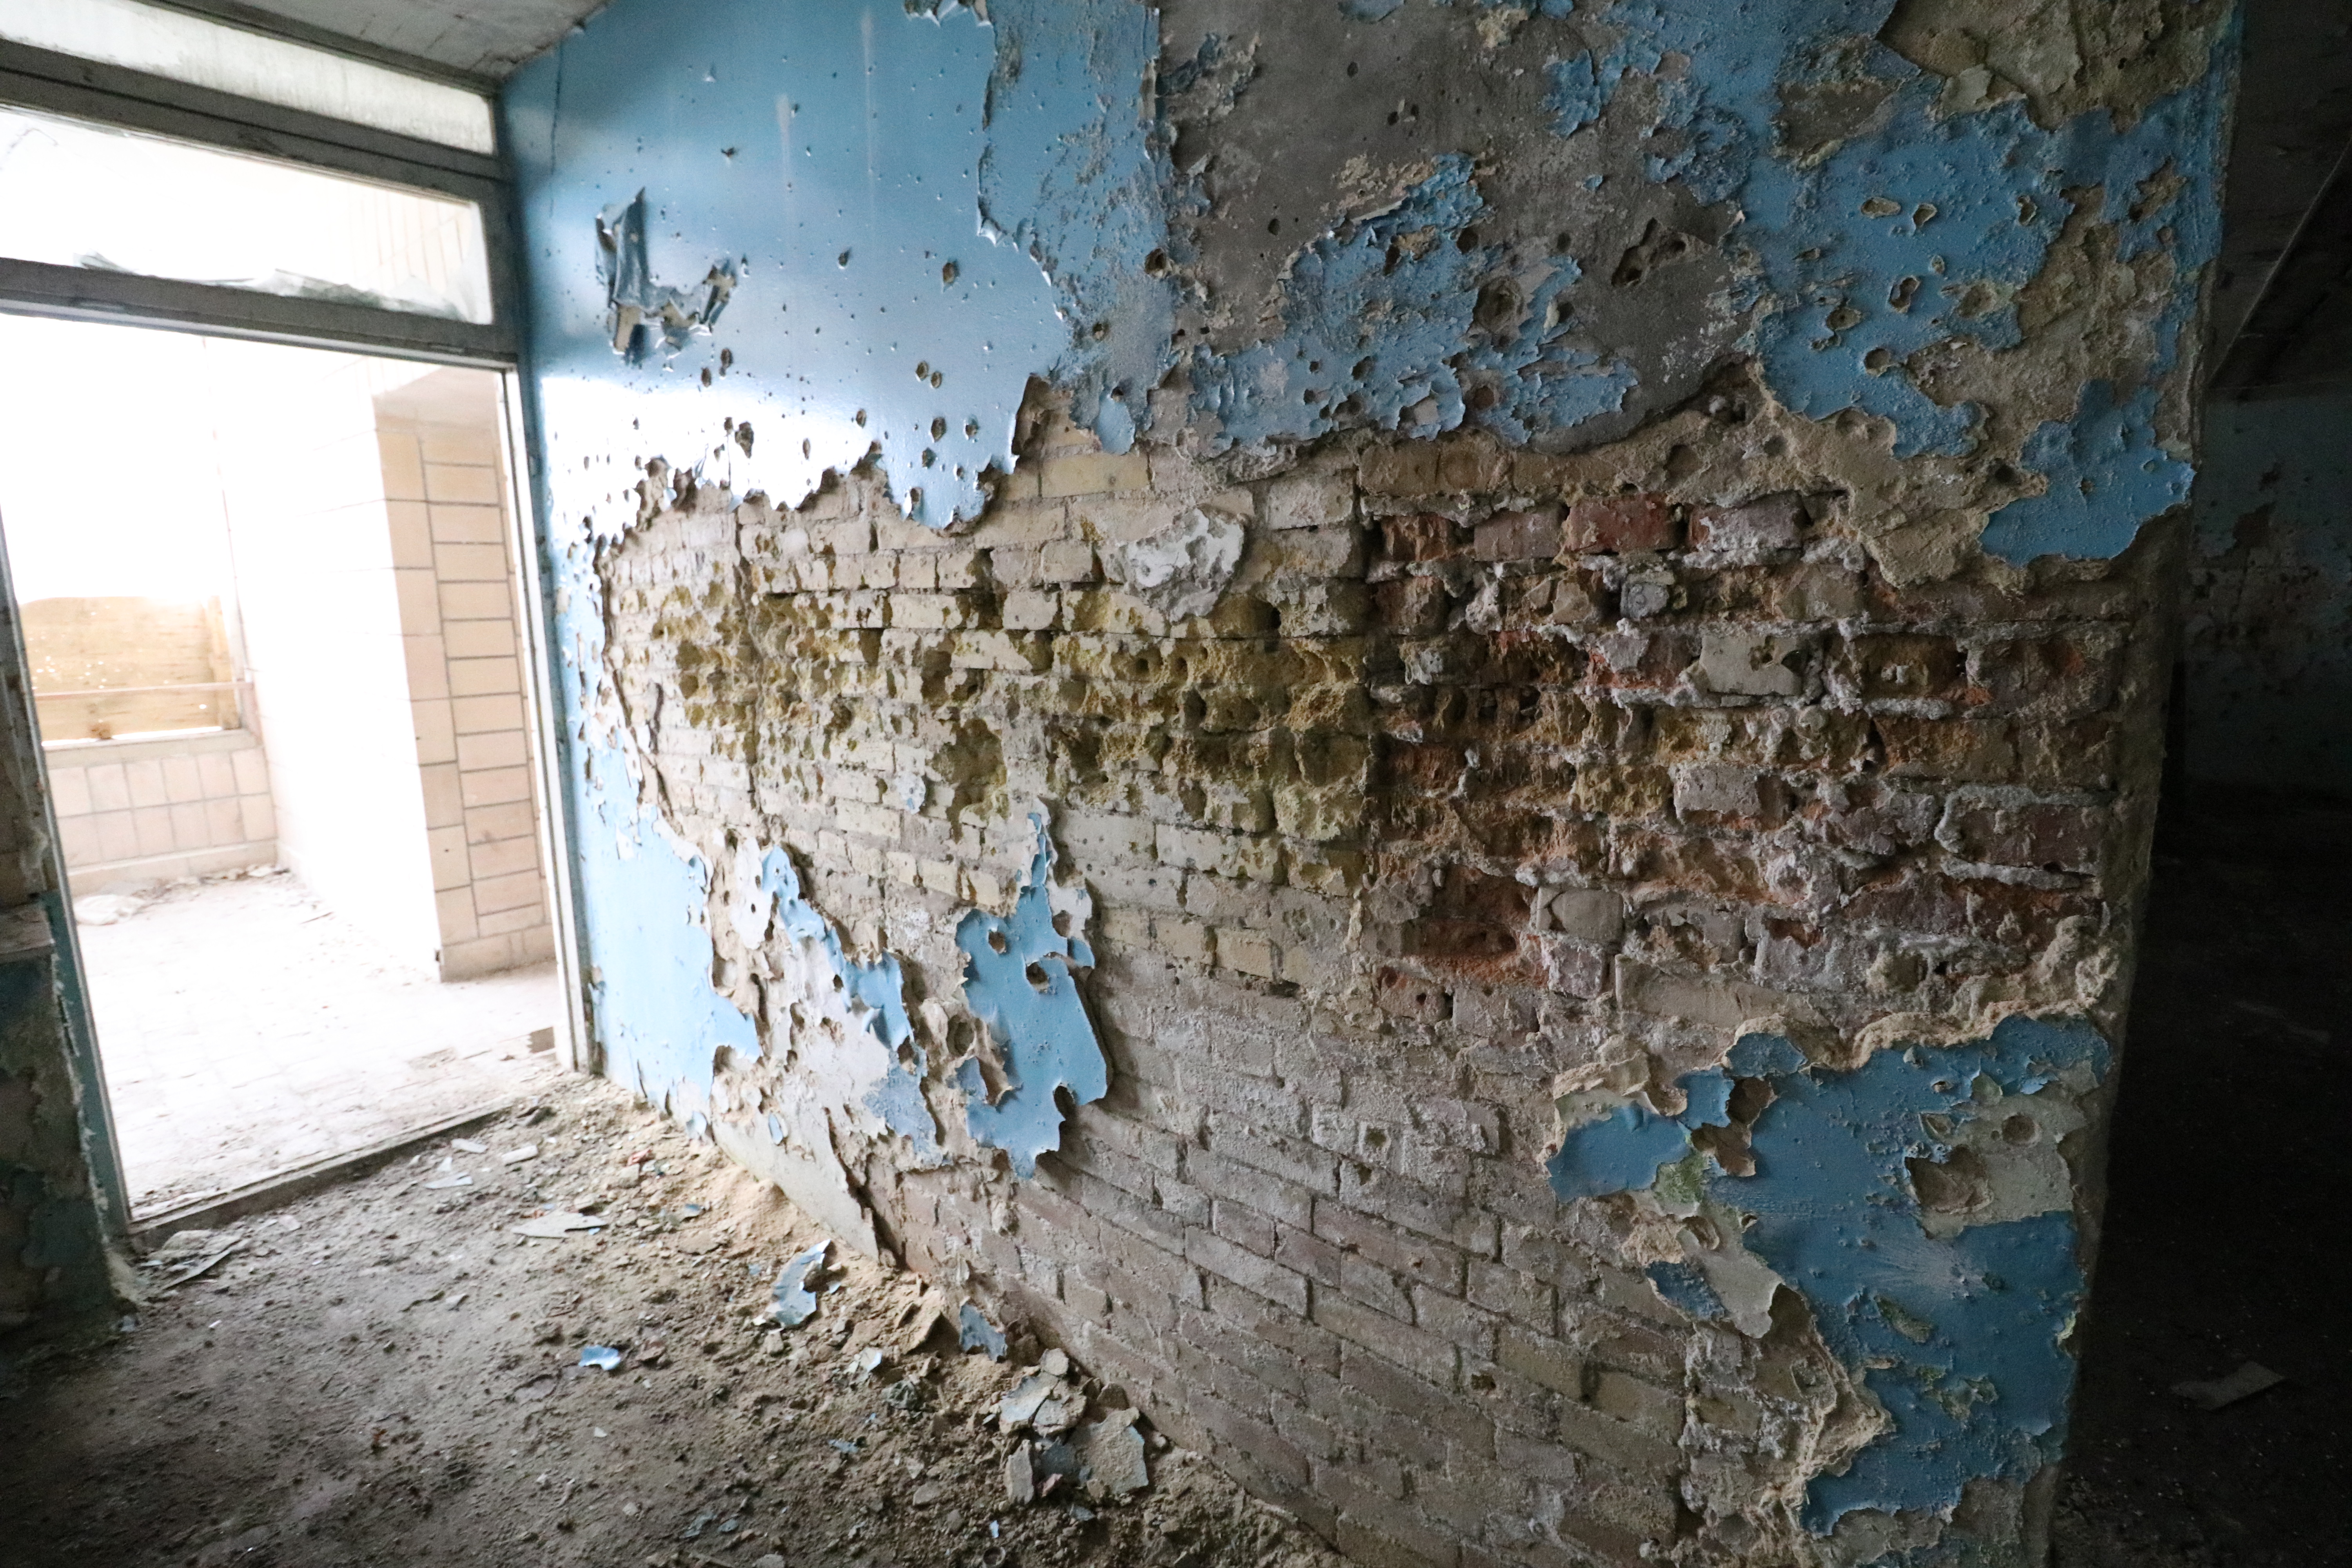
The blue wall caught my attention. It reminded me of one of my visits to the war zone in eastern Ukraine.
During the Euromaidan revolution, many people disappeared. I’d be curious to know when these bullet holes appeared, but there isn’t much info about this place on the internet.
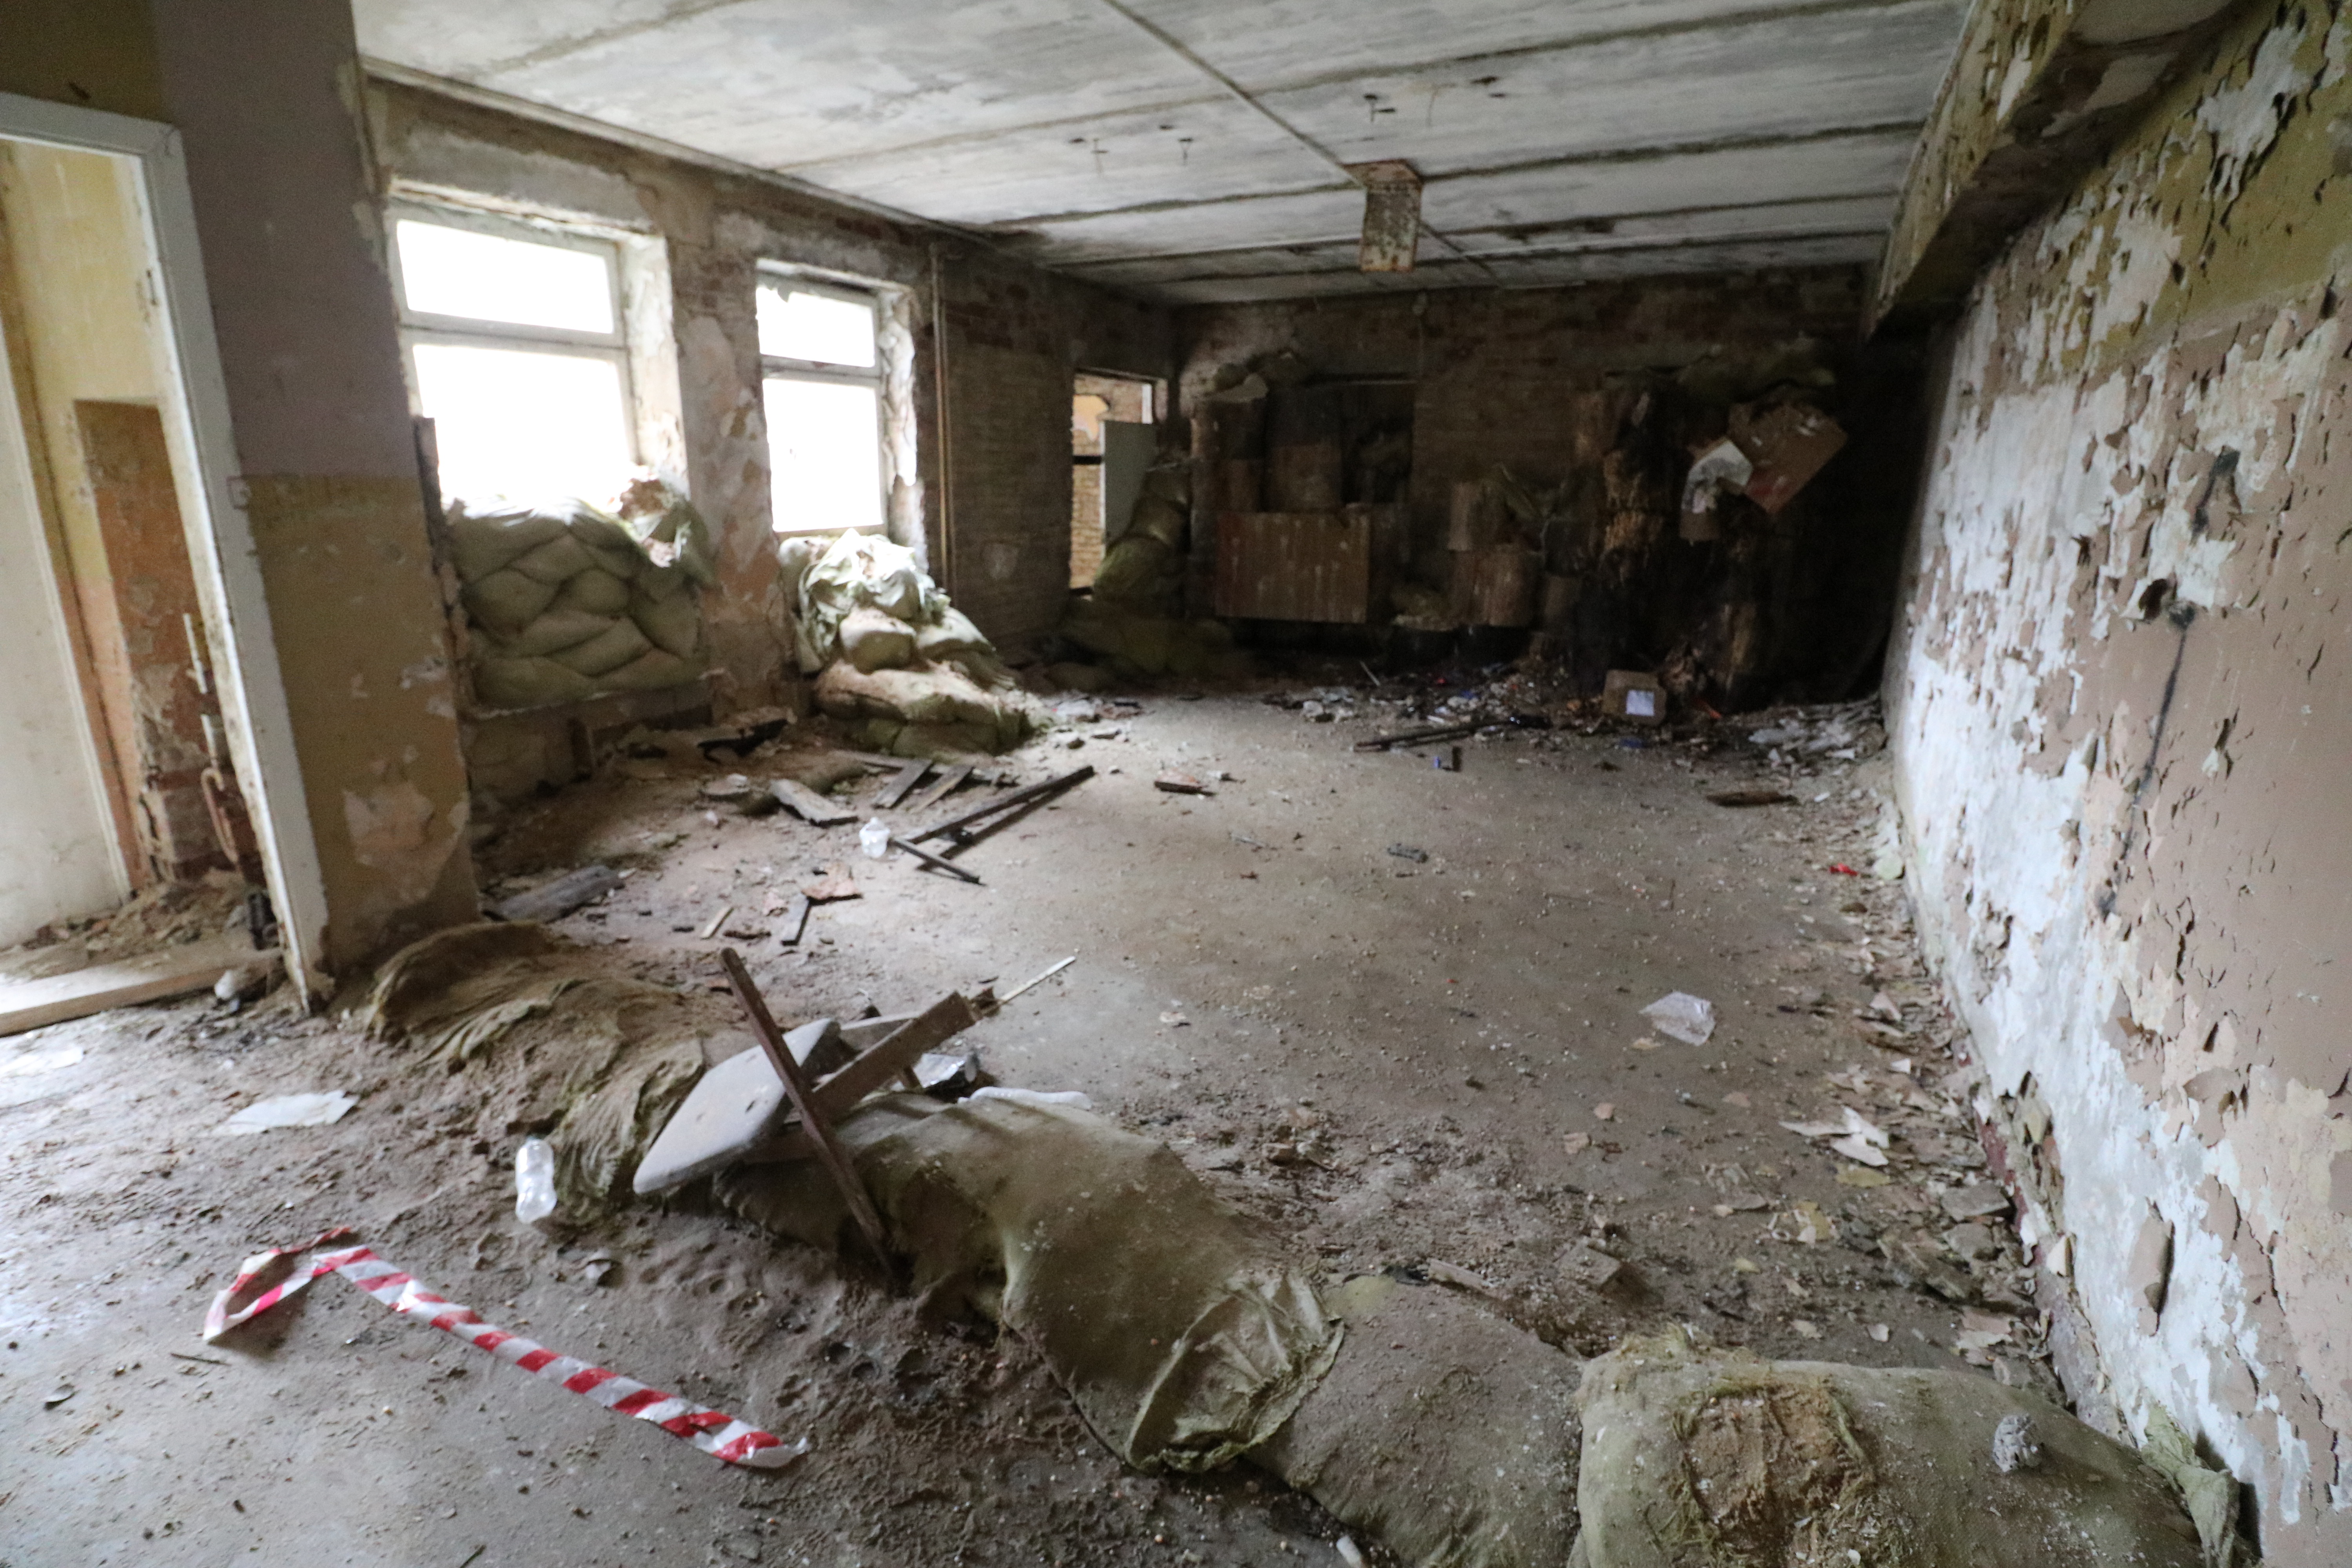
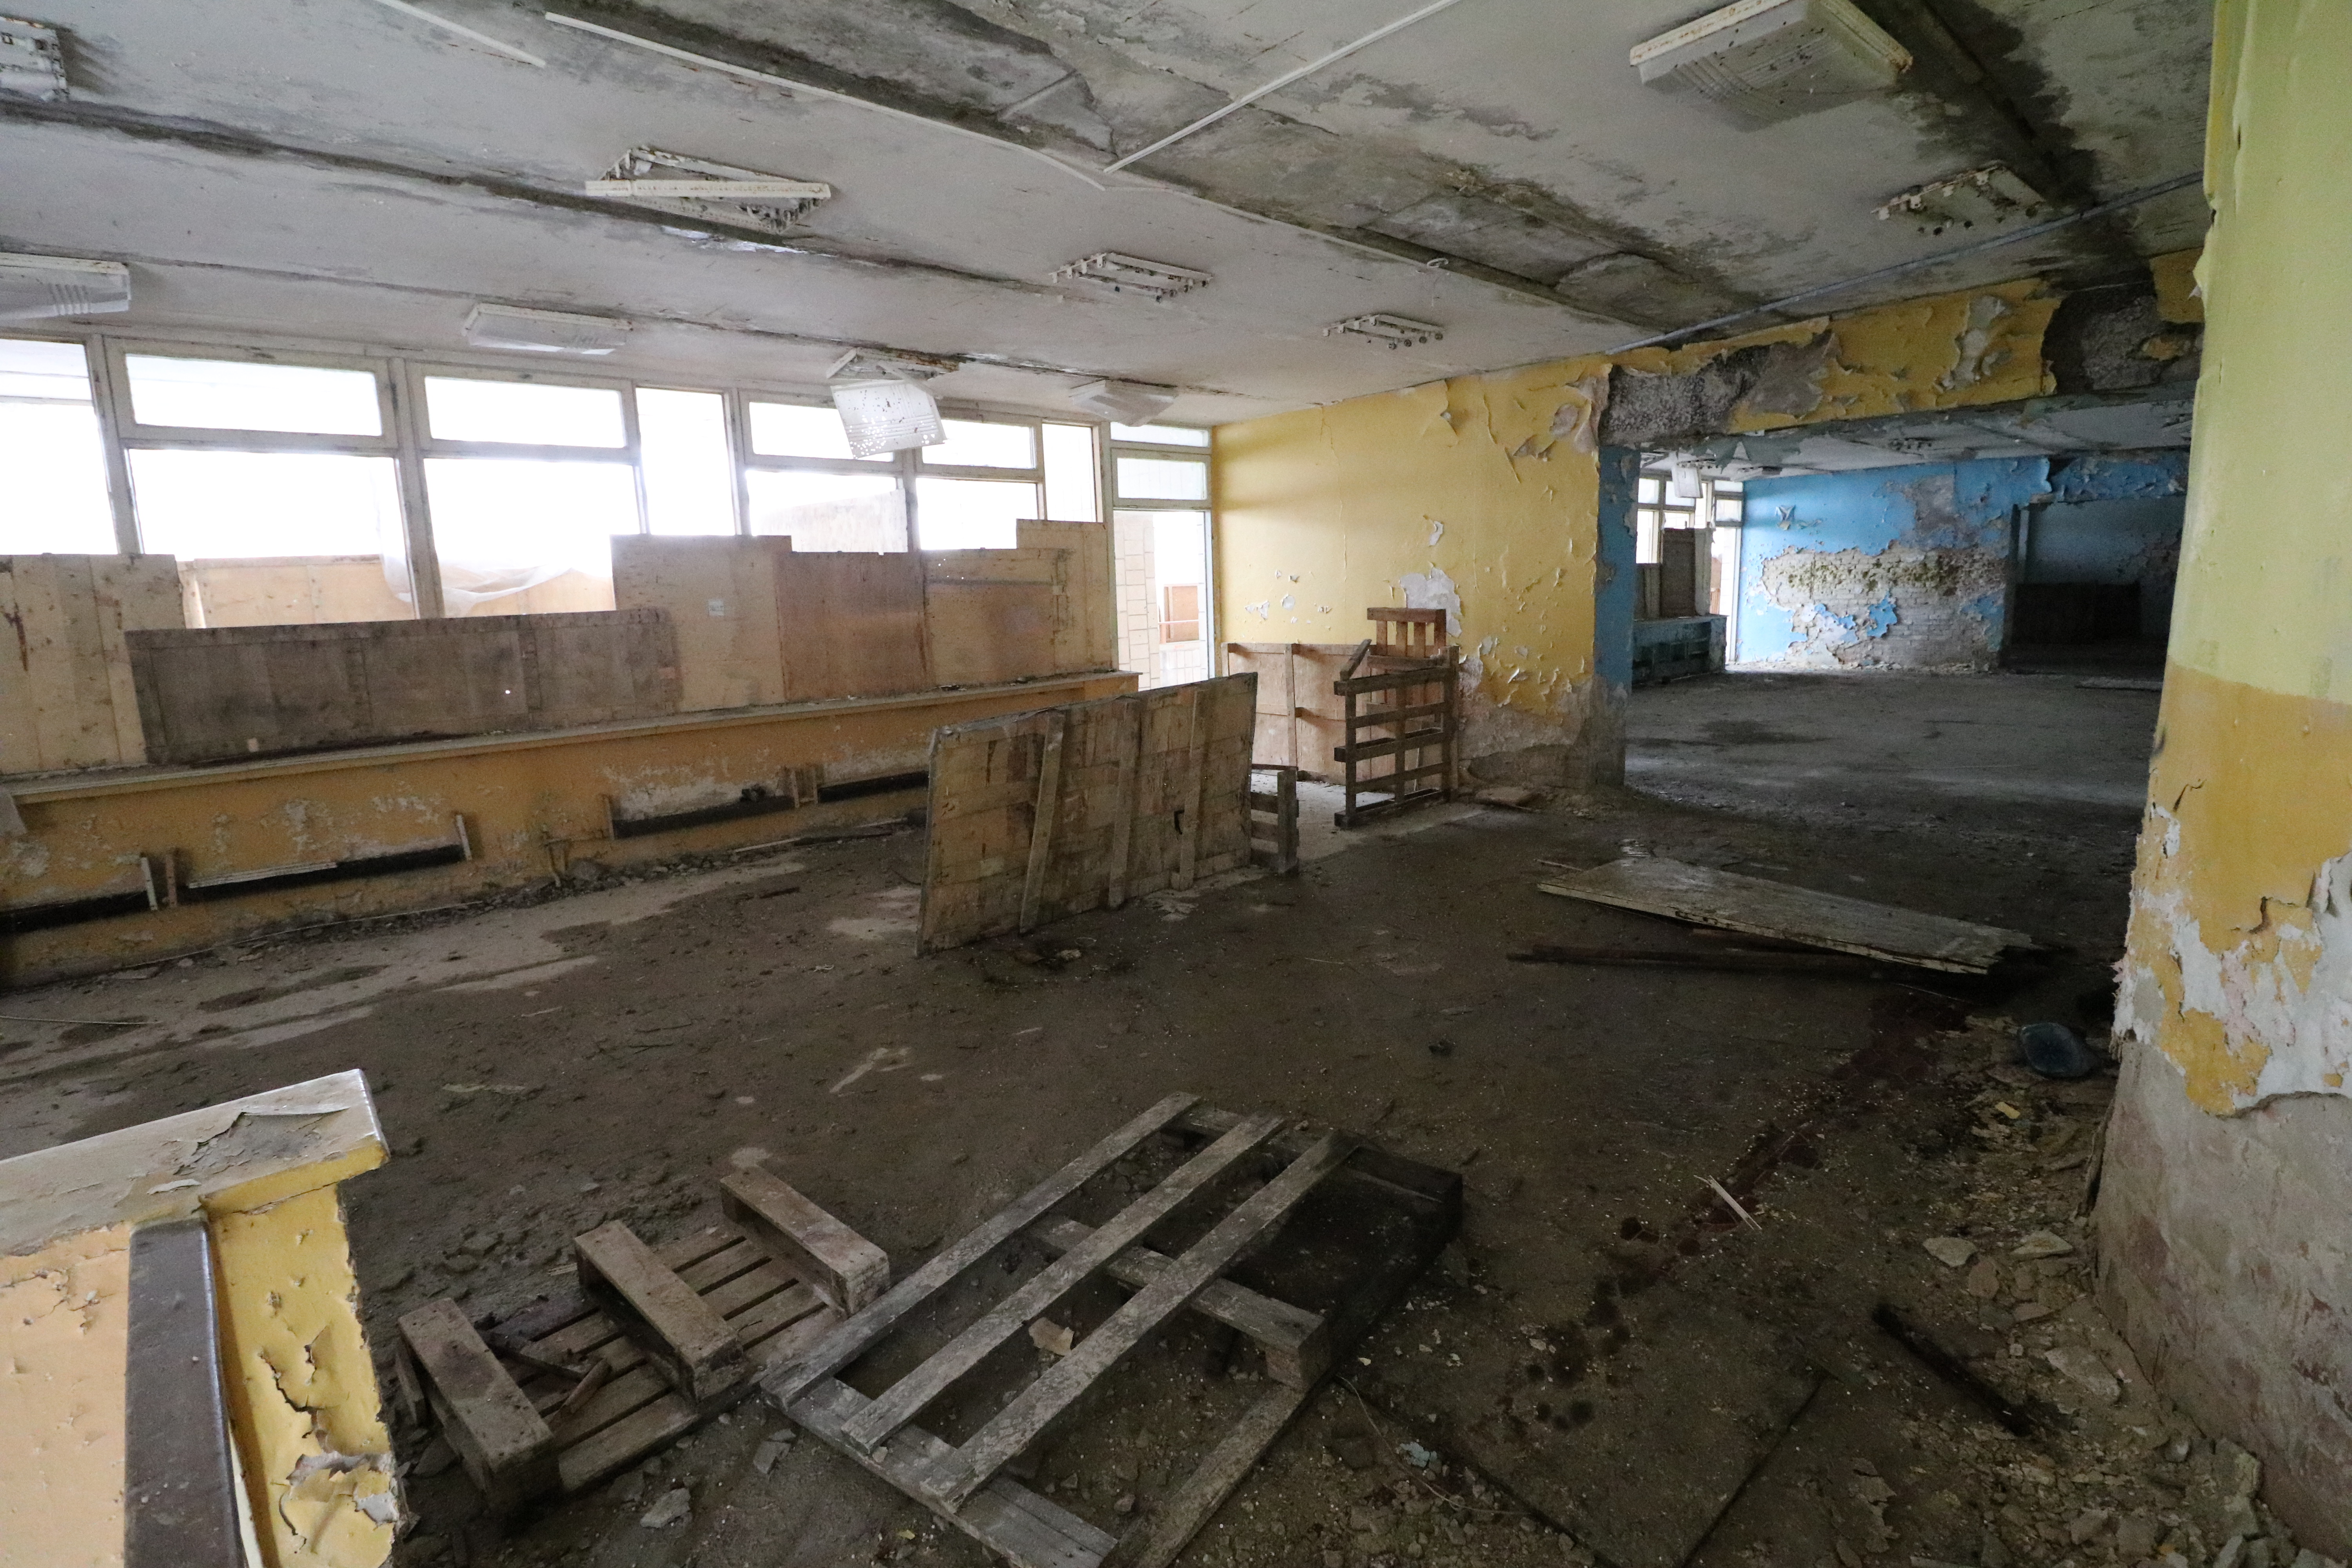
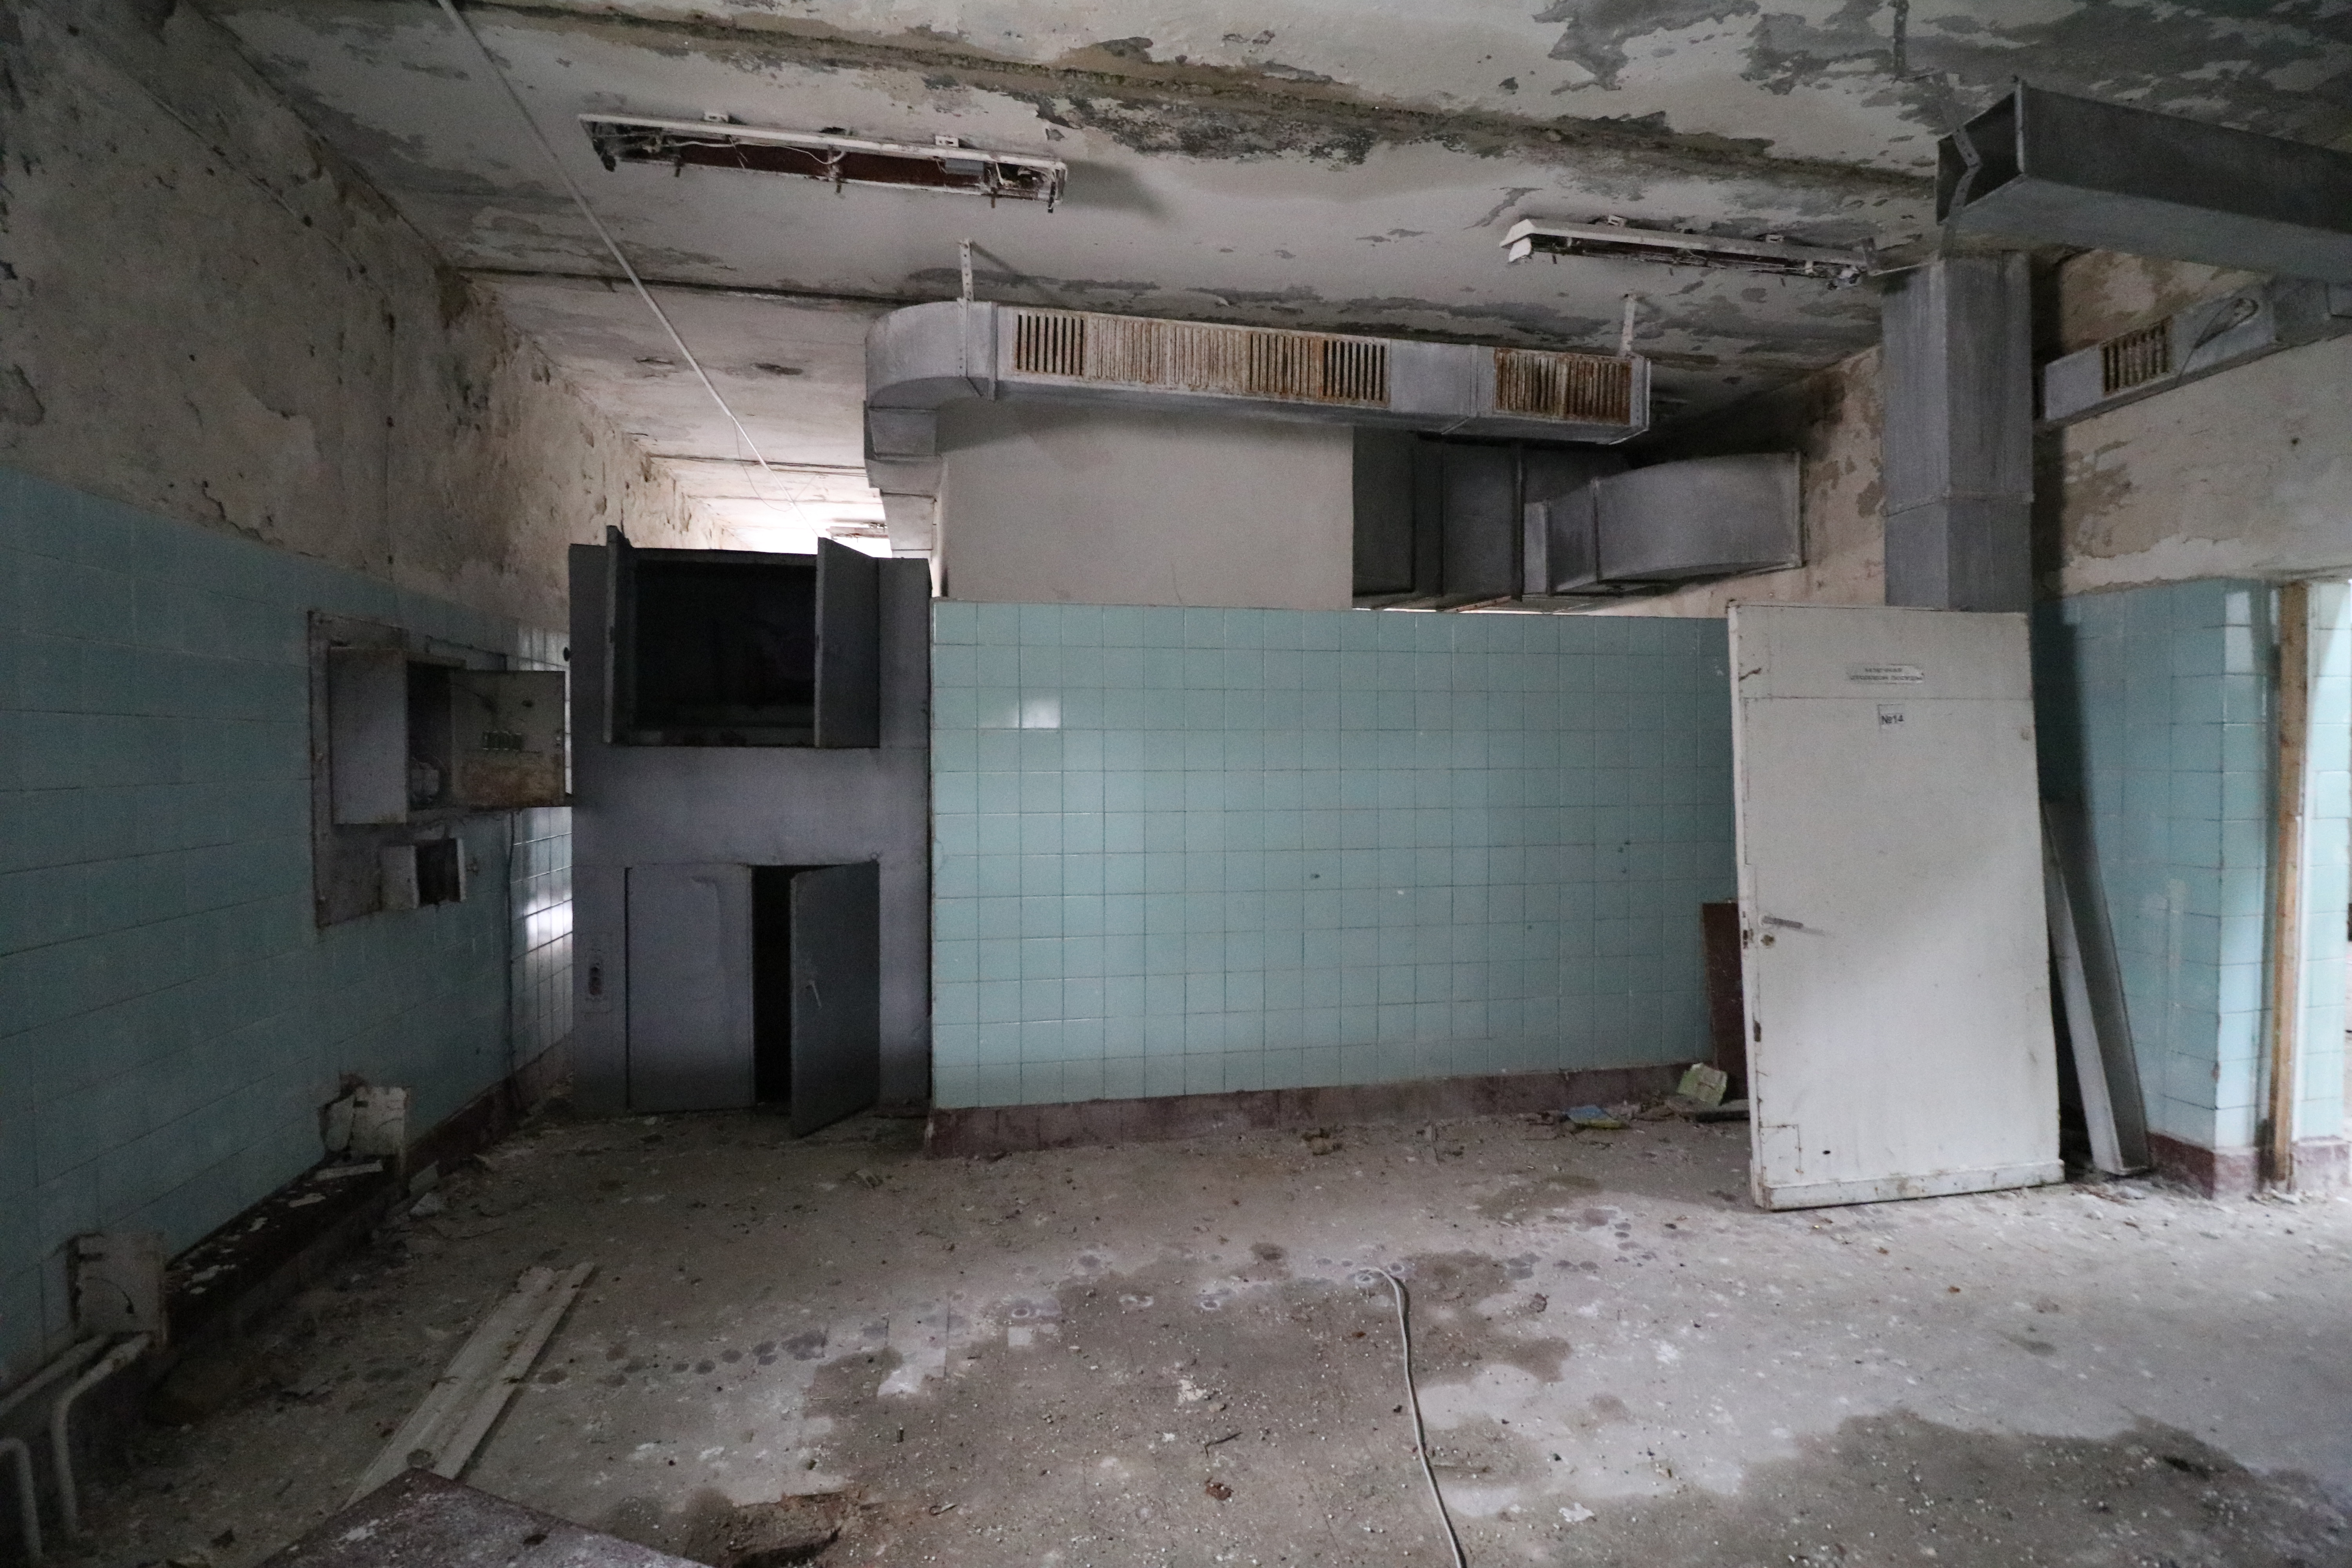
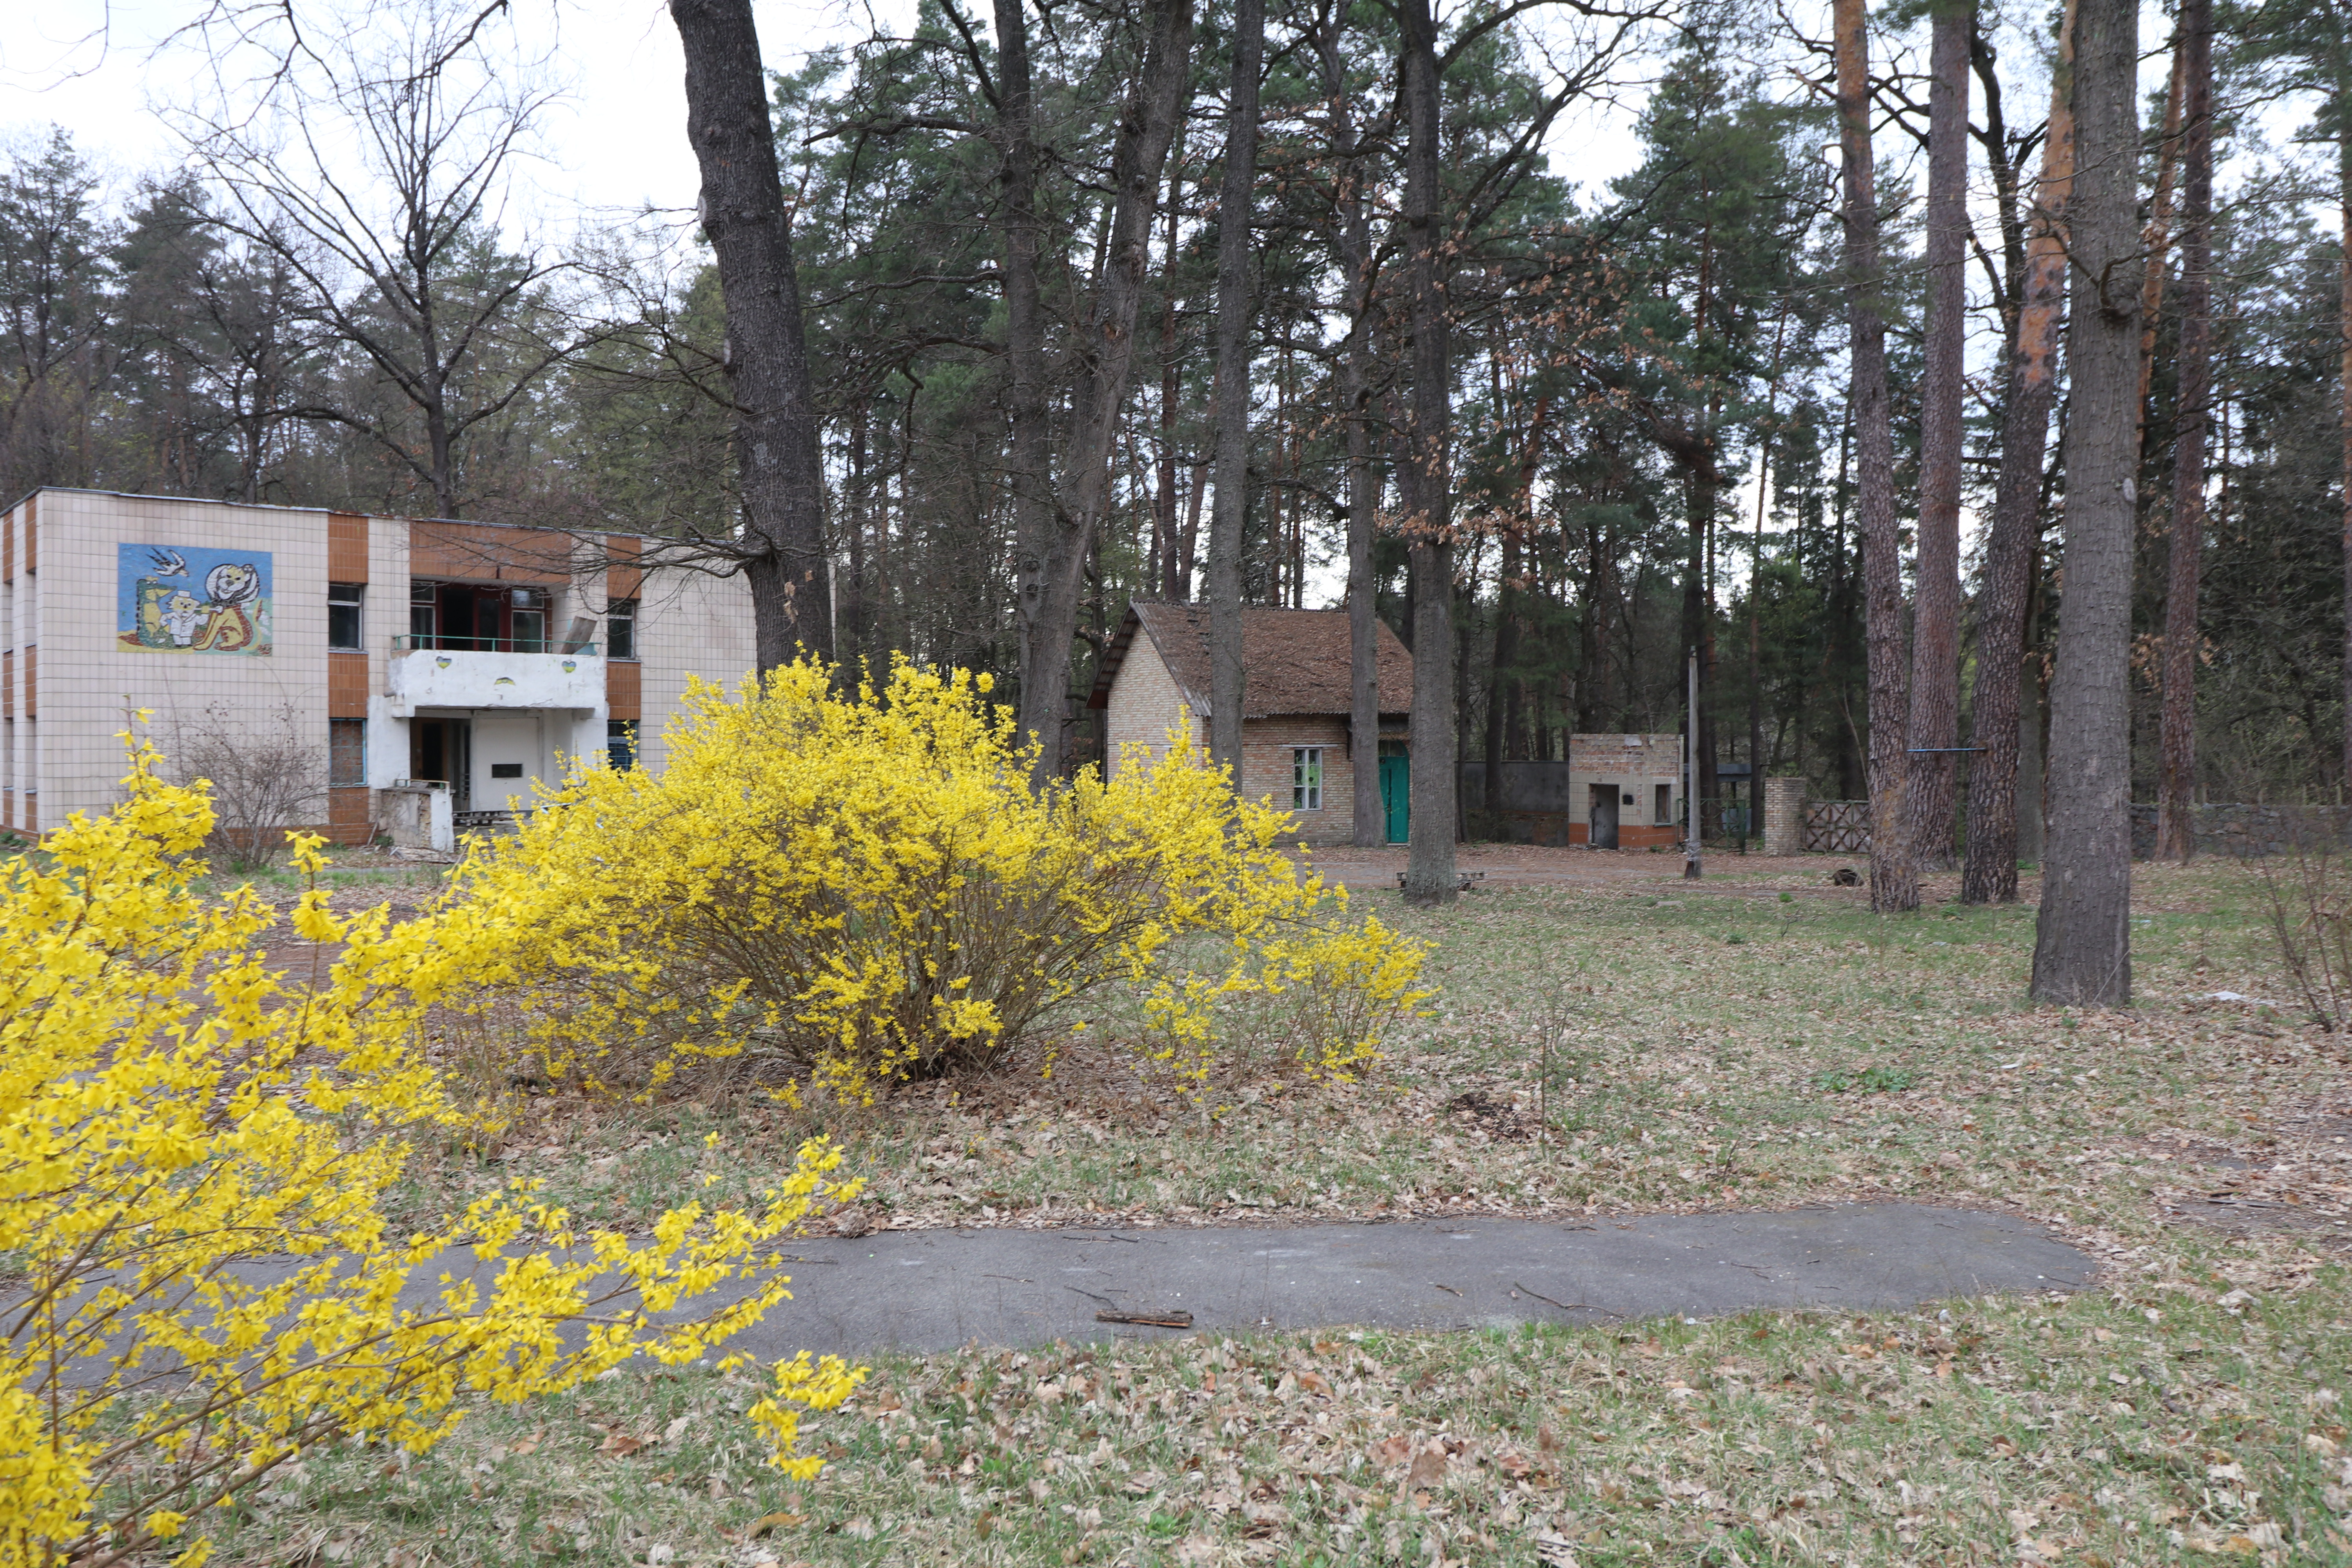
The second floor of this building had what looks like a kitchen. This is pretty standard for Soviet camps. I’ve been to many across the country, and they all have a pretty similar layout. It could’ve been a sanatarium, or a Pioneer Camp.
I was surprised to see so much metal still in place. Scrap metal is usually quickly stolen, along with anything else of possible value. It could be that not many people know about this place, or perhaps it’s guarded and I haven’t been caught yet.
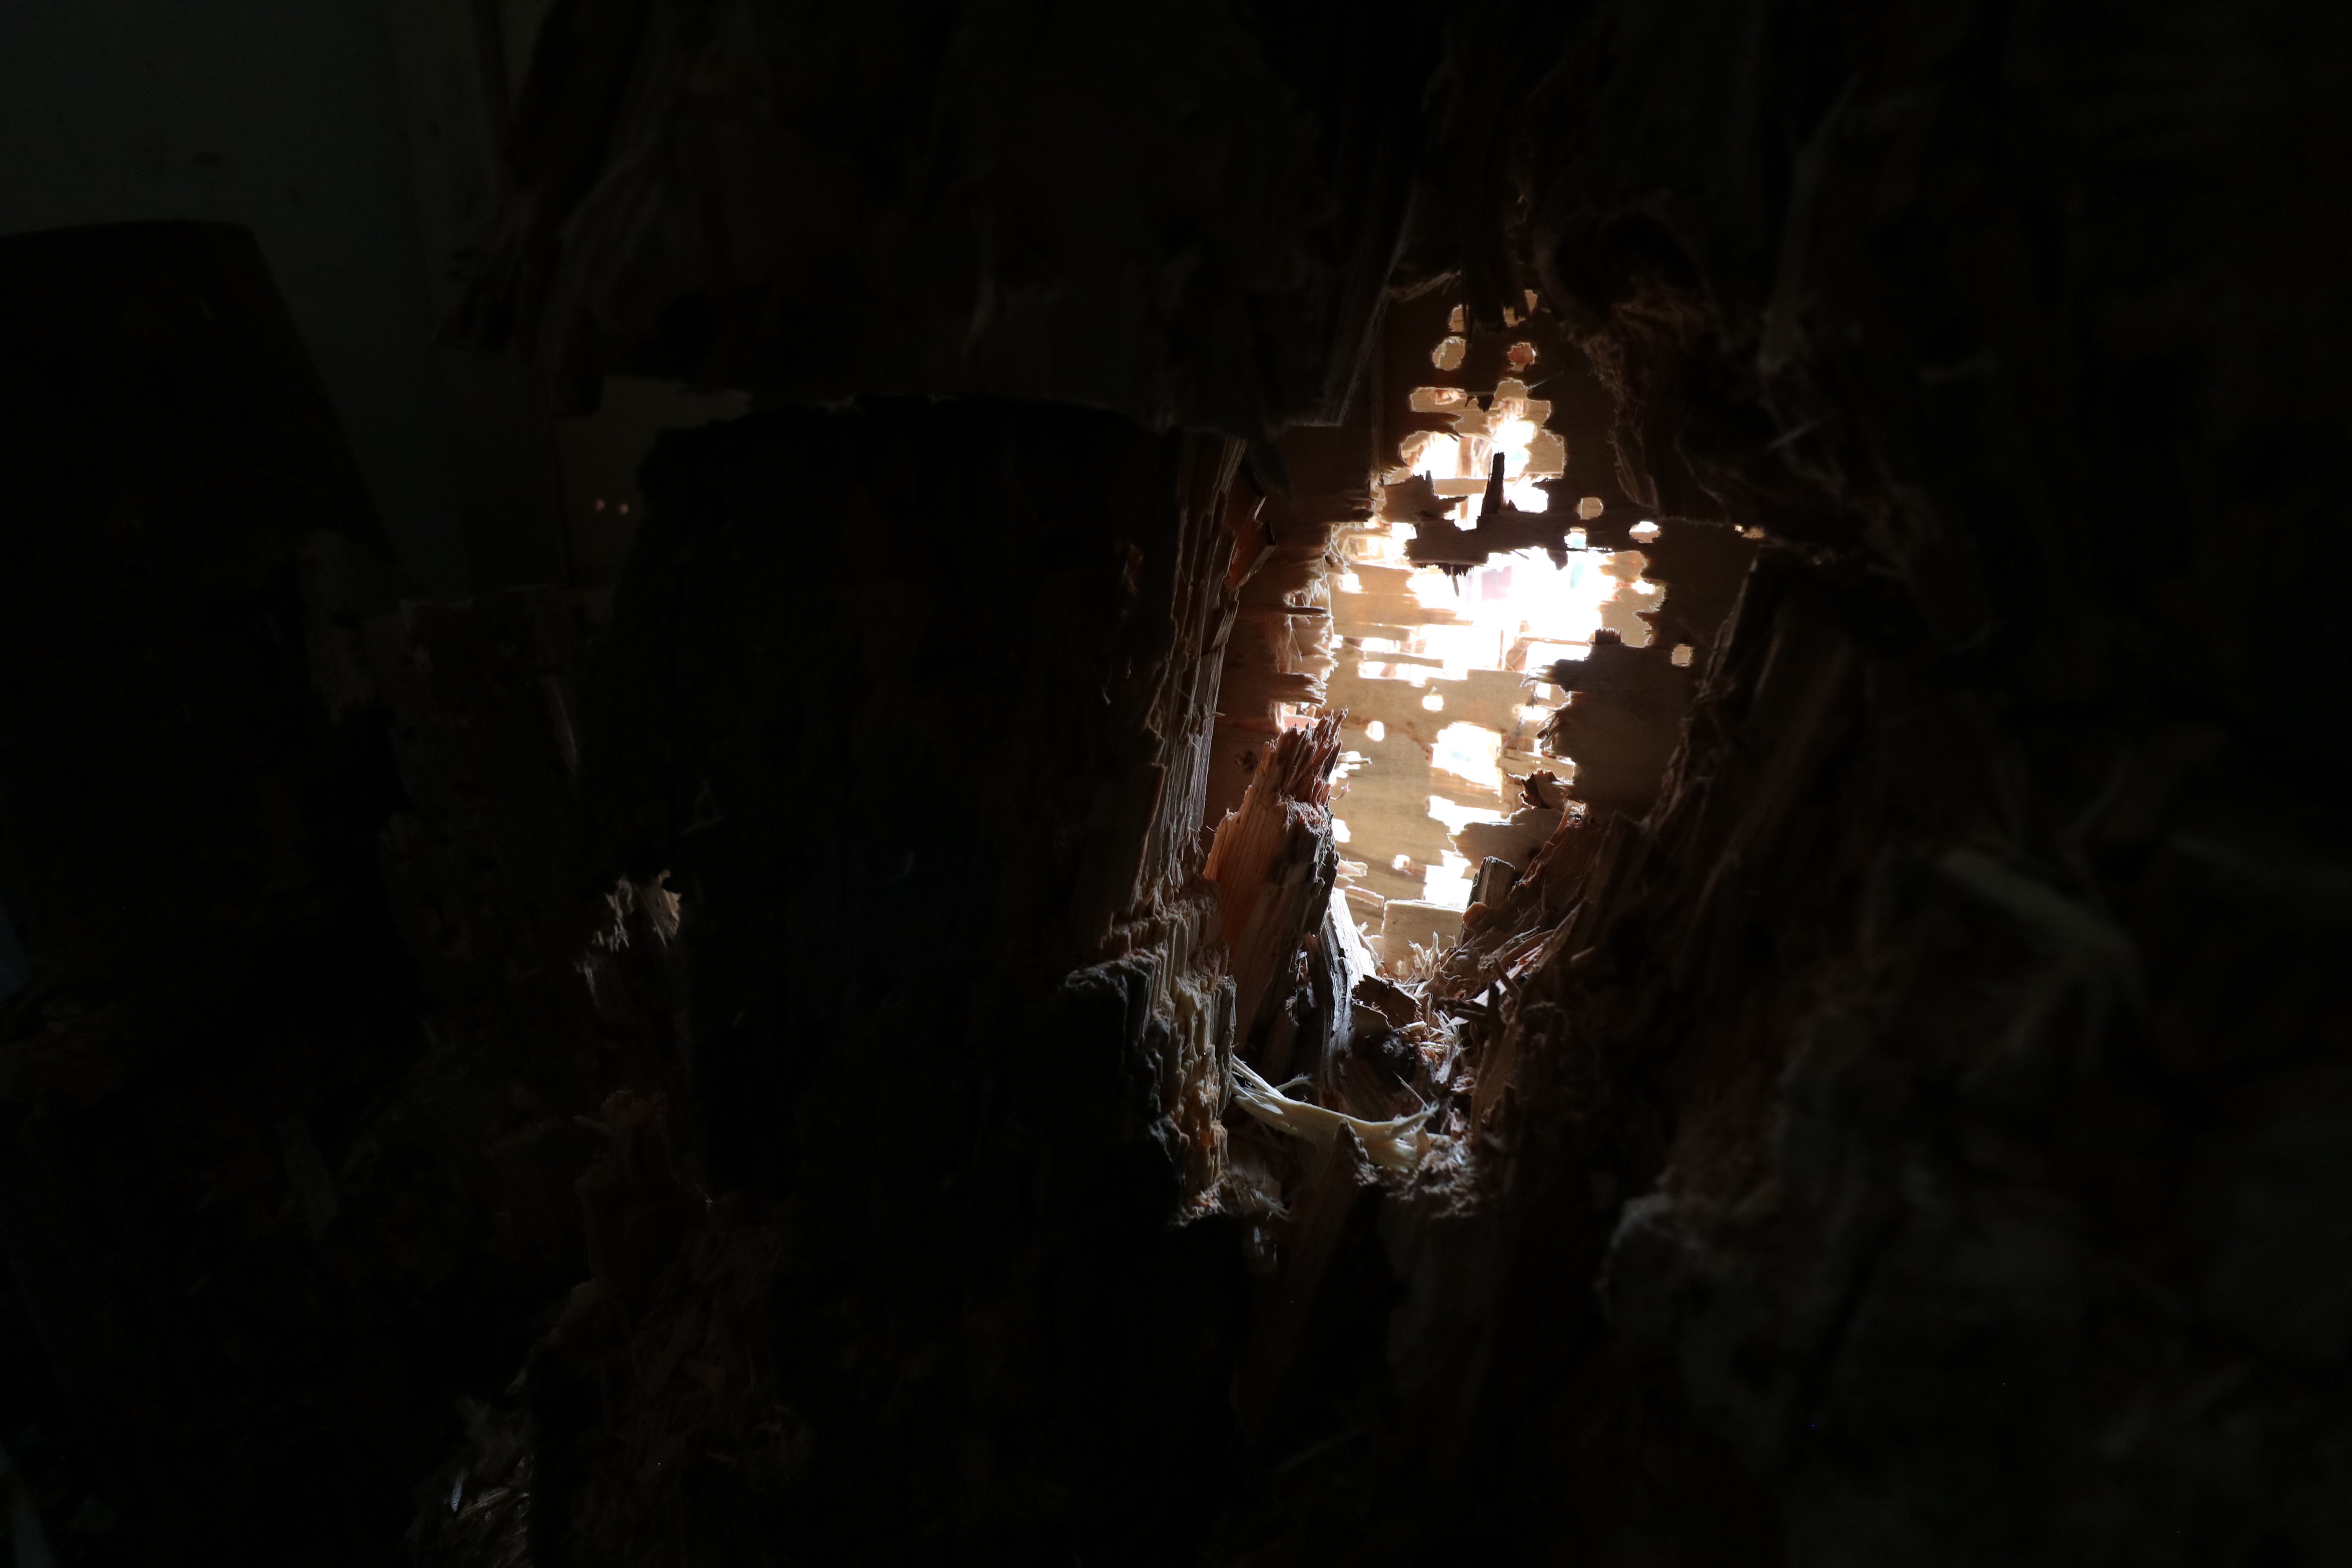
The massive hole at head-hight here caught my attention. Or I could be over-extrapolating 🙂
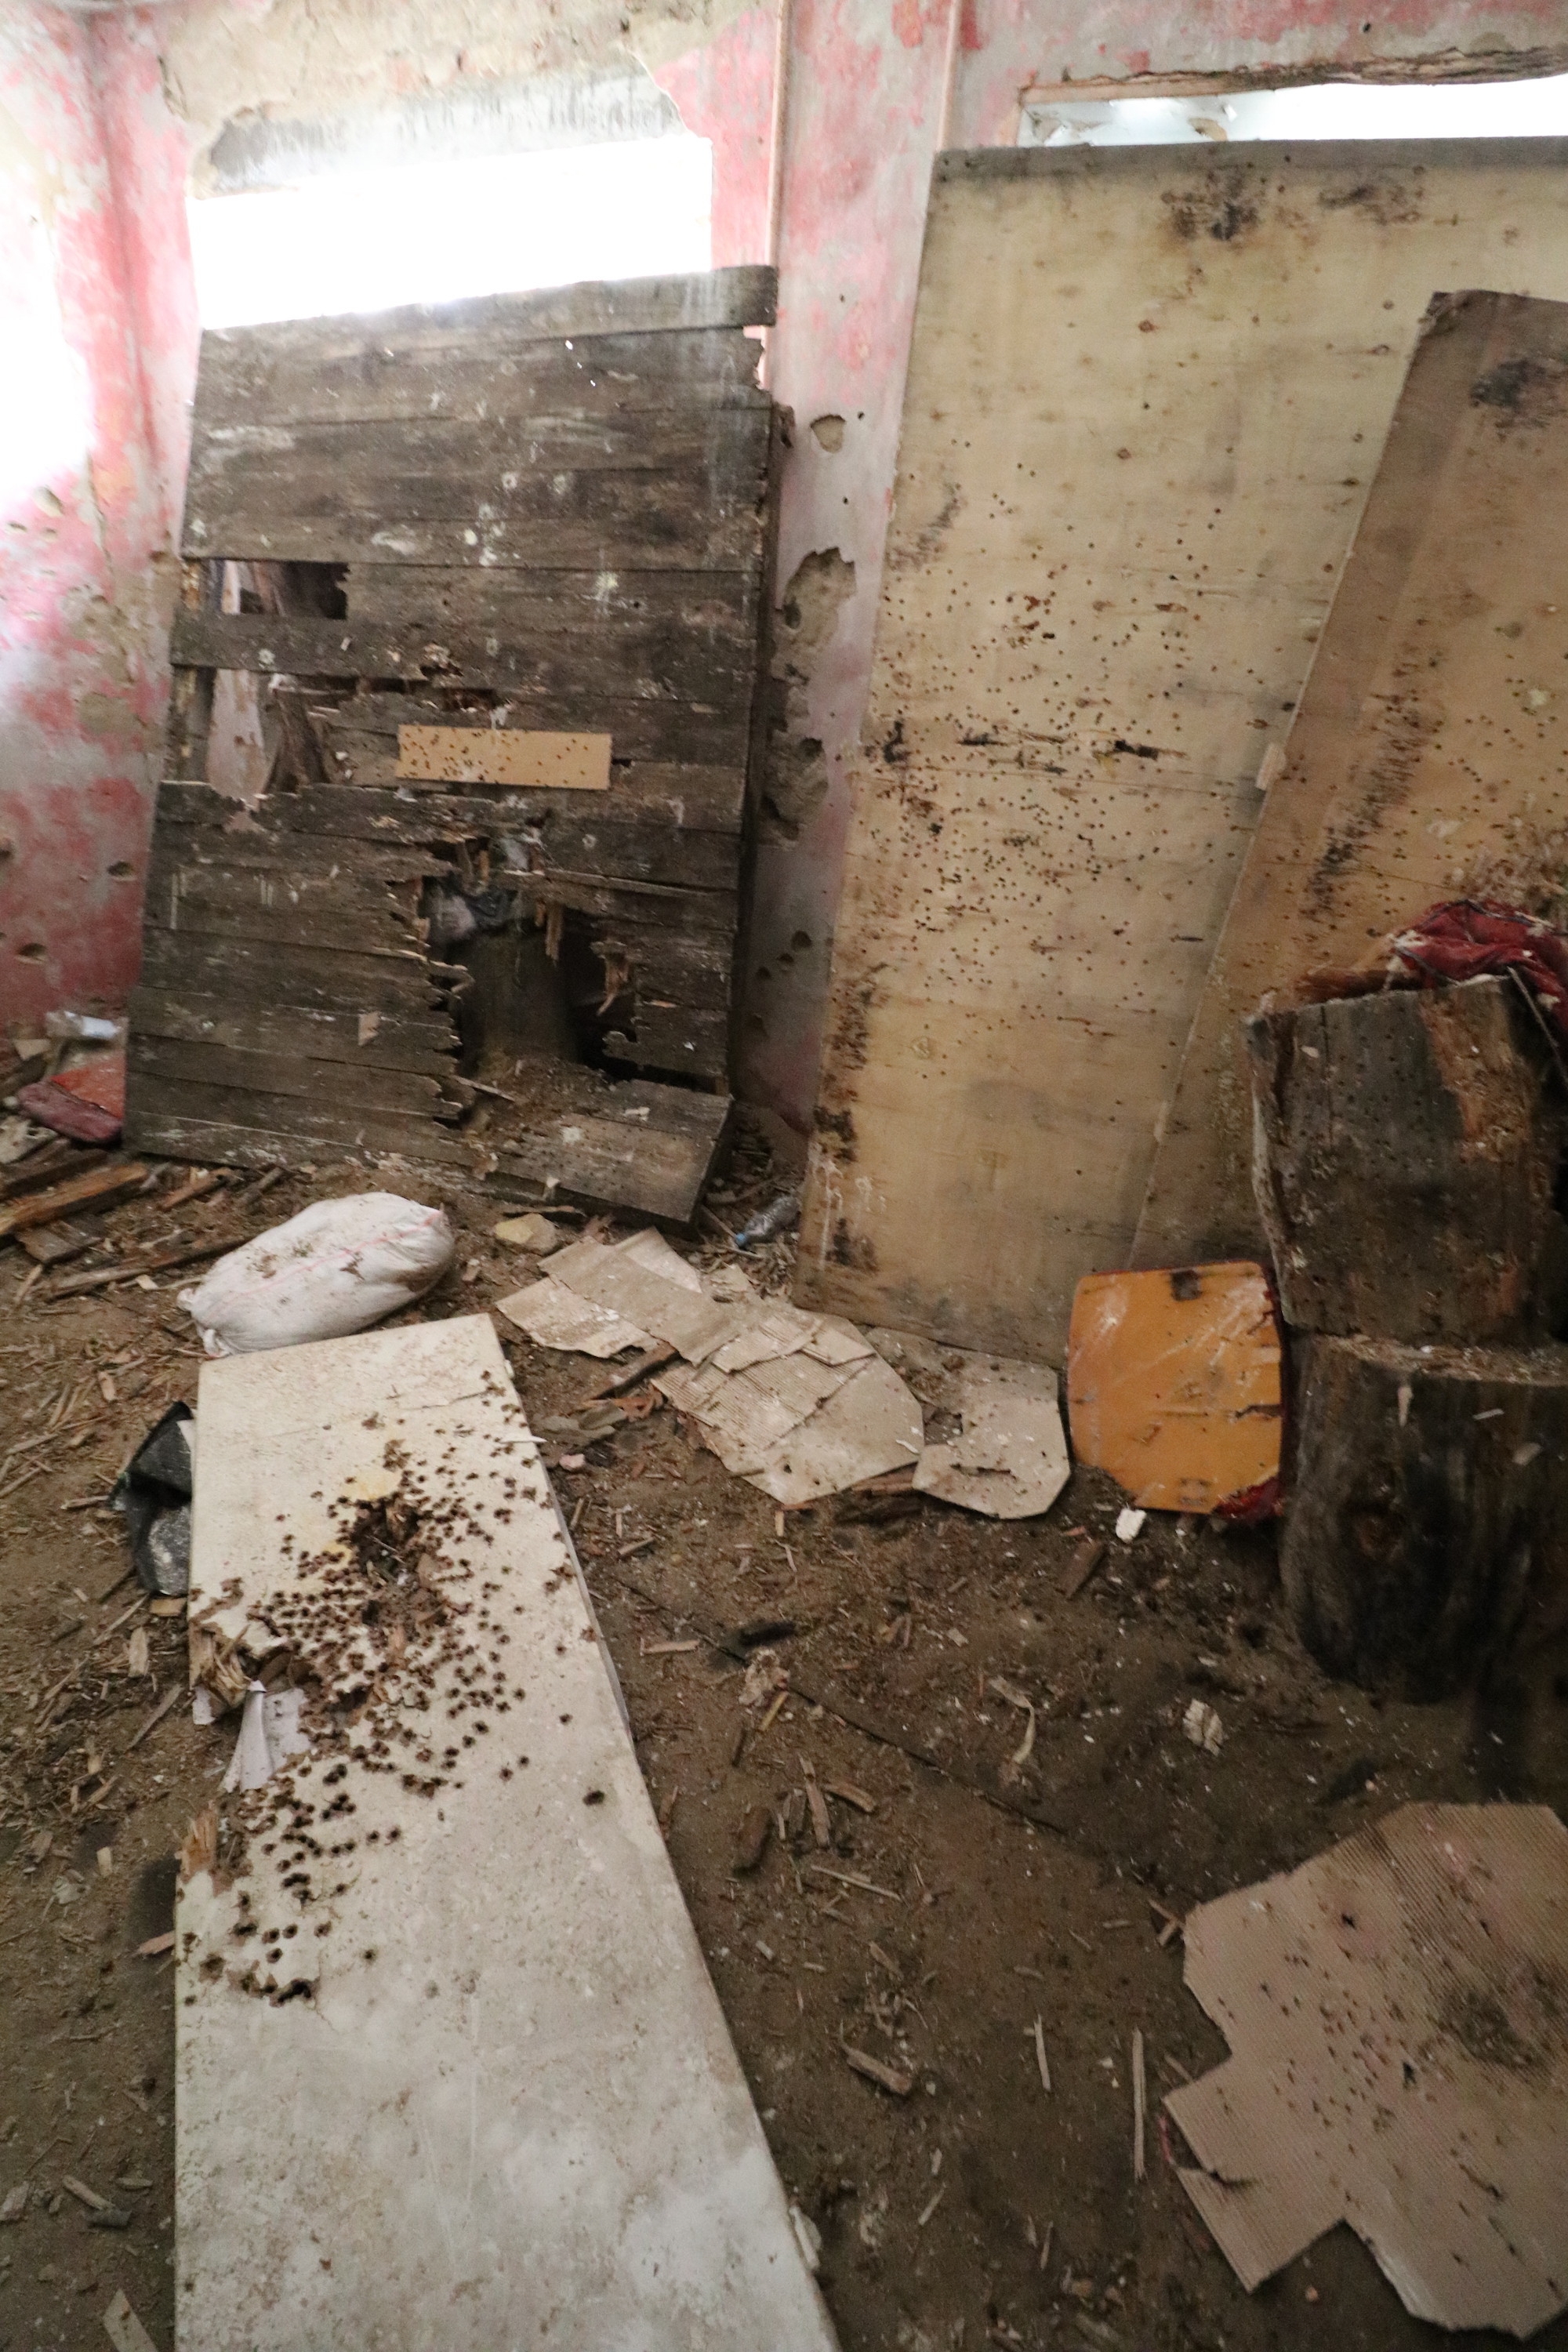
I can’t think of anything weaker than real bullets that would’ve shot their way through some thick pieces of wood that were barricaded against the window.
This graffiti (?) was on the same floor.
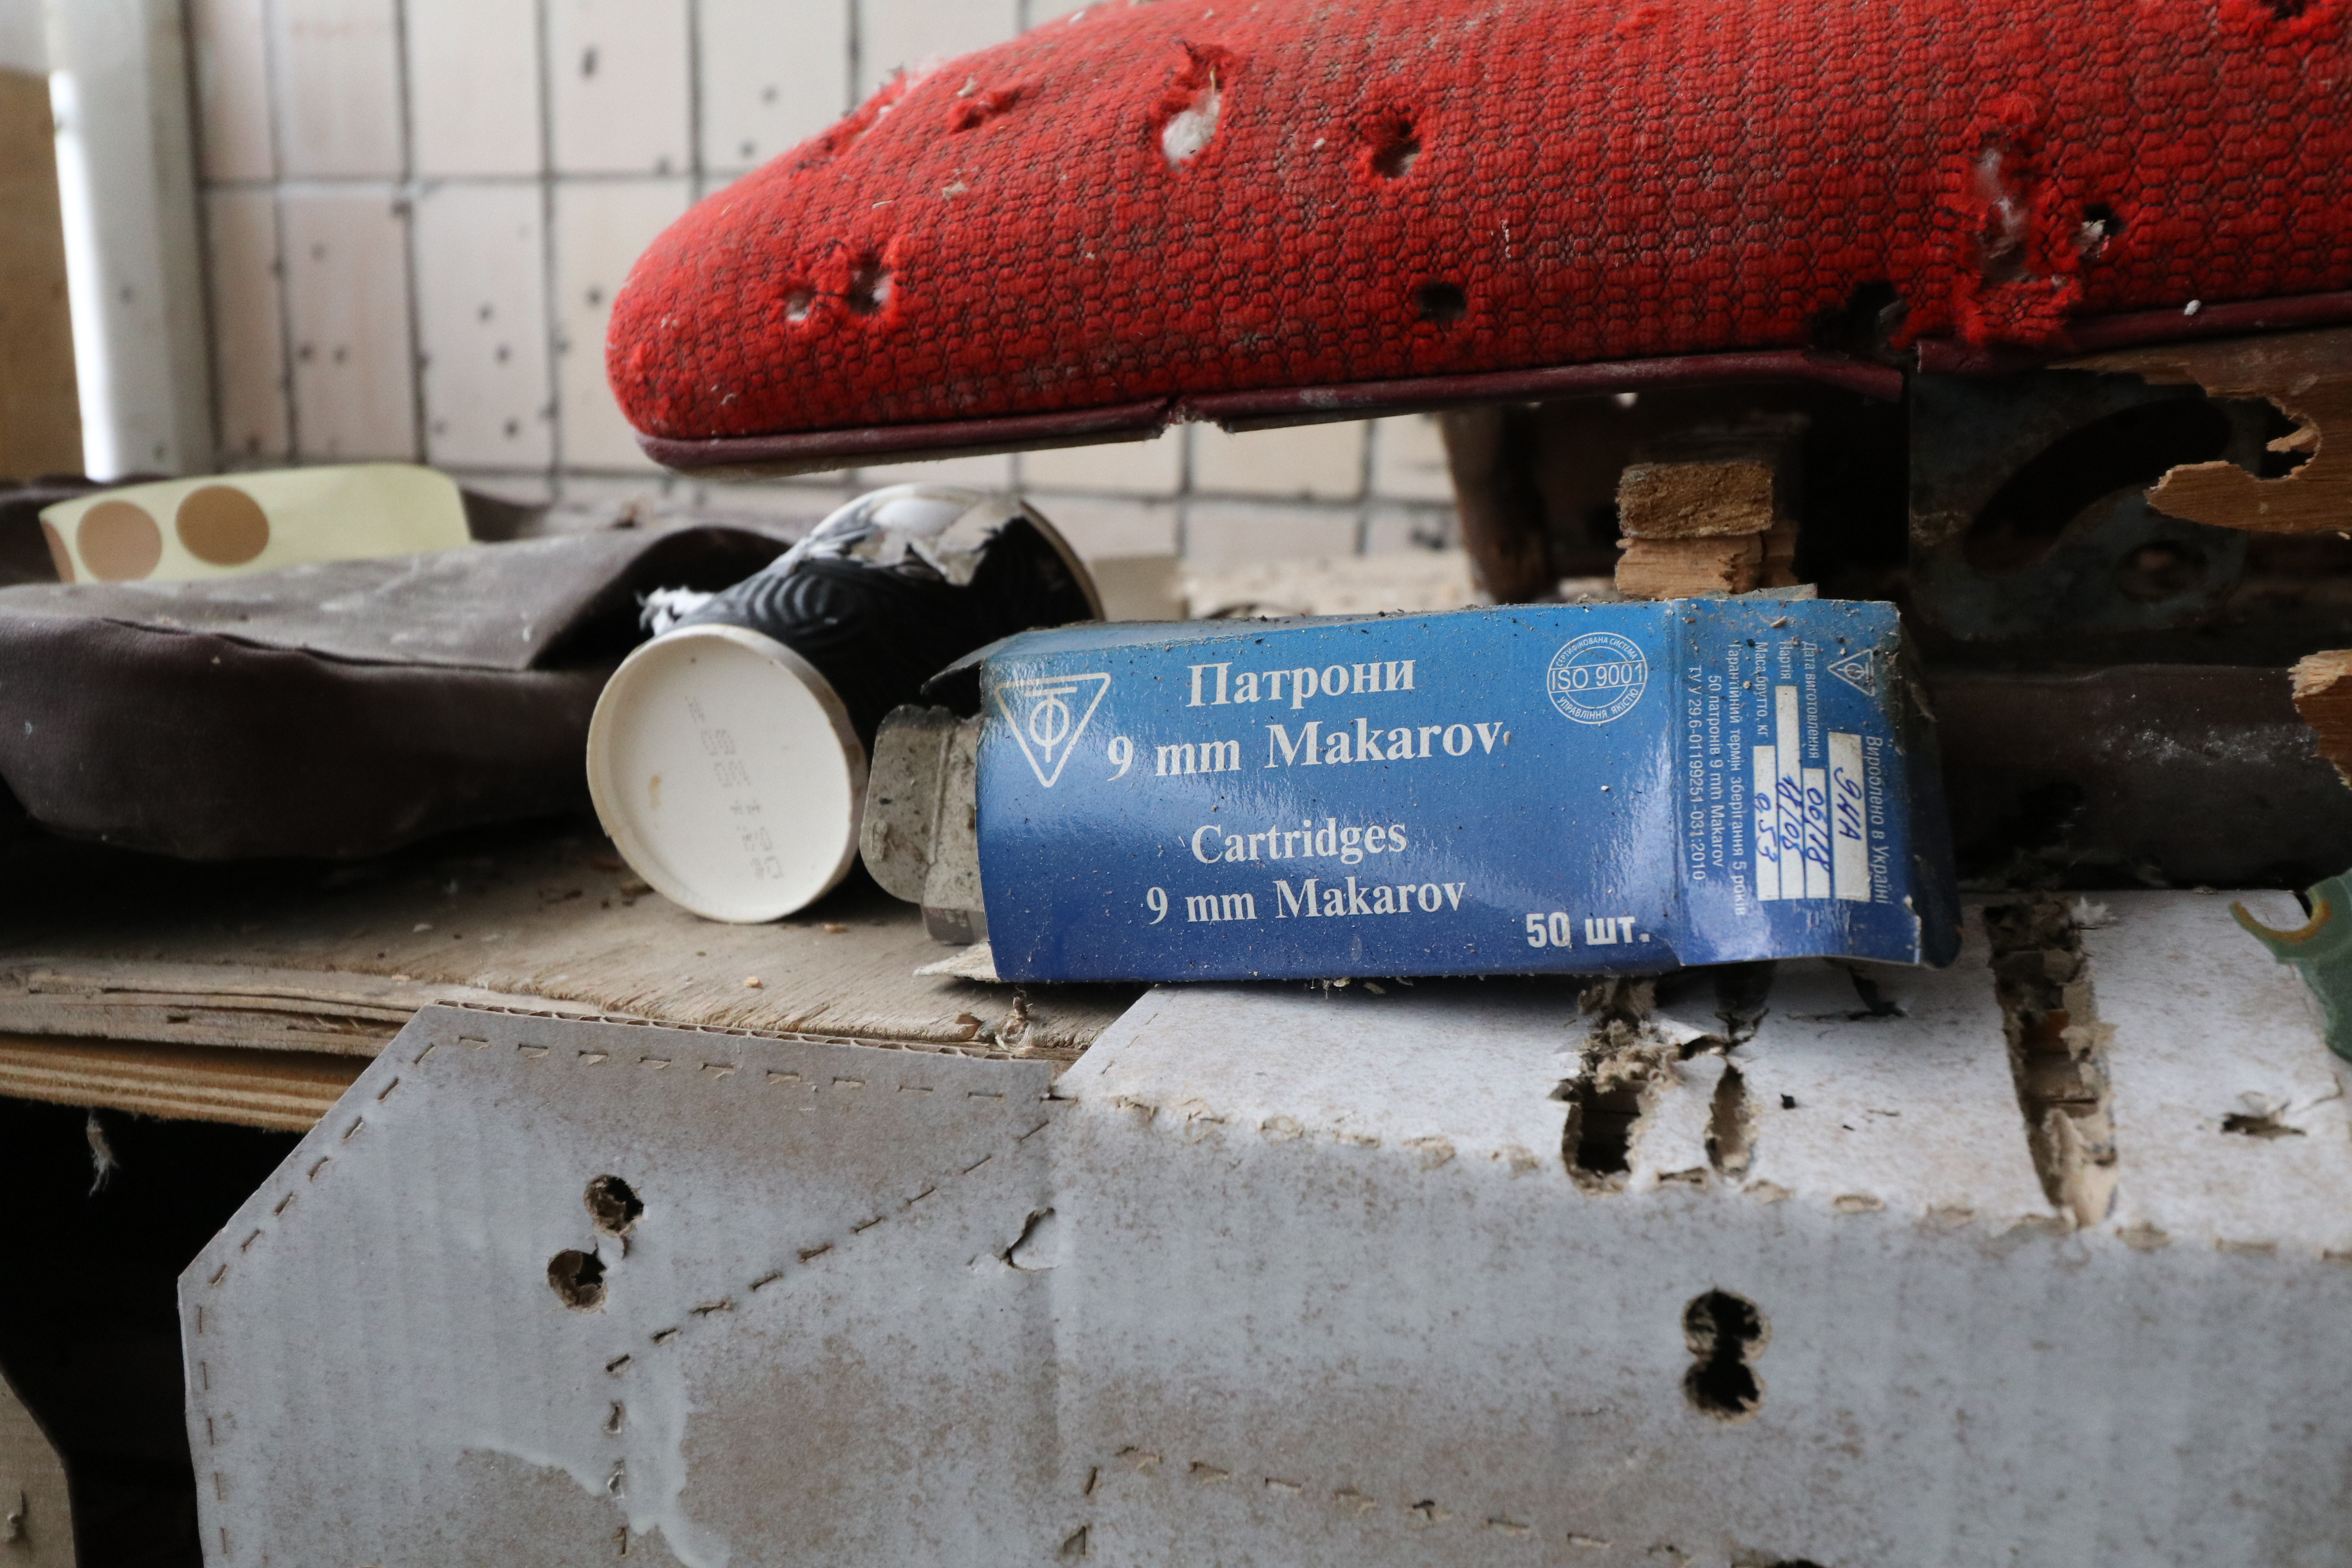
More target practice. The blue box caught my attention.
And, it confirmed my suspicions about real guns.
I made my way down to find the next building to explore.
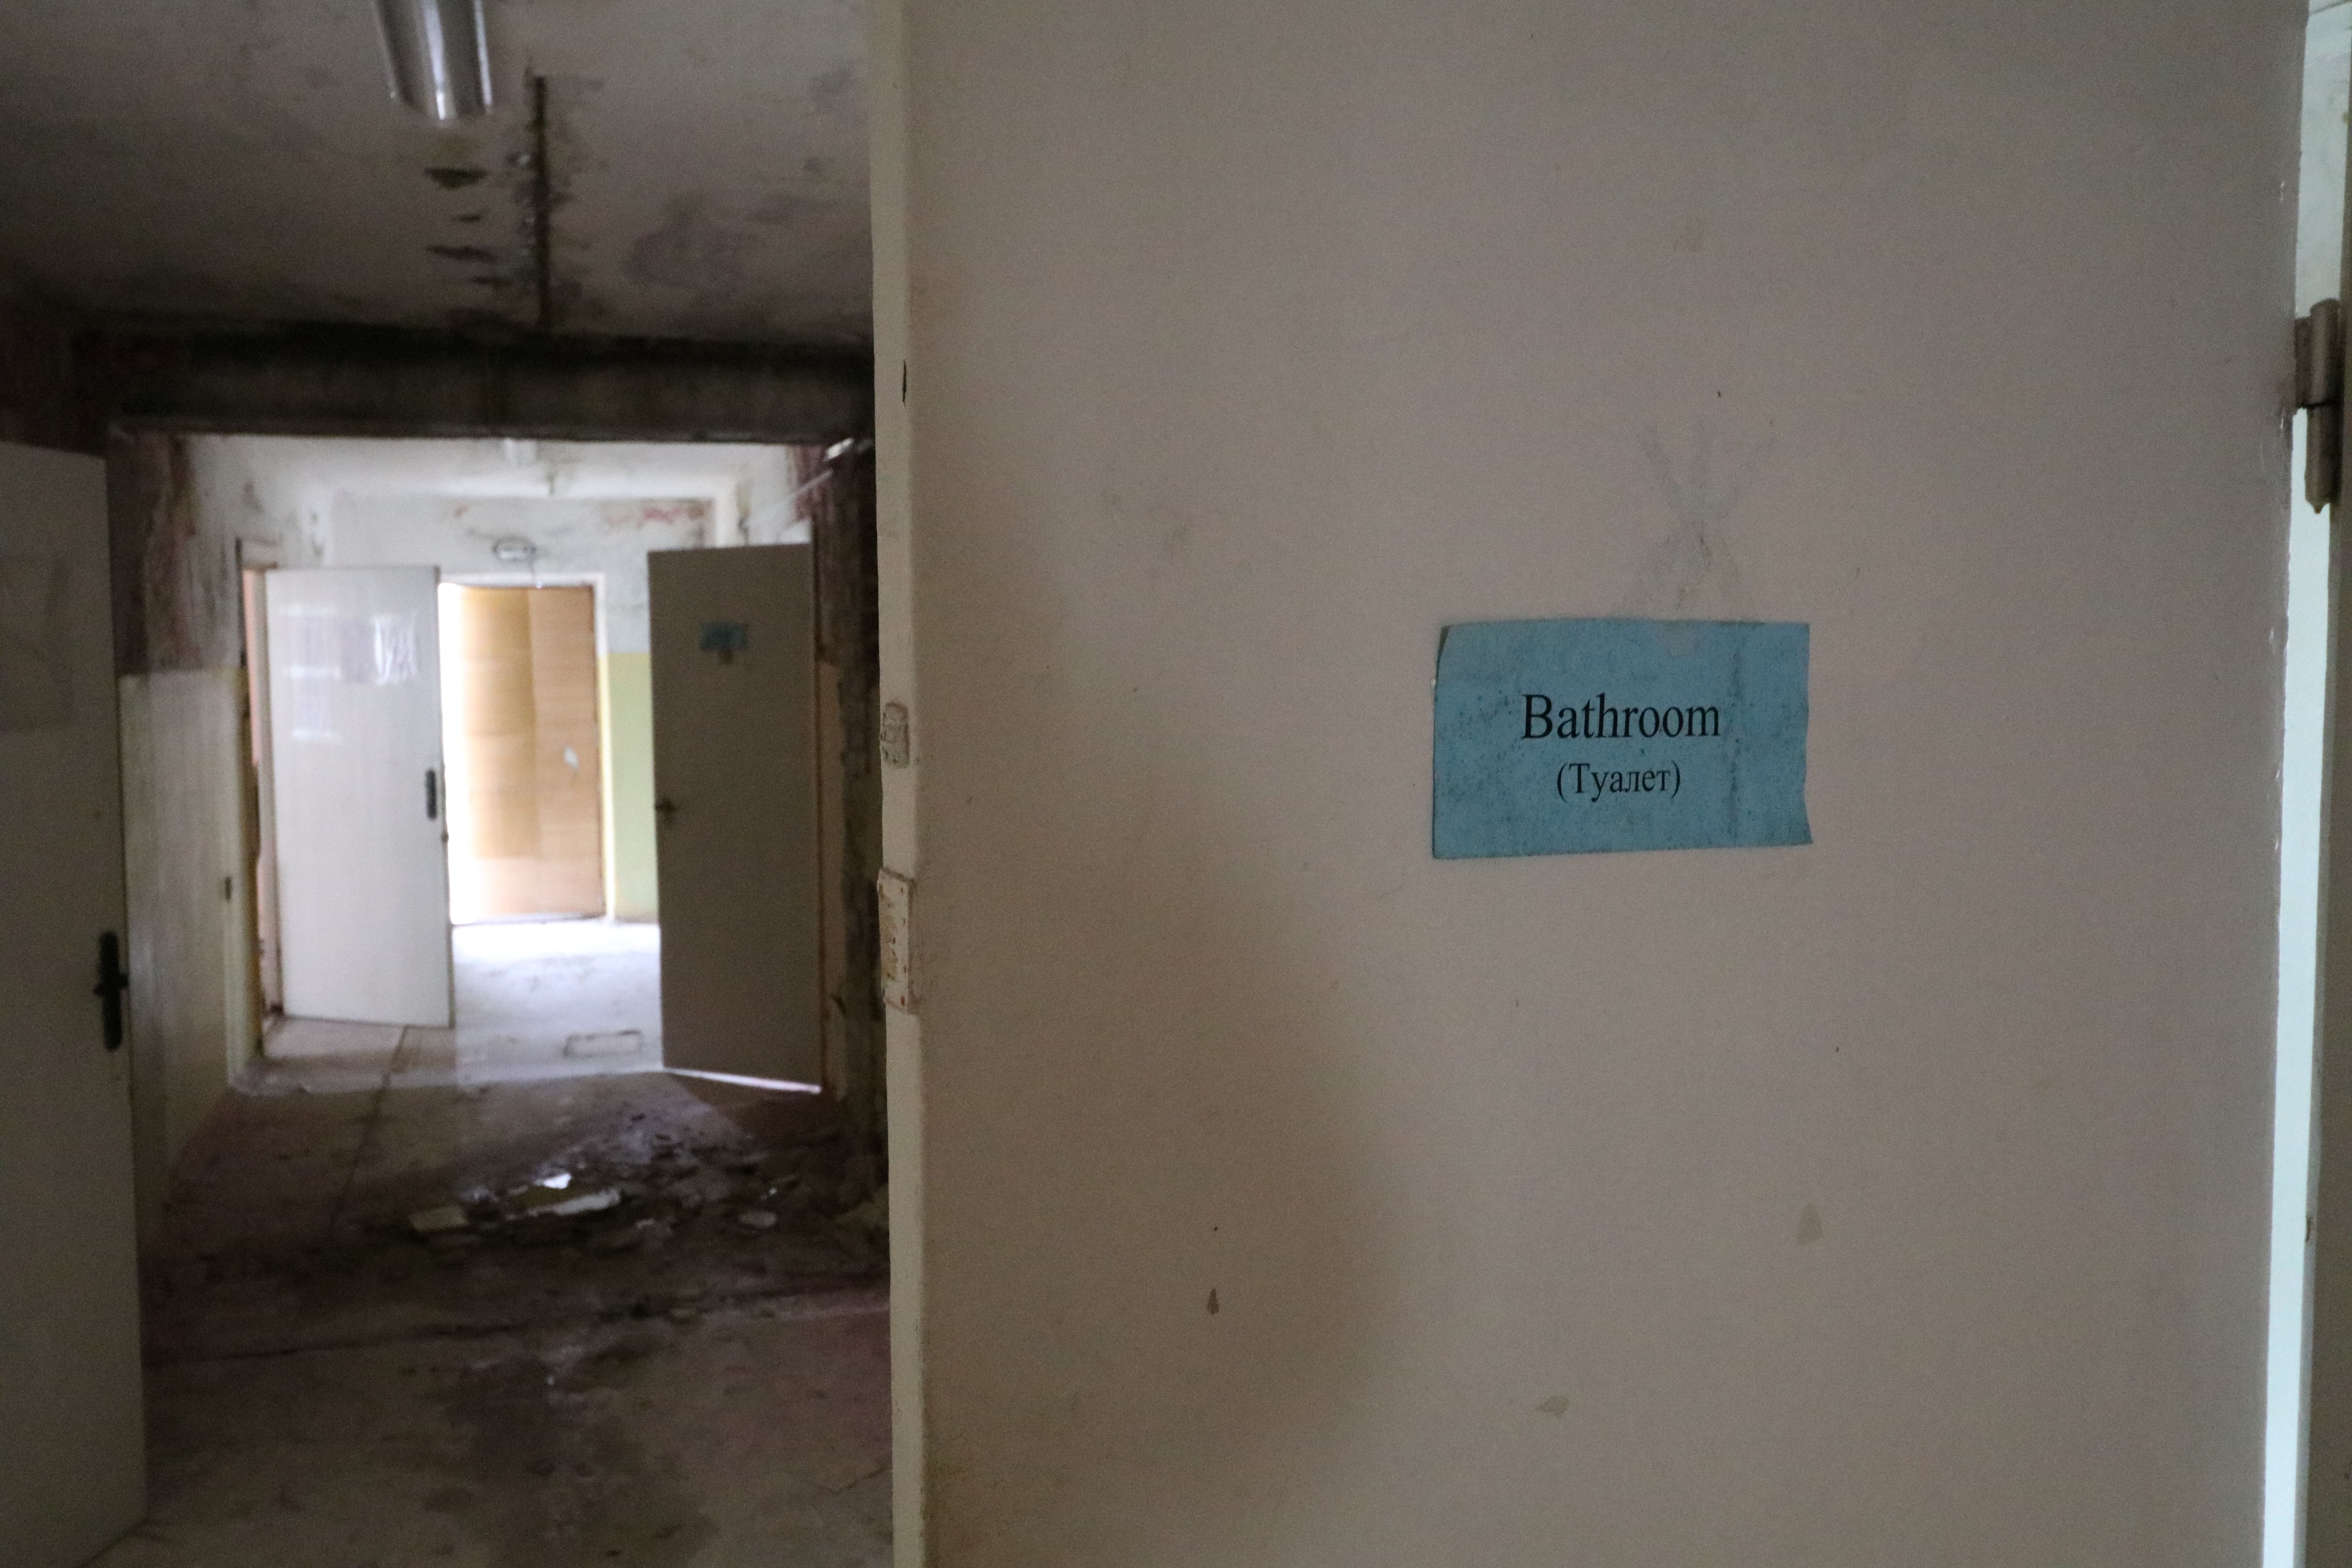
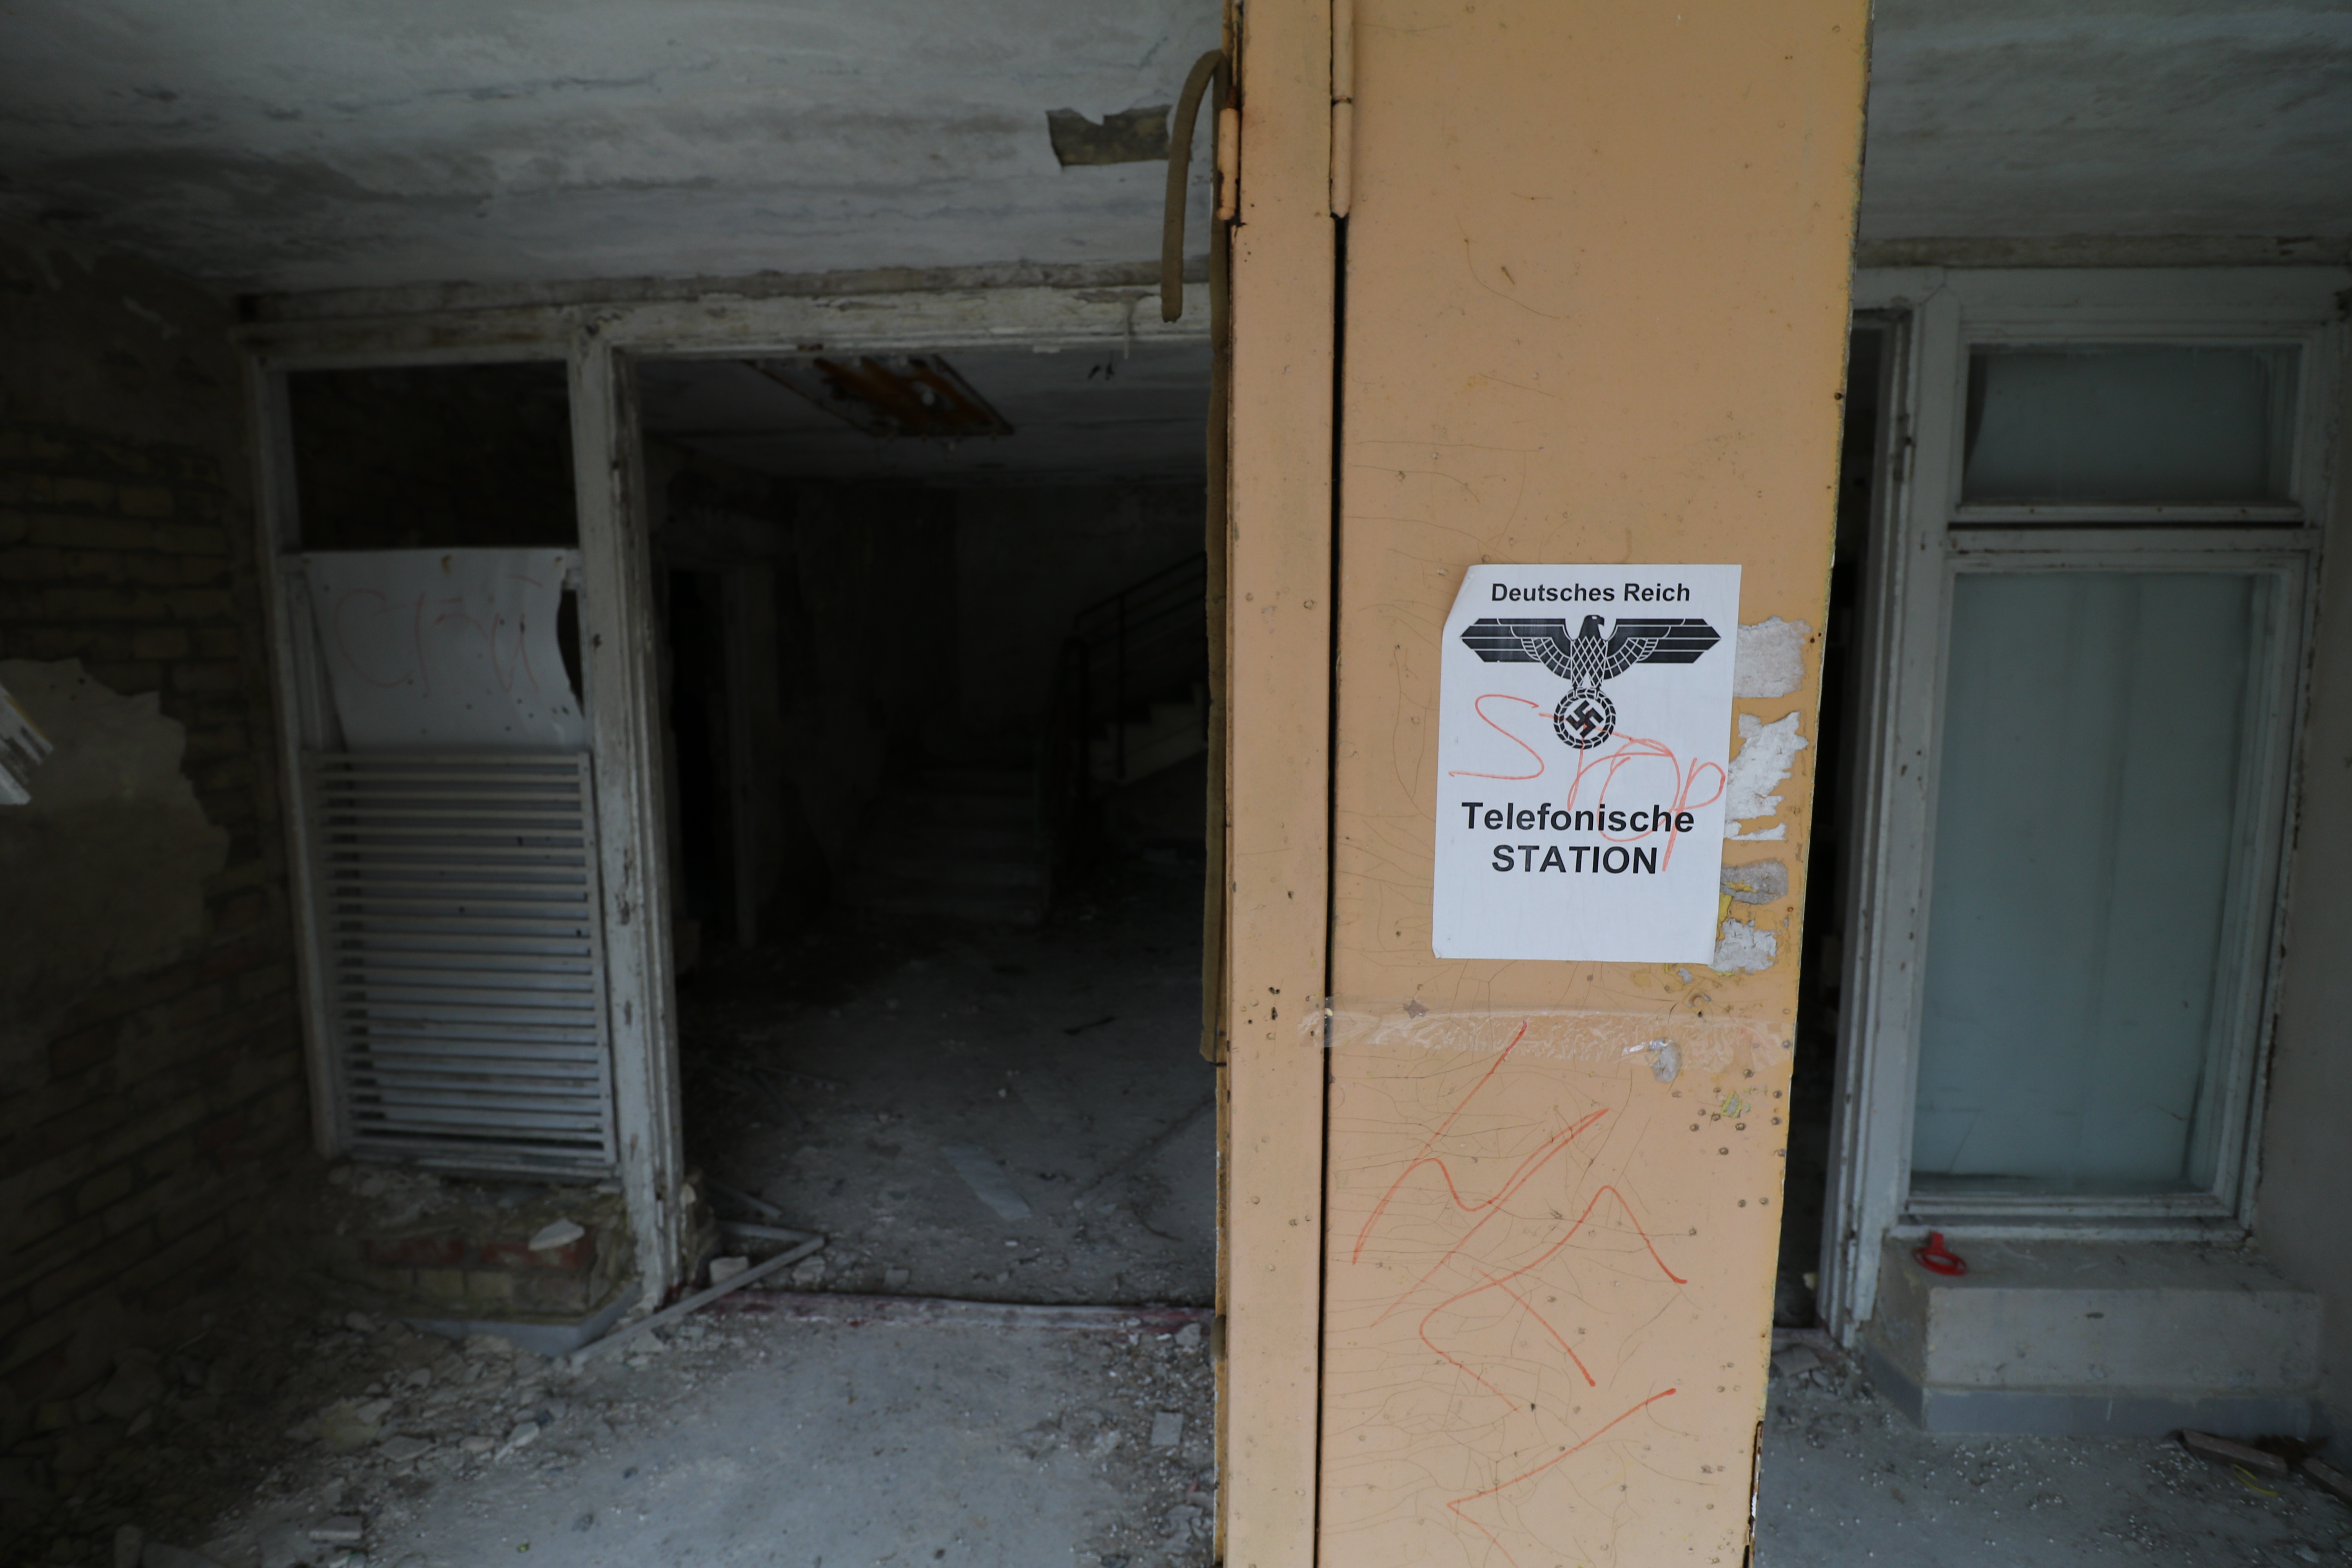
Hm, some sign of recent activity. If you don’t speak Ukrainian, I bet you’re curious by now 🙂
Hey, some english! Actually, I’ve been leaving some details out. I knew a little something about this place, but not about the bullet holes.
On Wikimapia (link to this camp) it’s called “Radooga Camp”. I know the guy that started Radooga, and he said yes, around 2004-2005 this camp was still in use. I know Americans come to help with these summer camps, so I bet this paper could be 14 years old. It seems unlikely, but certainly possible.
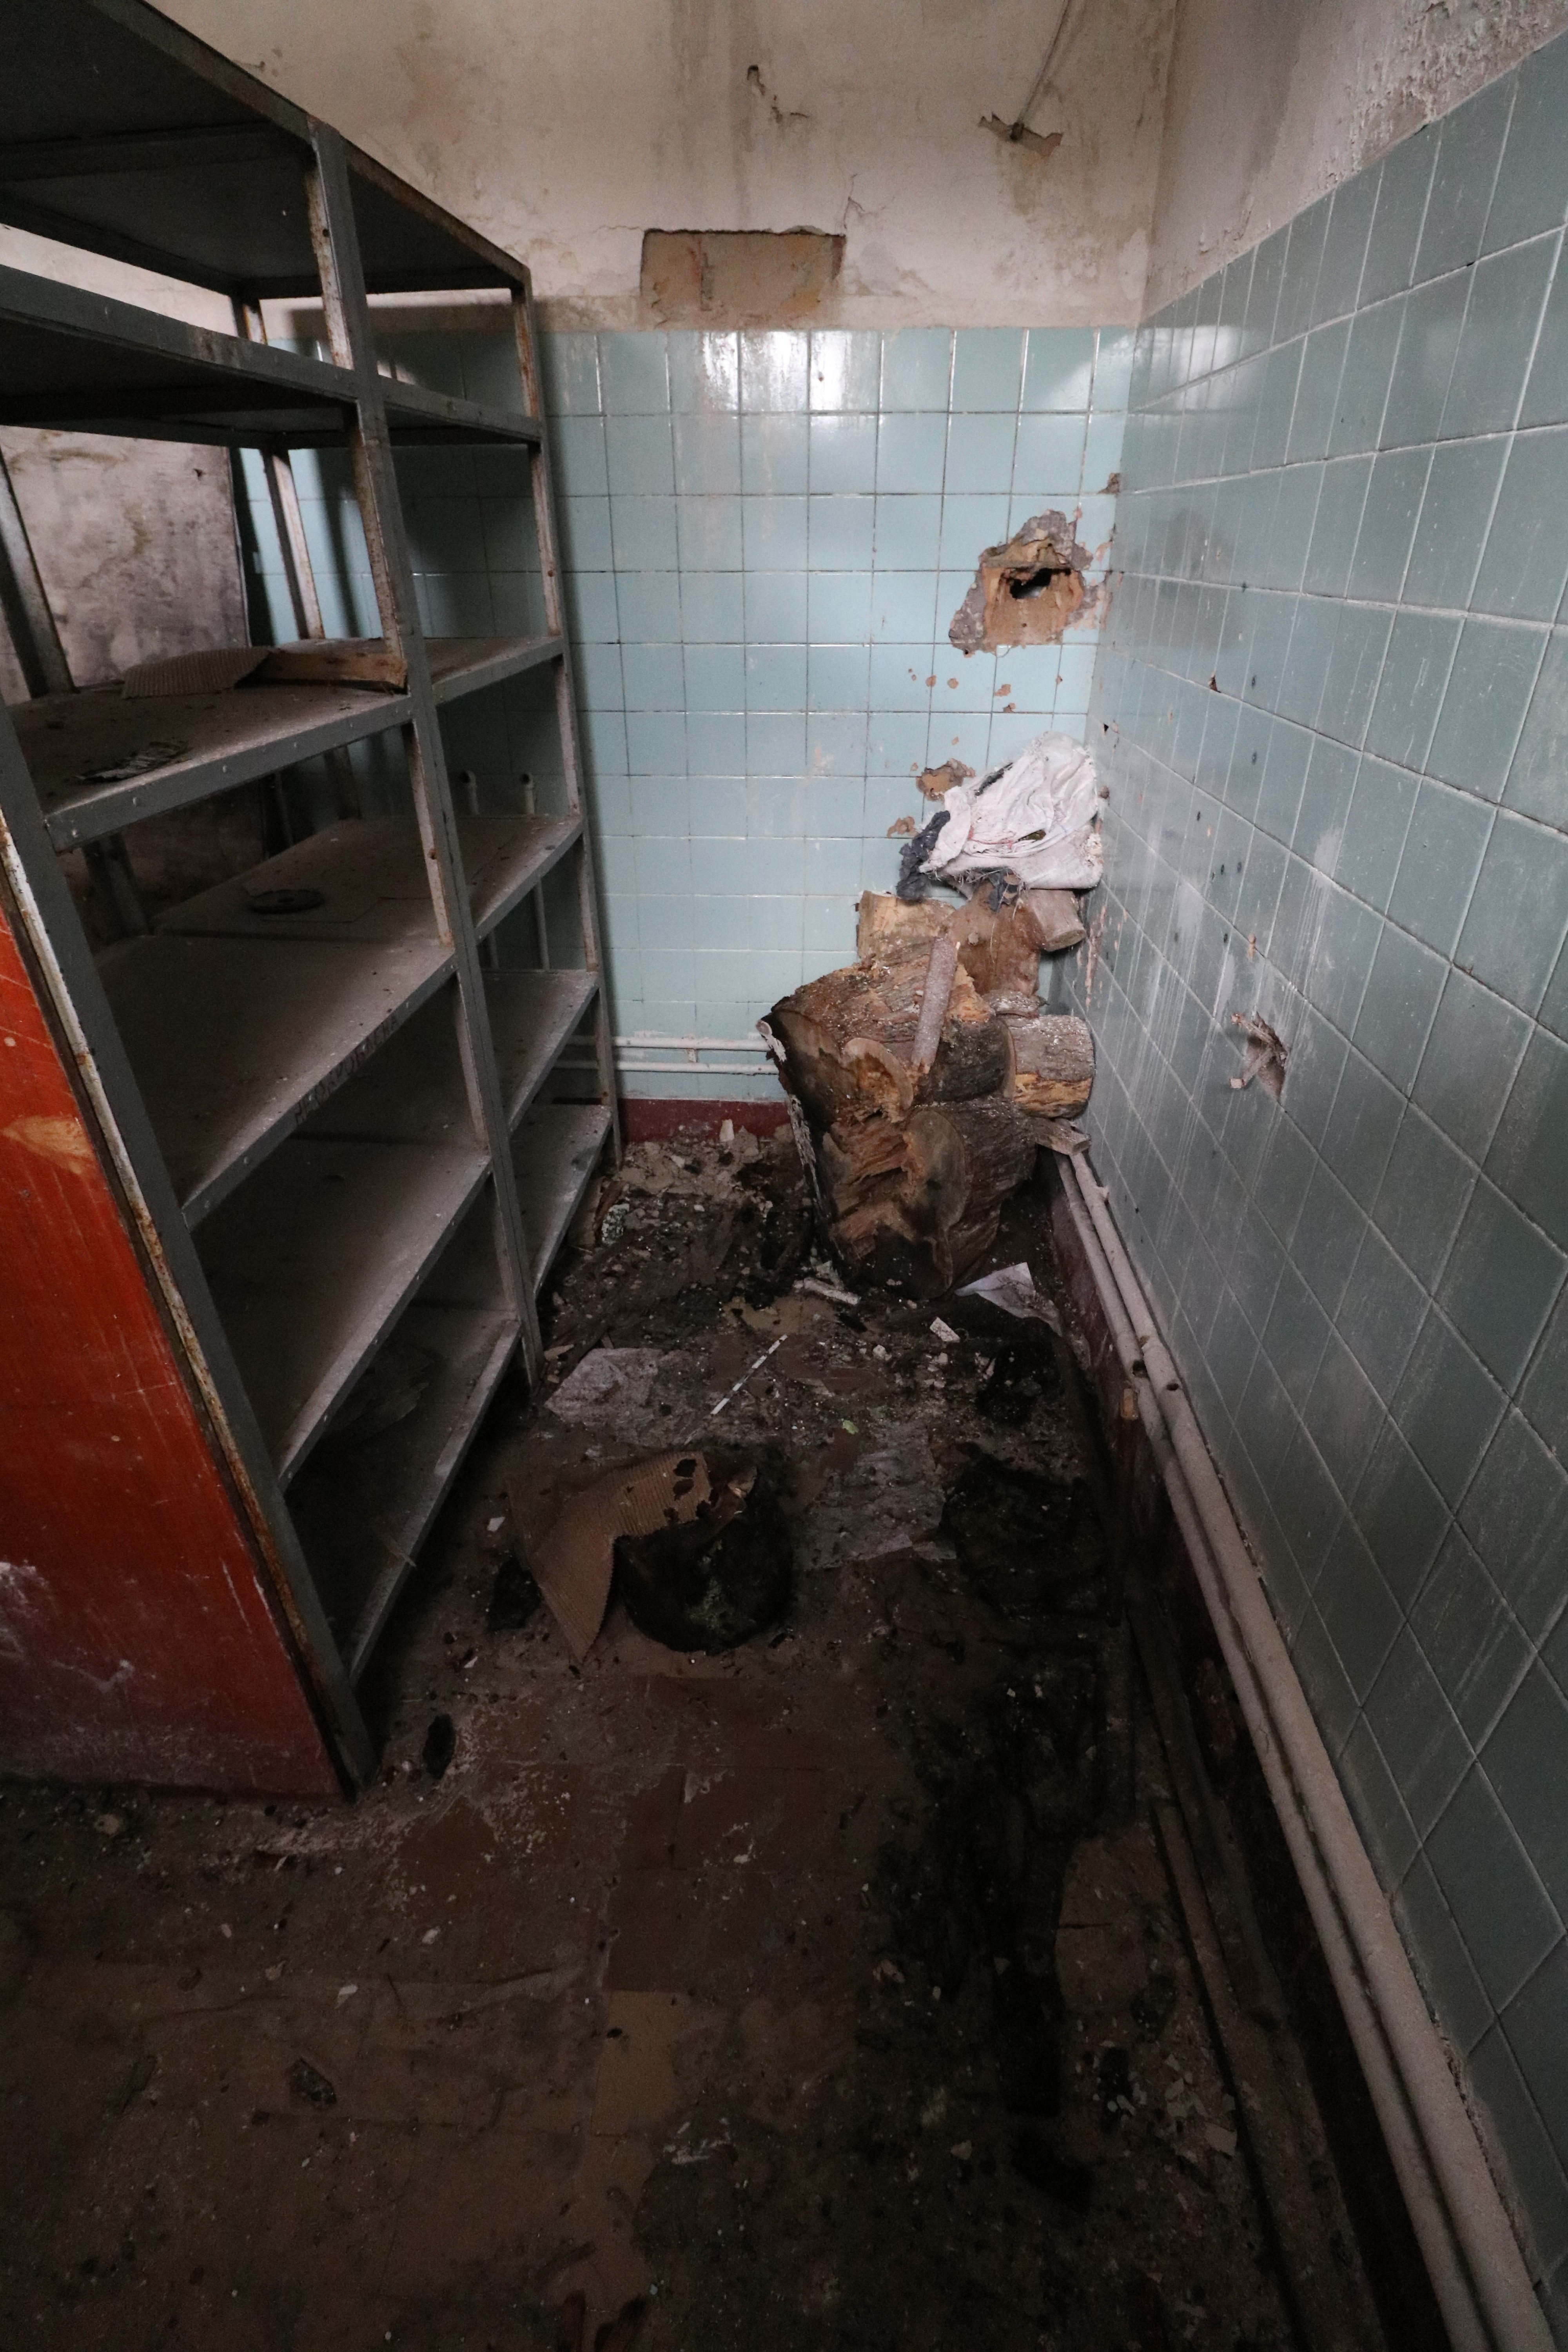
The rooms didn’t have much, just some old mattresses and furniture. Every building had a leaky roof, and some building were quite moldy. I tried to minimize my time in those areas
In another building I found more evidence of some kind of game, probably Airsoft. In fact, someone mentioned it in the Wikimapia comments.
As I walked around more, I started to feel more comfortable that there might not be anyone in this part of the camp.
Until I saw the guardhouse. Often times, if a place is guraded, there will be a guard that sits inside a little building and watches TV all day (if there’s electricity), maybe stepping outside for smoke breaks. I was more careful on this part.
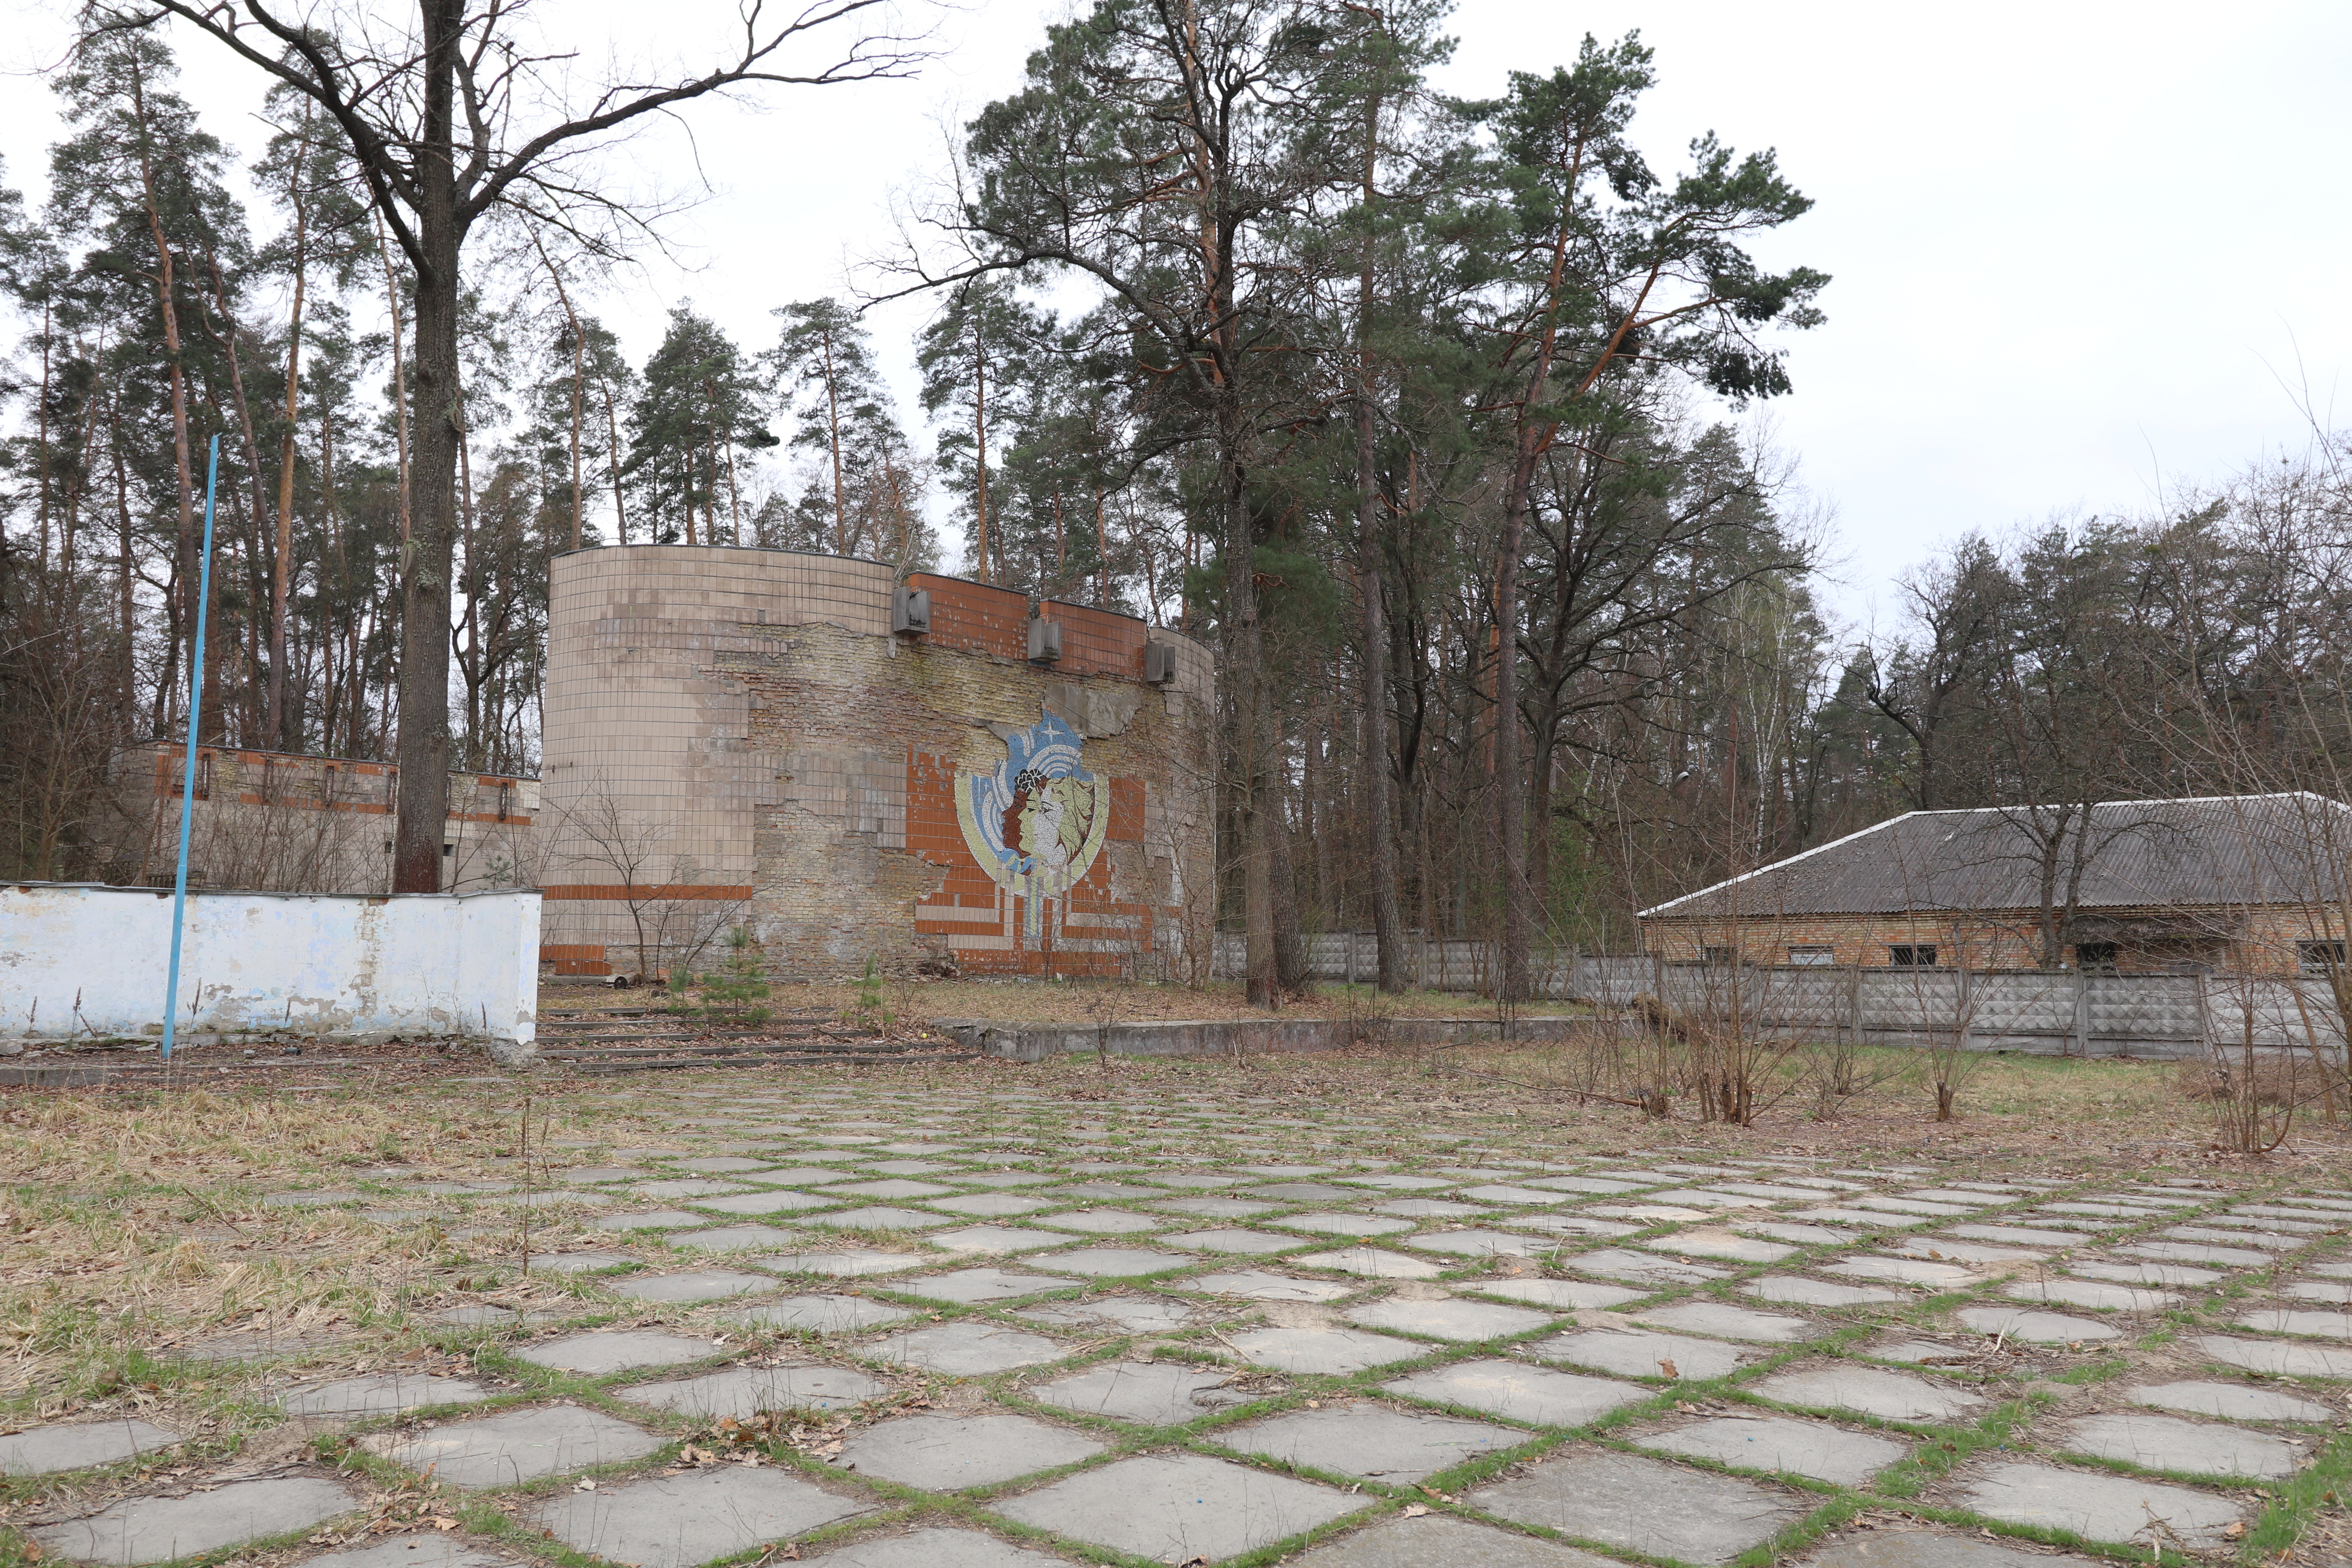
I noticed an awesome piece of Soviet artwork, I risked taking a closer look.
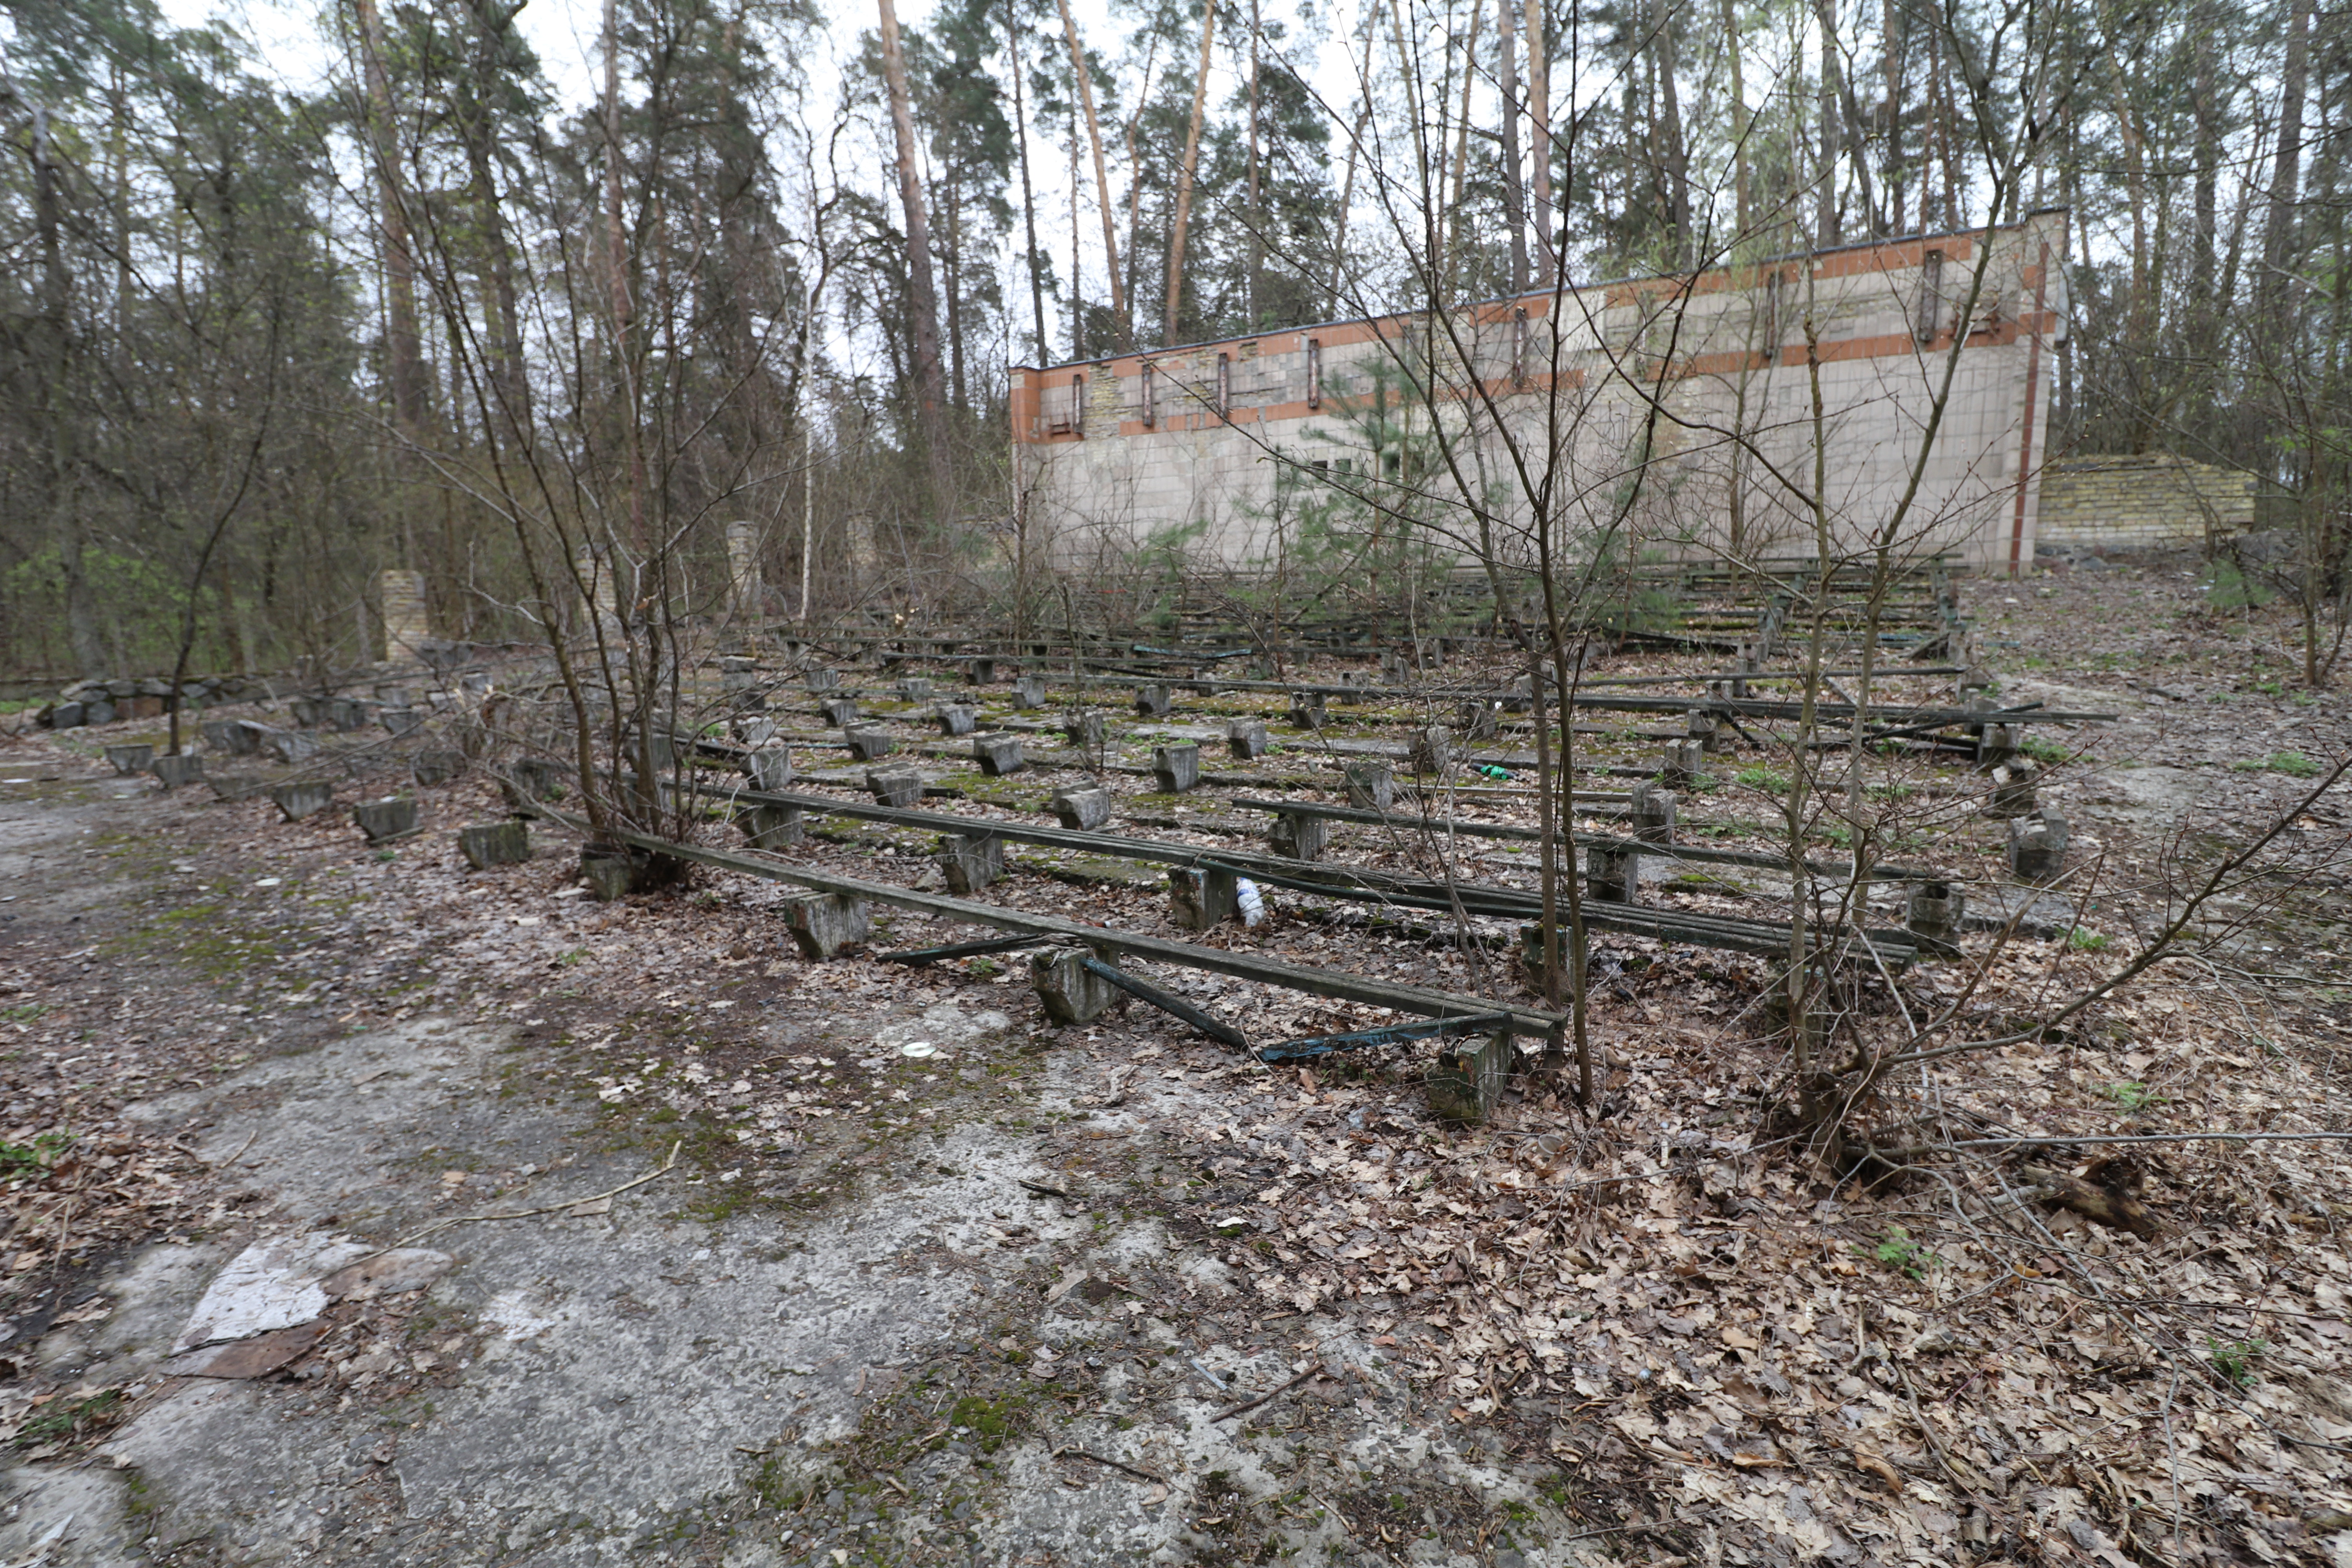
I stepped around to the other side, and found myself in the middle of an outdoor theater.
It was getting darker, so my exposures were a bit longer to make everything visible, but I now see I ended up with a few blurry photos.
This must’ve been the main gathering area of the camp, with a flagpole. I bet hundreds of Soviet kids stood here every summer day for a few decades. I’m sure many people have been here and would remember this place.
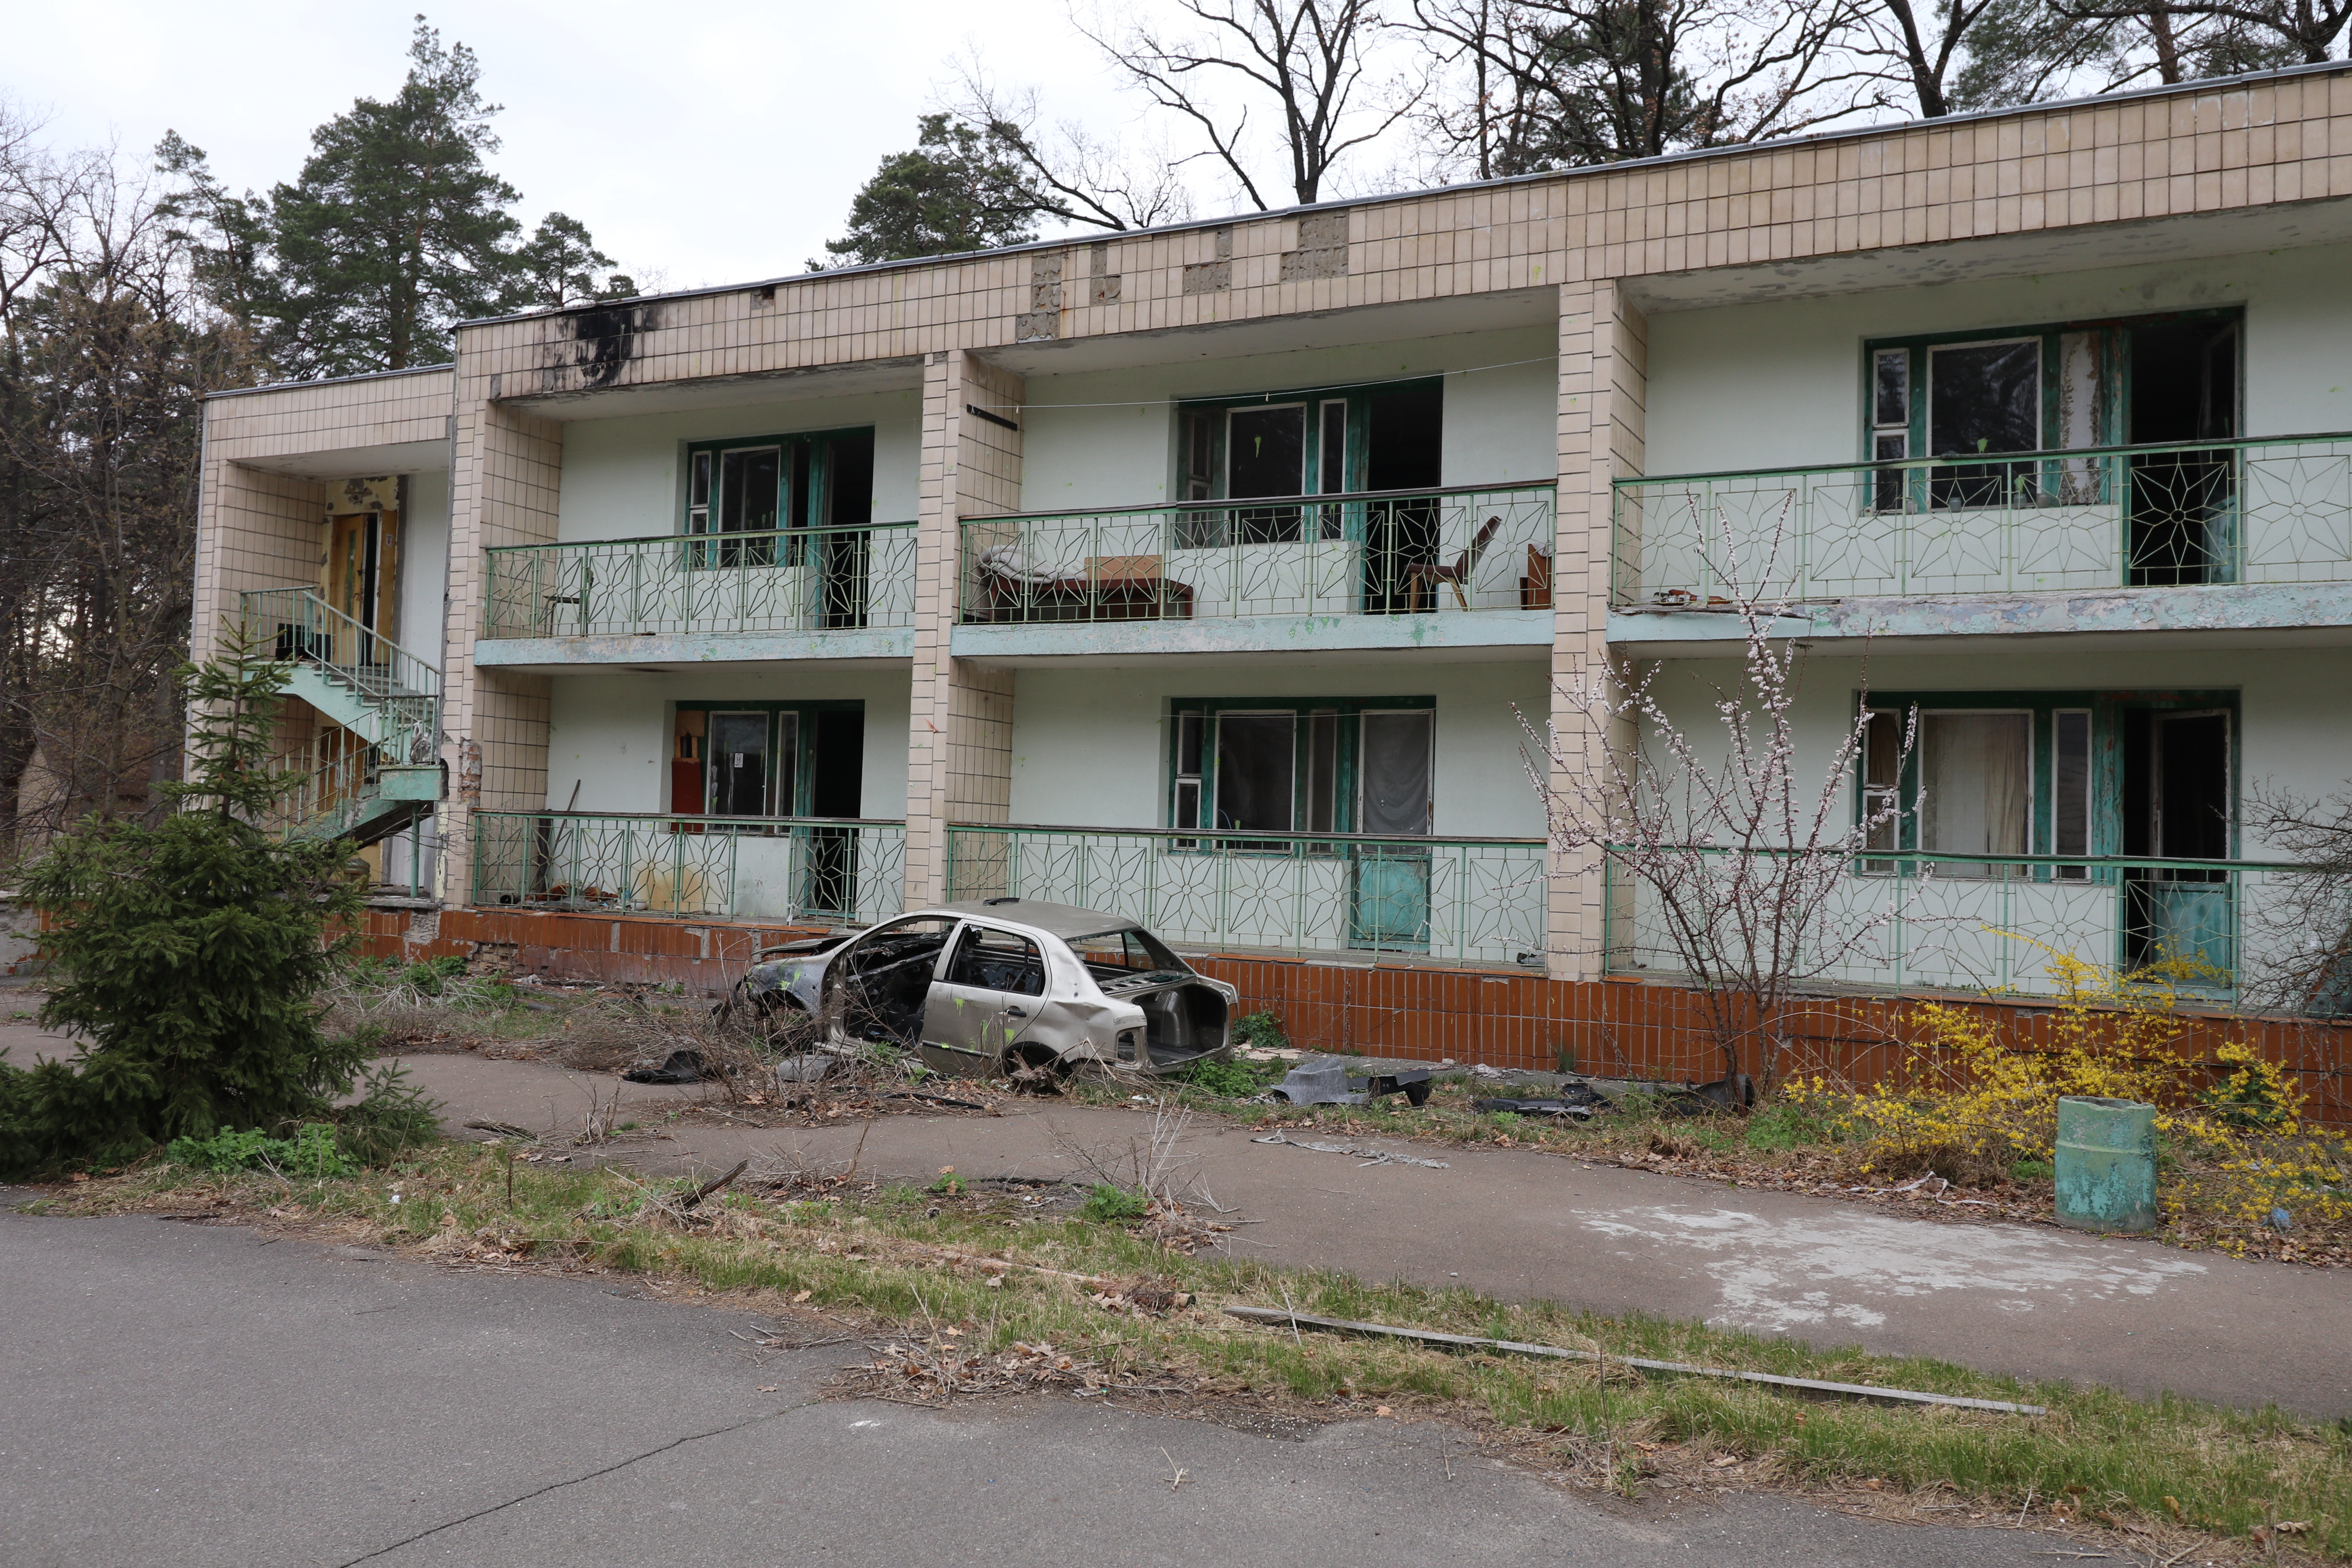
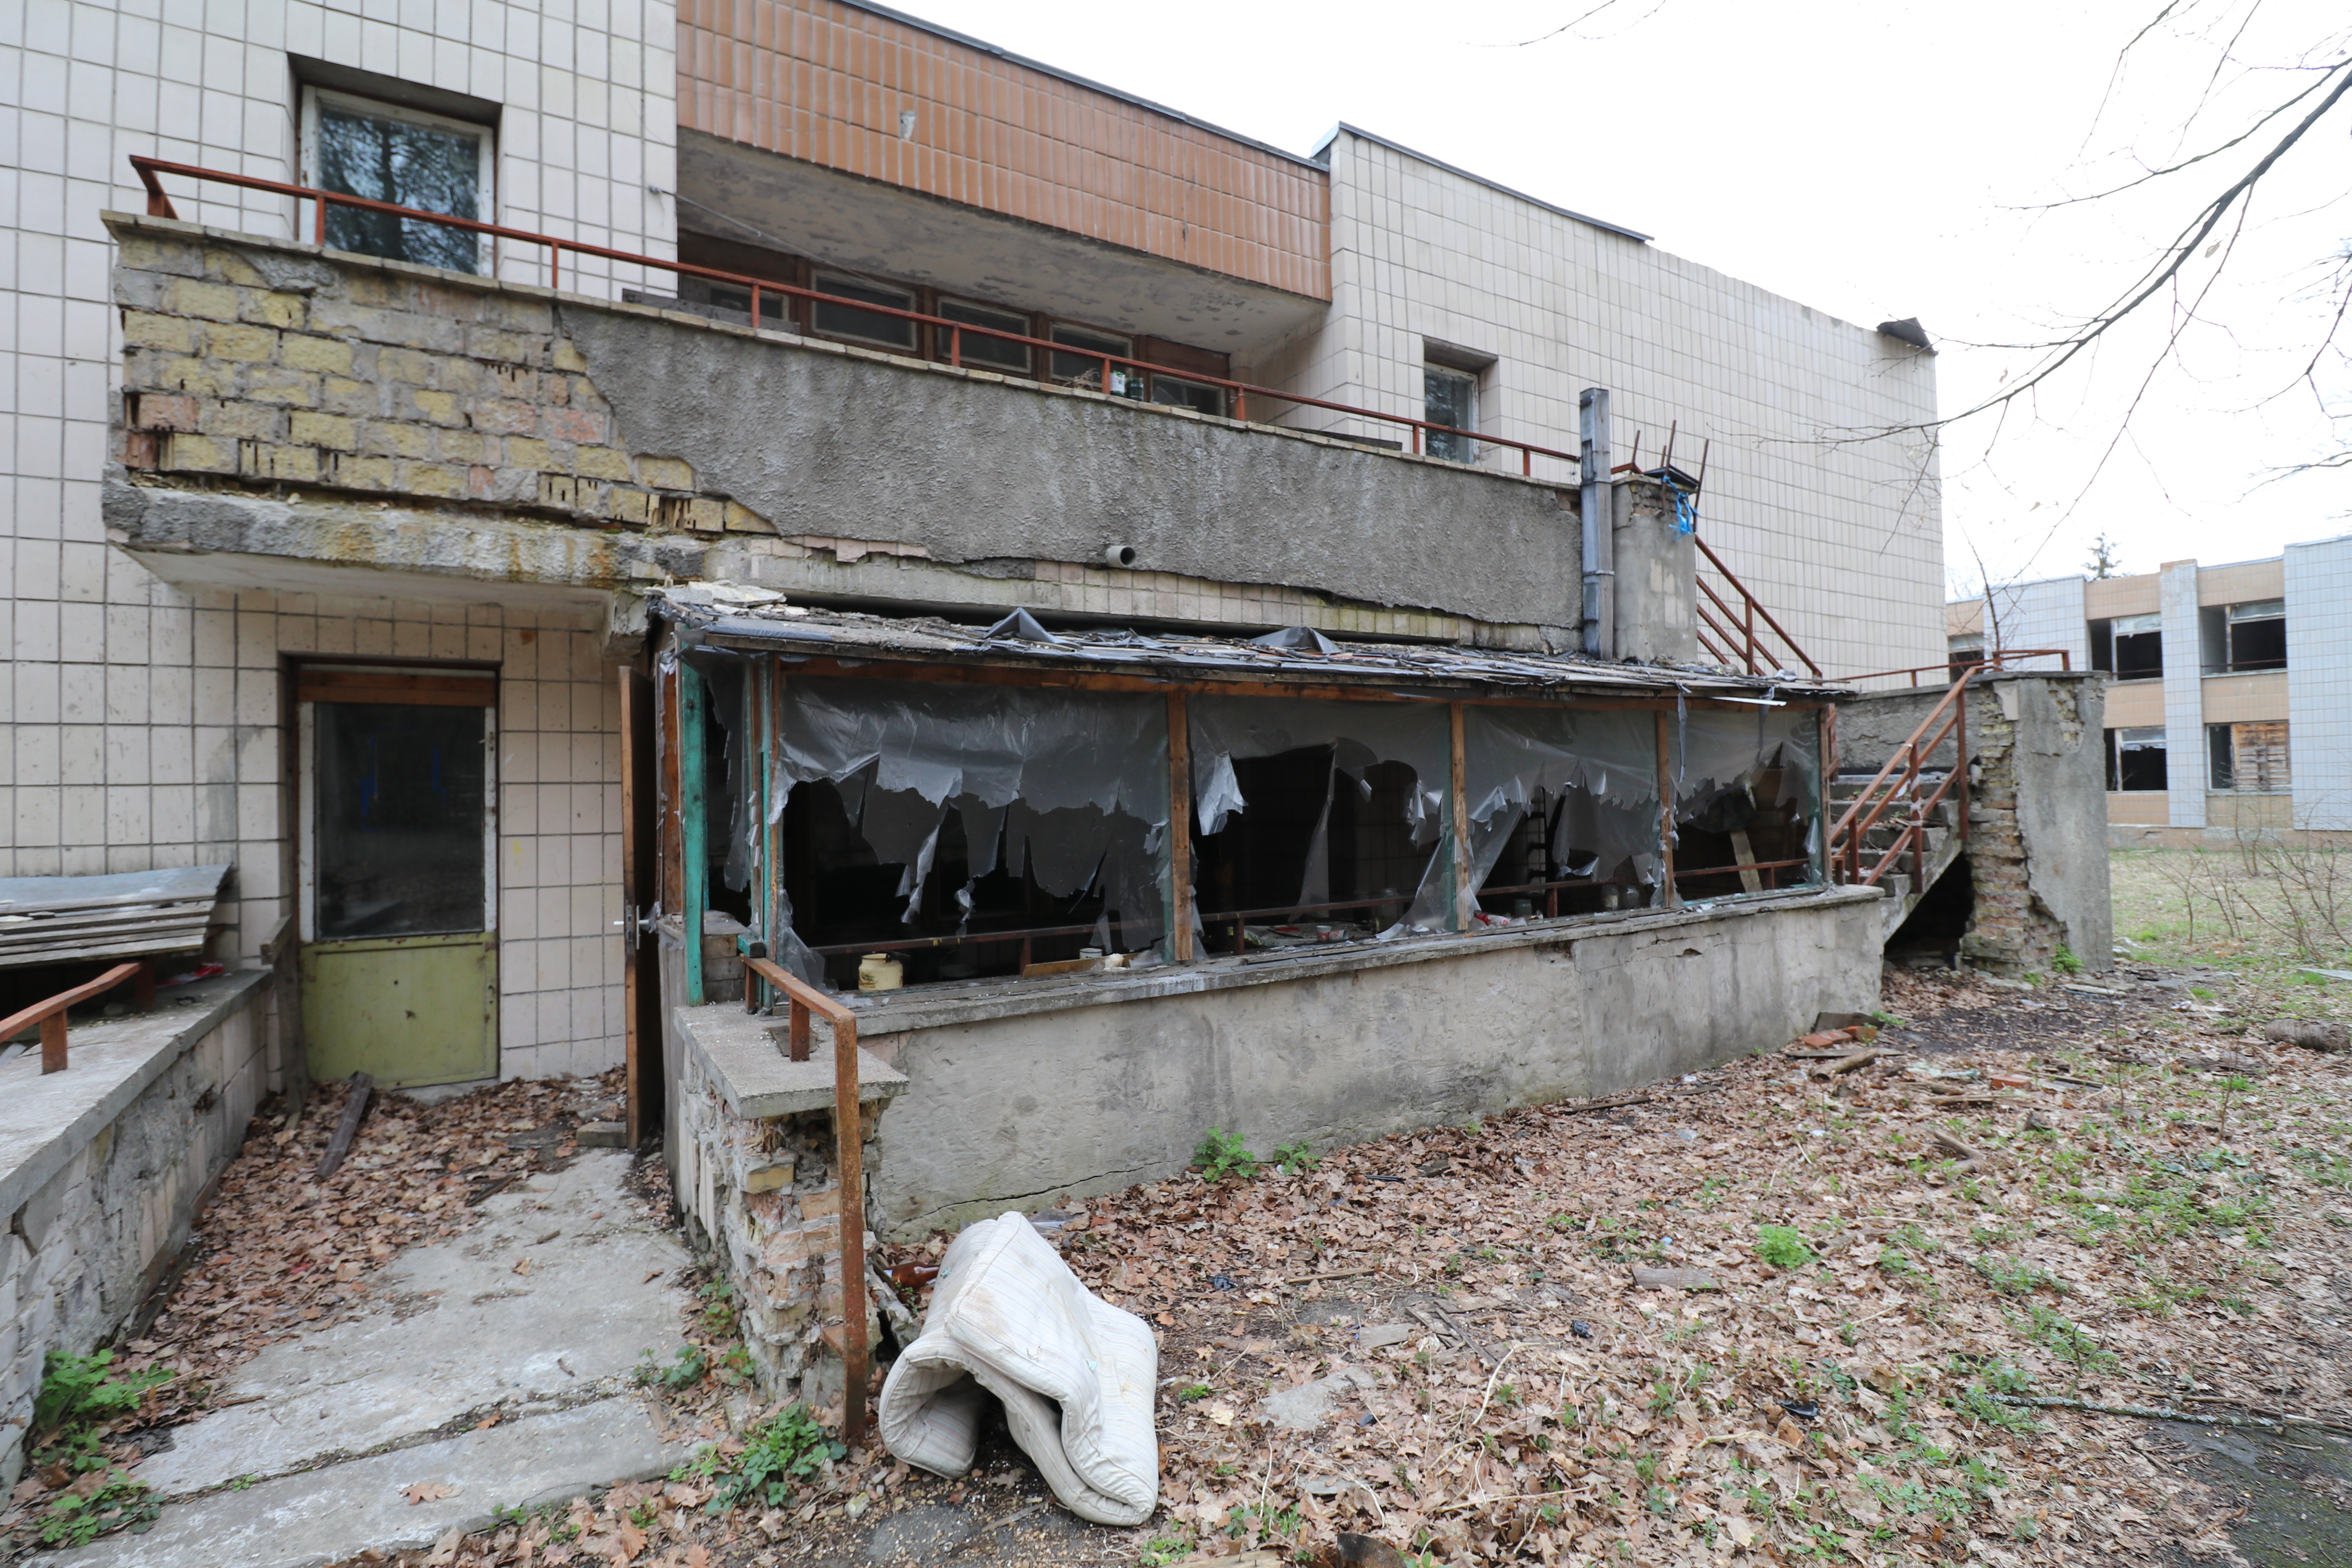
On the backside of a lodging building, there had been some more recent activity. There were green plants in those cut-off bottles on the second floor balcony, I didn’t go up that part to explore more.
Here’s a closer look at the barricades by the first building.
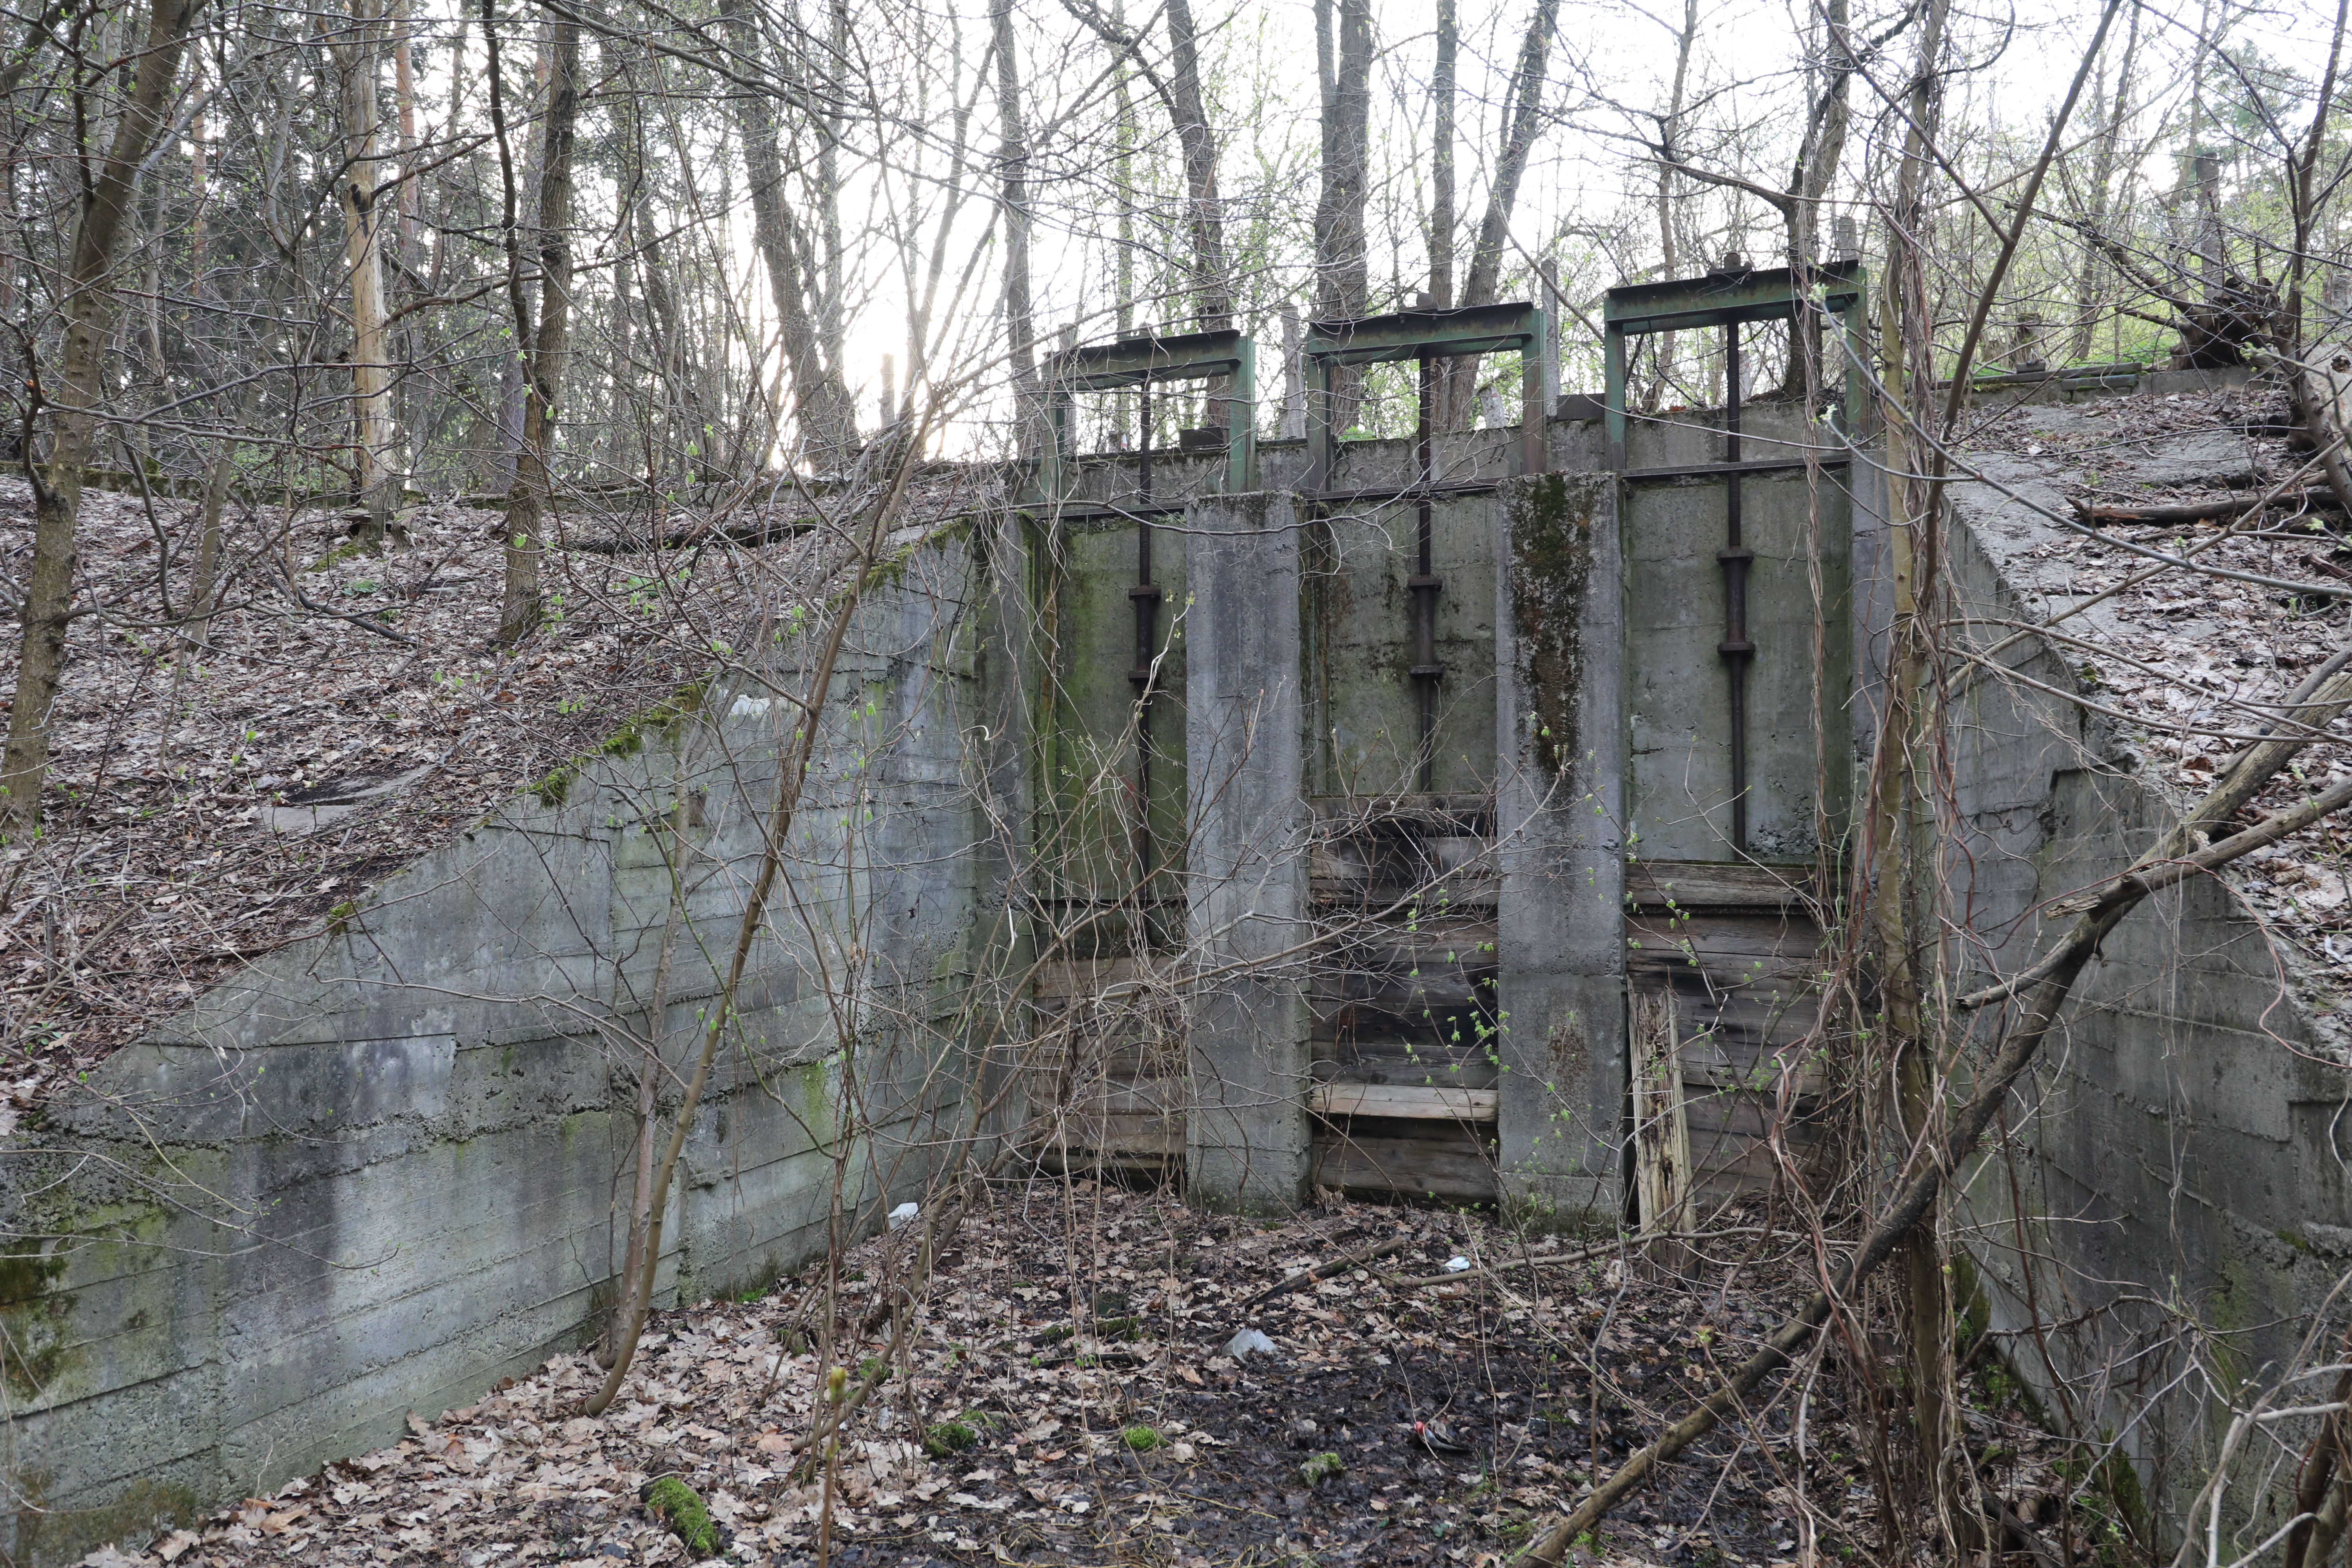
I was about to wrap up my adventure and head back to the car, so I double-checked Wikimapia to see if I was missing anything. I saw there was something labelled as бассейн, which means pool, so I went the other way around the theater building to take a closer look.
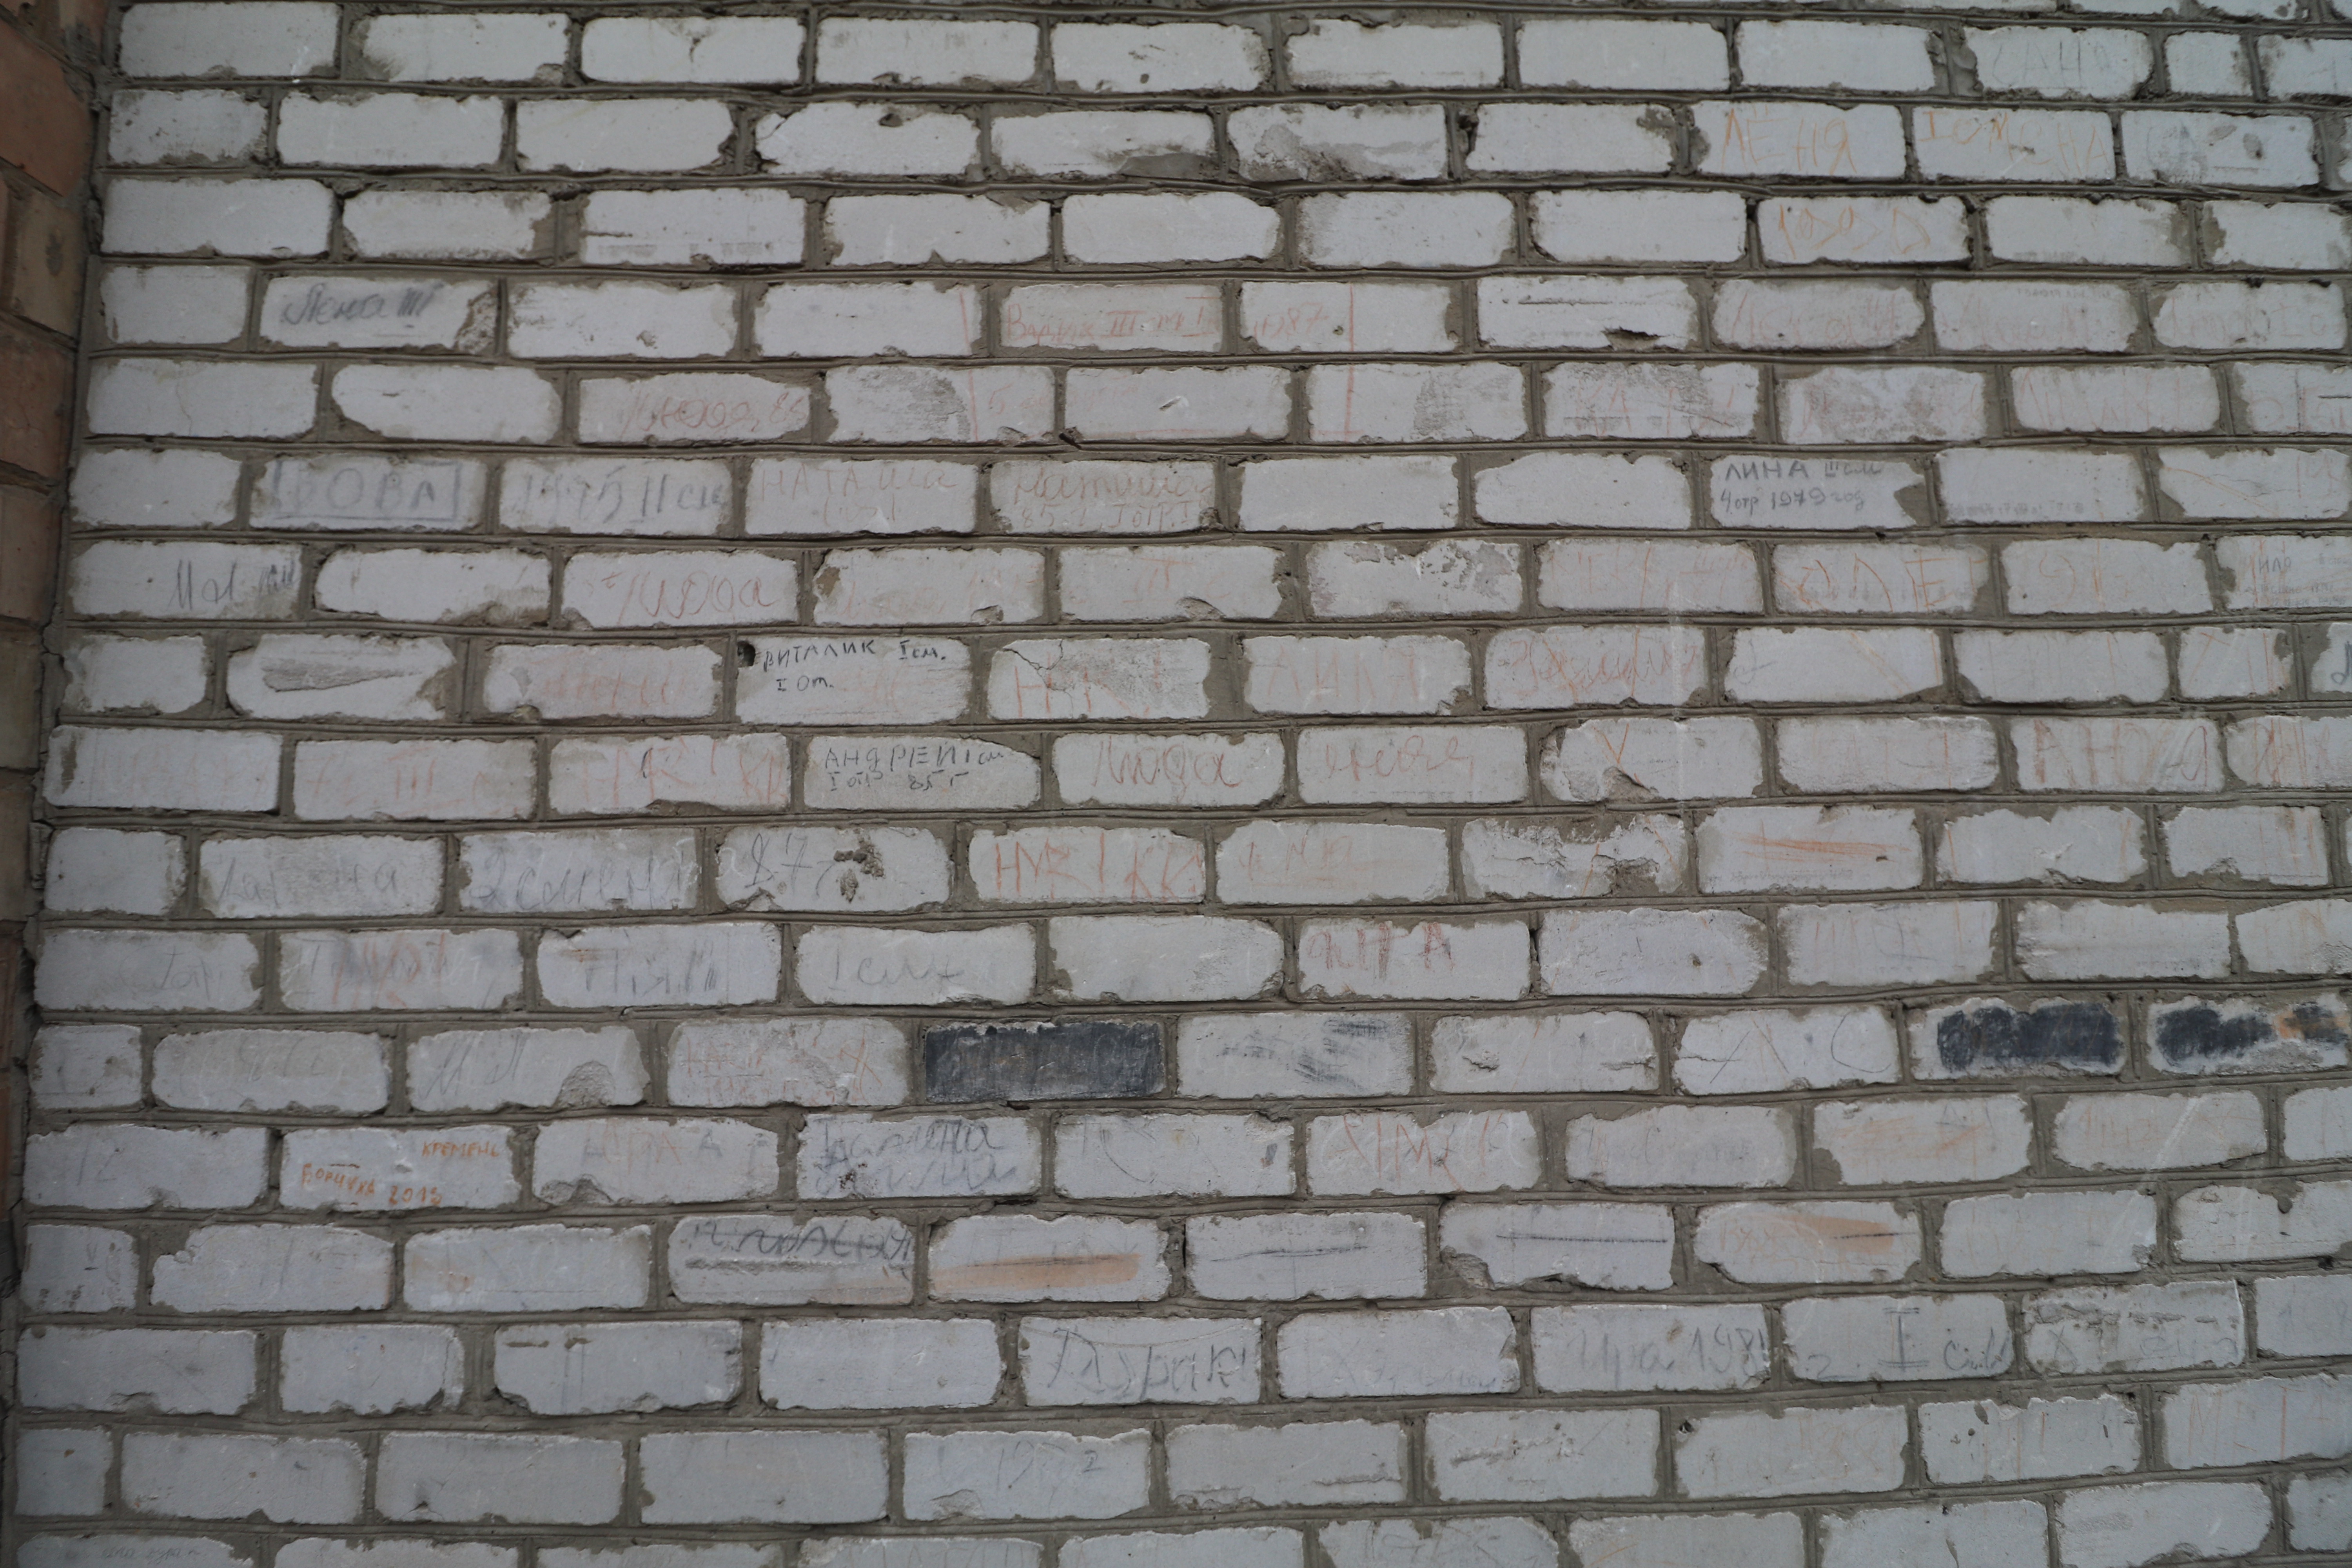
On the backside of the building, some bricks had names and years, I thought it was interesting. The earliest year was 1979, but it’s impossible to know when that was written there.
I took a quick peek at the pool and headed back to the car. My phone battery was at 2%, and I didn’t want to disappear without a trace.
I got in and drove around to the front entrance of the camp. If there were guard dogs, I’d be protected in the car. Maybe I’m too cautious, but I’ve come across packs of dogs on the outskirts of Kyiv before.
No sign of guards at the front. Awesome! And another cool piece of artwork.
This road kept going, but it was blocked. I could’ve gotten out and walked, but I think I had seen enough at that point.
I noticed these locks and a pulled over to take a look. There was probably a nice little lake for the campers to fish in.
If you’re looking for something to do in Odessa, the catacombs are pretty cool. If you haven’t heard of them before, posts on Atlas Obscura and The Bohemian Blog are good places to start.
If you’re like me, you’re already ready to go check it out, but where do you go exactly? I searched around for “how to get in the odessa catacombs yourself” or “odessa catacombs entrance”, but couldn’t find anything. I found several paid tours, but of course it’s not in their interest to give up the actual location of where you enter.
A lot of sites will warn you about getting lost in the caves. I thought their warnings were too cautious, but after firsthand experience, I must agree: they’re a serious danger. I went on a guided tour. About 10 or 15 turns in I thought I was doing pretty well in keeping my bearings. After 20 minutes we’d passed by perhaps 50 possible turn locations, not including all of the possible routes going backwards if you miss one, and my internal compass was disoriented. Either don’t walk more than a few minutes in, or go with a guide. Supposedly several people have gotten lost and died. It’s not surprising (even if only legend).
Our tour guide met us a bit out of the city in a smaller village, Nerubaiske. We parked out car under a tree, and walked to the entrance. There are supposedly dozens of entrances, but I was unable to find any other online besides the official museum (perhaps I wasn’t searching well enough, and, after all, I was only searching in english).
An entrance to the Odessa catacombs is located at 46°32’33.8″N 30°38’06.0″E. (Or decimal form: 46.542713, 30.635005).
Entrance to the Odessa Catacombs
If you want to go the safer route (which I didn’t do actually, but plan to next time I’m in Odessa), you can visit the Partisan Glory Museum in the same village (Nerubaiske).
I’ve been making huge strides in improving my chronic Lyme/parasites/heavy metals recently, and I intend to write much more about it, but for now I just wanted to post some simple info.
After a personal recommendation, I finally tried MMS. The disinformation campaign on the internet is overwhelmingly strong, and it was successful in scaring me away from trying it before hearing from a friend who had experience with it himself. MMS is Sodium Chlorite mixed with an activator (I use hydrochloric acid), to produce Chlorine Dioxide, a relatively weak oxidizer which is electrically attracted to pathogens, and oxidizes them on impact (steals their electrons, destroying their molecules and reducing them to mere salt or other harmless byproducts).
I originally purchased MMS from this US based supplier: https://mmsforhealth.com/ (I recommend the glass kit with hydrochloric acid as the activator). I unfortunately dropped the bag I was using to carry the bottles around on the cold icy ground in Kyiv and broke the Sodium Chlorite bottle (I was really bummed, I felt like I had actually dropped my brain on the floor because of how beneficial it had been over the previous few days).
I still had the hydrochloric acid, so all I needed was 22.4% Sodium Chlorite solution and I was good to go. The instructions on how to make this are basically “open source”, it’s just simple chemistry and Jim Humble describes how to create it in his book (The Master Mineral Solution of the Third Millennium).
By searching for “Хлорит натрия” I found an ad on olx.ua by someone who produces MMS in Ukraine. Going to insert the text from the ad here, just in case it disappears:
Хлорит натрия — неорганическое соединение, соль щелочного металла натрия и хлористой кислоты с формулой NaClO2, бесцветные кристаллы, растворимые в воде, образует кристаллогидрат.
MMS (Master Mineral Solution и старое название Miracle Mineral Solution) – это водный раствор хлорита натрия 22,4% концентрации (NaCLO2). Это уникальный окислитель, способный проникнуть в тело и уничтожить патоген, являющегося причиной заболевания. ММС также является окислителем ядов тяжелых металлов и самым сильным средством уничтожающим патогены: вирусы, грибки, микробы.
Может использоваться для получения диоксида хлора и приготовления CDS, CDH, CDI путем смешивания с активатором. Активатор может быть добавлен к Вашему заказу при необходимости.
Минимальный объем заказа: 1 литр.
Отправляем почтой по Украине.
The name listed on the ad was Oleg, phone number +38(063)208-0189. I called and an older lady answered. She didn’t speak any English, but my Russian was good enough to ask a few questions and place an order. I forgot her name, but she was very nice. They’re based in Kharkiv. They sent the package through Nova Poshta and it arrived just a day or two later (I was a little disappointed it was in a plastic bottle, but I suppose glass would’ve been much more difficult to ship). I think the price was 700 UAH for 1 liter (about $25). This is obviously a ton of MMS, and it’s cheaper than prices in the US, as most things are here. Anyway, if you need some MMS or want to give it a shot and you live in Ukraine, give them a call.
I’ve been chronically ill ever since I started taking Accutane in 2011. It’s now February 2017. Numerous doctors could identify my body had serious problems, but nobody could figure out the root cause. There were many. Parasites, heavy metals, and Lyme have been the main underlying issues, but I wouldn’t have had such a health decline if my liver and intestines weren’t destroyed by Accutane and the numerous antibiotics the dermatologists put me on before before that. The skin is a safety valve for you liver, I had so many zits and acne because my liver couldn’t keep up with all the toxic substances inside of me. I likely had acne mainly because of candida, or other parasites I probably had at that time (it’s on my todo list to write about the parasites I’ve gotten out of me. The pictures are the best part!).
The modern US “healthcare” system completely failed me. They’re great at treating acute issues, like if you break your arm or get shot, but horrible at chronic problems. They’ll just put you on health-harming drugs with little benefit. Once you’re on the drugs, you likely won’t get off. This is not the solution to health. I absolutely cannot trust allopathic medicine anymore for my personal health.
I feel so betrayed by the US healthcare system that they will likely never regain my trust again, unless we see some serious changes to the FDA, what studies are funded, and the leveling of the healthcare free market.
I intend to write more, time permitting, over the next several months about my health recovery. There are lots of success stories similar to mine, using the same tools I used, but the propaganda (yes, propaganda, as in the same sort of disinformation campaigns the Russian use) against these methods is so intense, many more will be tricked against using them. The least I can do is honestly write about my personal experience and what my years of research uncovered.
A few months ago, there was a series of online interviews related to Lyme uploaded on this site: http://chroniclymediseasesummit.com/ they’re for sale now, but I managed to snatch them before that deadline, and with some clever URL guessing, you might be able to do the same even still… ;). There was an interview with Kenneth Stoller, and that’s how I first found out about HBOT: Hyperbaric Oxygen Therapy.
If you google for his name and HBOT you’ll probably find this article, but if not, it’s worth reading to give you the general idea: http://www.tiredoflyme.com/dr-kenneth-p-stoller-md.html Here’s the meat of what you’re looking for:
It requires 160 mm Hg partial pressure of oxygen (pO2) to start causing the Borrelia organism to die. This is the amount of oxygen we breathe into our lungs at sea level, but by the time that oxygen gets into organs and bone marrow the partial pressure of oxygen is very low – in bone marrow it is in the low 50’s. Treating patients at 2.8 atmospheres of 100 % oxygen will increase the amount of oxygen in human tissue by over 2000%. A Borrellia organism exposed to that level of oxygen will die.
Awesome. A few follow up questions are “how long do you sit in this thing?” and “how many treatments do you need?” but I didn’t see either of those answered there by him, but you can find various answers across the web (anywhere from 10-50+) In the lyme summit interview Stoller mentioned he normally treats patients without HBOT for some time, then they go in for an HBOT session and see if they can provoke a die-off/herx reaction. It seems like he uses this more as tool used only a few times rather than constantly.
Why not use it all the time? My guess is cost. If you google “cost of HBOT” you’ll get answers from $100-380, wikipedia claims: “A 1-hour HBOT session may cost between $165 and $250 in private clinics, and over $2,000 in hospitals“. Yeah, $165 in a private clinic and $2000 in a hospital sounds like our “awesome” healthcare system in America. 10-50 sessions even at a $200 and you’re starting to get to the point where you consider getting one of these yourself, just like sports athletes: http://www.espn.com/video/clip?id=13860092
Here’s a study I found very informational that really tipped me over the edge in wanting to investigate more: http://hbotnova.com/resources/lyme_disease/Fife_EffectsofHyperbaricOxygenTherapyOnLymeDisease.pdf the gist: “it appears that approximately 84.8% of those treated showed significant improvement by a decrease or elimination of symptoms“. And this study was done in 1998! It seems like we should be using this more for Lyme patients.
But, I happen to not live in America at the moment, so I investigated options here in Kyiv, Ukraine. This is the first result on google for “гипербарическая оксигенация киев”, or “gyperbarecheskaya oksegenatsia kiev” for those of you still learning cyrillic (what do you mean you haven’t started? you just did). I had my wife call them up and get the low-down: 200 UAH ($7.50) for a required consultation, then 460 UAH ($17.30) per session. Now we’re talking. One of the reasons I love living here is that so many things become so affordable, even to the point where you can try stuff just for the lulz (that basically means “just for fun” for you old people). So, I have an appointment on monday (tomorrow), will report how it goes…
Update September 6th, 2016
I did it! I feel really tried. I’ll go in for another session tomorrow. I have pictures but I’m too tired to upload them now. I think I might be experiencing a mild die-off reaction. I did 1.5 atmospheres for 45 minutes (in that 45 mins was ~10 mins to increase/decrease pressure). My head is a bit weird feeling also.
Hyperbaric Oxygen Therapy Chamber at the main military hospital in Kyiv, Ukraine. Before you get in, they cover the old orange mattress with fresh sheets, obviously.
Me in the hyperbaric oxygen therapy machine
The front of the control box for the HBOT machine. If I recall correctly, it was made in 1996 by a Ukrainian aviation company, but they are no longer manufactured here. They can talk to you while you’re inside using the phone. One of the knobs is air conditioning, although I still got hot in it occasionally. I think they were just too afraid to cool it off.
Update September 27th, 2016
I finished 14 session of HBOT, and there was a considerable positive improvement. I’m certainly not “cured”, but I’m really happy with the cost/benefit ratio. I did 14 sessions, every week day with breaks on weekends for 3 weeks. By the 3rd session they had me up to 2.1 atmospheres for 1 hour, and I did that for every session thereafter.
After the 5th session, I felt immense clarity and almost euphoria for a couple hours following the treatment. My treatments were done at the main military hospital in Kyiv, which is right next to the Kyiv Fortress, where there’s a beautiful view overlooking the city and the stadium. I sat there for almost an hour enjoying the view and relaxing in this calm energy I felt from inside of me. It was as if my brain was working the way it was designed to, and I just sat in awe, feeling so relieved of the burden of Lyme.
I didn’t feel this clarity after every session, sometimes I felt more as if the pathogens in me were dying and my body was taxed with cleaning up the mess. I realized that hyperbaric oxygen therapy was a tool, and I should take full advantage of it. I increased my doses of biofilm busters (Serrapeptase, Cistus Tincture), EDTA, Chlorella, Cilantro, R-Alpha Lipoic Acid, Niacin, Samento, minerals, and other weapons you’ll commonly find in a Lyme warrior’s toolkit. HBOT helped my body recover more quickly from the dying masses of bugs caused by these tools, as well as help clean up from the toxins released more quickly. The doctors recommended I do 10 sessions for a good boost, and after 10 I wanted more, the older man recommended 14 for a really solid boost. I suppose there are only minor incremental benefits after 14 sessions, so I decided to take a break. I miss it, (it also helped me keep a good sleep schedule), but I still feel like I’m seeing the benefits of the therapy. The practitioners there claimed I would still be seeing the affects for up to 10 months after the therapy finished, but my Russian wasn’t good enough to understand why exactly.
I started sleeping better as a result of the therapy. Interestingly enough, they asked my how my sleep was after about 5 treatments, so it must be a known/commonly seen benefit. I normally had to get up to use the restroom 1-3 times in the night, but while I was being treated, it happened quite often that I wouldn’t have to get up in the night at all! This was certainly appreciated, since my sleep is so delicate, I have a hard time falling asleep and staying asleep. And since sleep is critical to getting better (that’s when your brain detoxifies), I think this will have benefits that will be hard to measure.
I also noticed I started having more frequent bowel movements. This is great, because any Lyme patient is extremely toxic, and most toxins are excreted through the intestines. I’m not sure how or why I started to have movements more frequently, but my hypothesis is that the oxygen killed off some of the dysbiotic anaerobic bacteria in my guts, and gave the good bacteria a boost, which helped move things along better. I would be interesting in hearing other theories or research.
Overall, if you have Lyme or any other chronic disease, I highly recommend trying Hyperbaric Oxygen Therapy. It’s super cheap in Ukraine, but if you can afford it wherever you are, it’s definitely worth trying.
At one point in my health journey, I became very sensitive to polluted air. I’d walk in the woods outside of the city and feel very clear headed, then as soon as I got out of the forest and near cars I’d feel bad again. At the time I was living in an apartment (Kyiv, Ukraine), and it was great to get fresh air from outside, but the reality was that the air wasn’t all that fresh.
I decided to check out air purifiers and see if they might be able to help me out. Indoor air is supposedly more polluted than outdoor anyway, so even if I wasn’t going to open the windows the air was still not ideal. There was also a sort of chemical smell in the apartment I was in, probably from the off-gassing of the furniture there (even though it had been finished for a few years, something still smelled).
I did some research and came to the conclusion that IQAir makes the highest quality/best residential air purifiers around. Awesome, in the US the retail price at the time (end of 2014 if I recall correctly) was $1200. Looking in September for 2016 it seems like it’s still the same price. Great! Let’s call them up and make sure it’ll work in Europe with 220v-240v outlets. Nope. “Get the European version, contact IQAir in Switzerland”. Of course Switzerland is the land of the cheap (not), but I still contacted them to see what it would cost. 1600 CHF. Pfft. Plus shipping, probably a couple hundred. I’ll just buy the US version and use a transformer. That should be no problem right?
All the sellers warned against it. Nobody wanted to continue the warranty outside of North America. Plus, I had to transport it. Whatever, I’ll give it a shot, I thought. A good 220->110v transformer should be the exact same as 110v power in the US, assuming no power surges or anything. I ordered one, with a Black Friday discount for another 10% off (from freshairpro.com, wait until a holiday and they’ll email you a discount code if you’re on their list. Most recent code is from labor day 2016: LABORDAY).
It came, and my plan was to take it with me on the plane as a checked bag. It fit within the weight limits, but there was a problem: the size. The airlines limit by length+width+height in addition to weight, and the purifier was just a couple inches over. No worries: my Dad is a master packer (and pilot himself) so we tore it open and started looking for a way to reduce the size. It wasn’t too hard actually, if you take off the bottom stand that the wheels connect to, you save a few inches. I put that bottom square thing on the outside of my backpack and carried it through Frankfurt on to Kyiv no problem. I was obviously worried about how it would make it through, seeing that the lugging handling regularly throws bags around and this was a seemingly delicate device. Thankfully there were no issue.
I unpacked it, plugged it into my voltage transformer/converter (not sure what the proper term is), and it worked! Beautifully smelling fresh air flooded the room. I still use it to this day. Now I live outside the city and like to leave the windows open, but sometimes the annoying neighbors burn things and it gets in the house. This purifier takes care of it no problem within a few minutes. I generally leave it on level 3, which is high enough to make quite a noticeable difference but not too loud. Anyway: if you’re looking to use an IQAir purifier on a 220v european outlet or somewhere else in the world, using a transformer has worked perfectly for me so far and saved a few hundred bucks.
A friend of mine and I launched a small little project today: an app to help you compare product costs in terms of price per unit. It’s free, take a look on the App Store.
My wife has been asking me to make this for some time, so, this is for her 🙂
Recently, a friend of mine and I started meeting up for 1-day “hackathon” projects. He designs, I code.
It wasn’t too long before I had the desire to automate my job, which, I felt, was simply a matter of making Sketch mockups come to life.
I enjoy writing views in code, rather than using interface builder. I wanted something that would “export” Sketch mockups into UIView code.
The first task was to get the data out of Sketch, which appeared to be easiest using Sketch Plugins. Sketch plugins use CocoaScript, which is similar to cycript, which I’m quite familiar with (at least using Objective-C methods) from iOS reverse engineering. I decided to start with just exporting data, then work on generating UIView code later.
This is the “Sketch to json export” script I came up with.
Select a layer, like an artboard, and run this script. You’ll see a .json file popup on your desktop.
I can post the python script that reads the .json and generates code later if there’s interest.
Tests for Lyme Disease have low accuracy, but I’ve suspected for some time that I might have it, so I’m going to give this a shot. Antibiotics this late in the game (assuming I have it) seem to be fairly ineffective, from my understanding of the research. I’ve actually been taking the detox herbs for a few days, today was my first with 1 drop of Samento and Banderol. Perhaps it’s my imagination, but it seems something is happening in my head already. (Here’s the schedule).
Update Feburary 24th, 2016:
I’m doing amazingly better. This protocol is super effective. If there’s a chance you might have Lyme, I recommend just buying the Nutramedix products and starting ASAP, you’ll know within a couple days if it’ll help you or not. I’ve gone a little over the recommended dose up to 35 drops for the microbial defense herbs. Dr. Cowden said somewhere (don’t recall the source) that you can double to 60 and it should help clear things out faster.
Update April 4th, 2016:
Past week has certainly been hard. I appear to be having some serious Herxheimer reaction/dieoff symptoms. I think I was slacking off a bit too much on drinking water. Yesterday I did multiple glasses of Burbur/Pinella and Parsley/Pinella combinations, and I could feel that working in my head. I put a full dropper of each into a glass of water and sip it down. I need to impress upon myself that there’s basically no limit to how much of the detox herbs I can take, they’ve been animal tested in huge amounts with no negative affects. I’ll try and make myself take more than before.
Update May 14th, 2016:
I’m currently on day 101 of the program. I’m certainly making progress, but, not as quickly as I’d hoped. This is pretty standard though. It’s hard for me to be patient when I feel like I’ve already lost a good 3 years of my life to mysterious illnesses that fell through the cracks of our broken medical system.
Anyway, I am doing better. A couple weeks ago I started doing LLLT with a device from LazrPulsr. They have a “Lyme Recovery Treatment Record“, which I was generally following, but now I mostly just to the “Lyme #684” and “Bacterial Infection #620” programs over and over. #684 almost always have a great impact on how I feel, generally in a positive way. I can feel it doing something in my head, it feels like my brain is slowly expanding in an odd sort of pleasant and relieving way. I really wish I knew what exactly it was doing, but it’s certainly helping, so I’m not at all worried. I hypothesize that it’s helping my brain better handle the toxins released by dead Lyme spirochetes, but, it could also be helping my immune system kill them, so I have no idea really. LLLT really needs to be studied more. There’s a place in NH that claims to have good results with LLLT, but I’d love to hear some patient testimonies (besides the ones on their site).
I’d like to note that I once took drops of the Cowden protocol, I don’t remember which exactly but I’m certain it’s irrelevant, and then went on a walk. I walked about 5km at a fairly brisk pace. I started feeling my typical brain fog, as a result of the herbs doing their work in killing the bad stuff, but after I got back, it continued to get worse. I reached a point where I had a splitting headache. After googling for “Lyme exercise” I confirmed that yes, lots of people experience discomfort after exercising with Lyme, because it helps our body kill off the spirochetes. But, I had gone on plenty of walks, or bike rides, or runs, before. The difference was I took the “killing herbs” right before I went on a walk, and my increased blood-flow helped them get to places in my body they might not reach as well when I’m inactive. I’m careful with how I take the drops and exercise now, because serious Herxheimer reactions can kill.